
Browser Extension Dev - 07. Popup UI
Introduction
In the previous chapter Browser Extension Dev - 06. On-Demand Script Injection, we explored on-demand script injection and implemented a simple extension that copies webpage main content as Markdown. In this chapter, we’ll continue building on that by implementing a Popup panel that displays the Markdown converted from the page content, with support for previewing and editing before copying.
First, what exactly is a Popup?
We’ve already encountered Content Script UI injection and Options configuration pages. Popup is similar to the Options page - it runs independently, but with more restricted permissions compared to Background/Options. Generally speaking, its use cases are very similar to Content Script UI, both displaying content related to the current webpage, but Popup has some unique advantages:
- Security and Isolation: Websites cannot access Popup UI in any way - they’re completely isolated by different browser threads/processes. Any UI injected by Content Scripts can potentially be detected by the webpage, which is one reason websites can detect ad blockers.
- Unaffected by Page Behavior: For example, an auto-refresh extension that automatically refreshes the current page - you certainly don’t want to re-inject and display the control panel after each refresh.
- No Memory Cleanup Needed: Content Script injection makes complete memory cleanup difficult. This isn’t a problem on regular webpages, but can cause issues on SPA applications. Complex JavaScript code (in other words, code using many npm packages) really does have memory leaks everywhere. Popup is completely destroyed when closed and rebuilt next time.
- Works on Privileged Pages: For example, https://chromewebstore.google.com/ - all extension Content Script UIs are disabled on this site, but you can still open a popup and get the current tab’s URL. This is useful in specific scenarios, such as tools for downloading extension zip files.
Content Script UI has its own advantages:
- Larger UI Area: Popup UI is limited by panel width and cannot create fullscreen panels.
- Easier Deep Integration with Websites: For example, when you need to add buttons matching the site’s appearance.
- Easier to Control and Modify the Website: For example, intercepting network requests, listening to and modifying DOM, or intercepting specific code execution - Popup can do this by combining Background Script to inject scripts, but it’s not as flexible.
Now, let’s continue building on our previous implementation.
Reference Chrome official documentation: https://developer.chrome.com/docs/extensions/develop/ui/add-popup
Thinking Through the Approach
We face a problem: How do we get the page content in the Popup?
The answer is that you can’t get it directly - you need to relay through the Background Script. The general flow is:
Popup → Background → executeScript(inject.js) → return markdown → Popup displays
But wait, can scripting.executeScript have a return value? Absolutely - it supports both synchronous and asynchronous return values, but the return value must be structurally cloneable.
Reference Chrome scripting API official documentation on Promise return values: https://developer.chrome.com/docs/extensions/reference/api/scripting#promises
Implementation
Adding the Popup Page
First, add a popup page. Create index.html and main.ts under entrypoints/popup.
<!-- entrypoints/popup/index.html -->
<!doctype html>
<html lang="en">
  <head>
    <meta charset="UTF-8" />
    <meta name="viewport" content="width=device-width, initial-scale=1.0" />
    <title>Popup</title>
    <style>
      html,
      body,
      #root {
        margin: 0;
        padding: 0;
        width: 600px;
        height: 800px;
        font-size: 16px;
      }
    </style>
  </head>
  <body>
    <div id="root"></div>
    <script type="module" src="./main.ts"></script>
  </body>
</html>
// entrypoints/popup/main.ts
const root = document.getElementById('root')!
root.innerHTML = `
<h1>Popup UI</h1>
<p>This is a placeholder for the popup UI.</p>
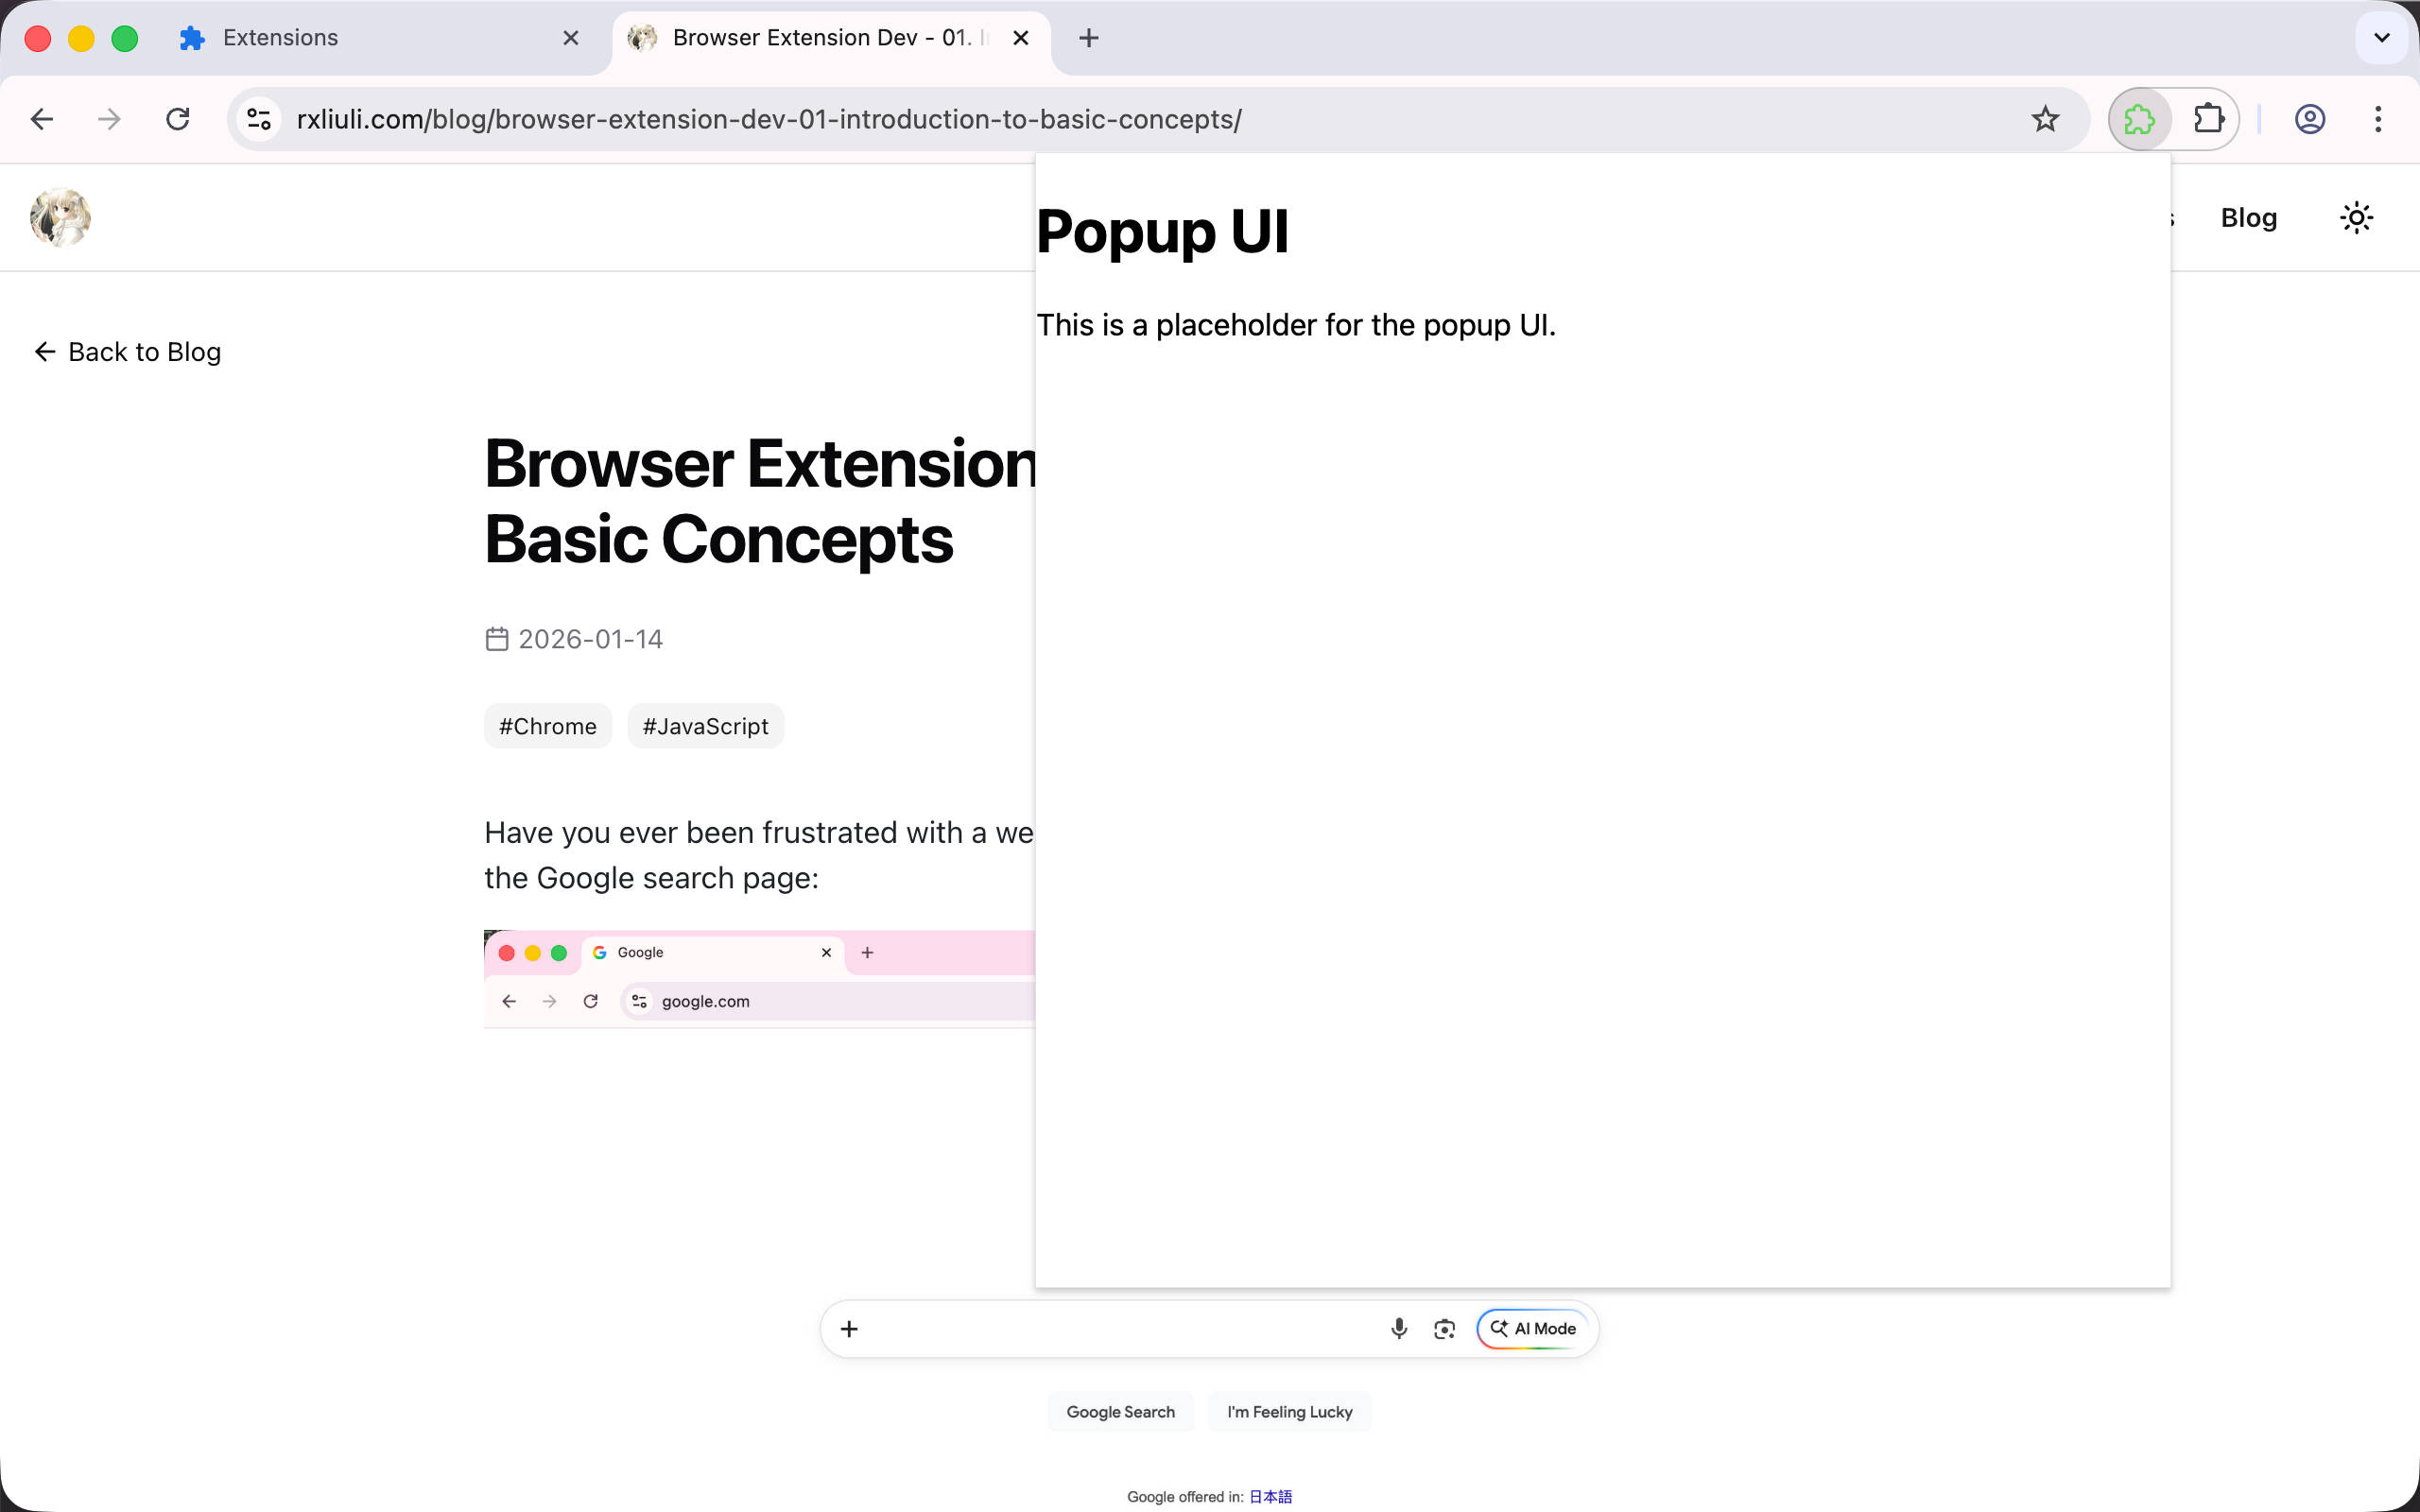
`After loading the extension in the browser, clicking the action icon will show the popup.
Modifying the Inject Script
Before implementing the communication part, we need to modify the previously injected script. Instead of copying Markdown to the clipboard, it should return the value to the caller.
import { Readability } from '@mozilla/readability'
import TurndownService from 'turndown'

export default defineUnlistedScript(async () => {
  const service = new TurndownService({
    headingStyle: 'atx',
    codeBlockStyle: 'fenced',
  })
  const reader = new Readability(document.cloneNode(true) as Document)
  const article = reader.parse()
  if (article && article.title && article.content) {
    return service.turndown(article.content)
    // const markdown = service.turndown(article.content)
    // await navigator.clipboard.writeText(`# ${article.title}\n\n${markdown}`)
    // alert('Article copied as Markdown!')
  } else {
    return null
    // alert('Failed to parse the article.')
  }
})
Implementing Popup and Background Script Communication
Now let’s implement the communication between Popup and Background Script. Since Chrome’s native messaging API is painful to use, we’ll use a lightweight wrapper called @webext-core/messaging.
Install the dependency:
pnpm i @webext-core/messagingThen define the interface in lib/messager.ts:
// lib/messager.ts
import { defineExtensionMessaging } from '@webext-core/messaging'

export const messager = defineExtensionMessaging<{
  getMarkdown: () => string | null
}>()
Then define the implementation in the Background Script:
messager.onMessage('getMarkdown', async (ev) => {
  const tabs = await browser.tabs.query({
    active: true,
    currentWindow: true,
  })
  if (!tabs[0].id) {
    throw new Error('No active tab found')
  }
  const result = await browser.scripting.executeScript({
    target: { tabId: tabs[0].id },
    files: ['/inject.js'] as PublicPath[],
  }) // Execute script and get return value
  return result[0].result as string | null
})
Finally, call it from the Popup. For simplicity, we’re directly rendering the Markdown using a pre element - we’ll introduce a WYSIWYG Markdown editor in the next step.
import { messager } from '@/lib/messager'

const root = document.getElementById('root')!
const md = await messager.sendMessage('getMarkdown')
const pre = document.createElement('pre')
pre.textContent = md as string
root.appendChild(pre)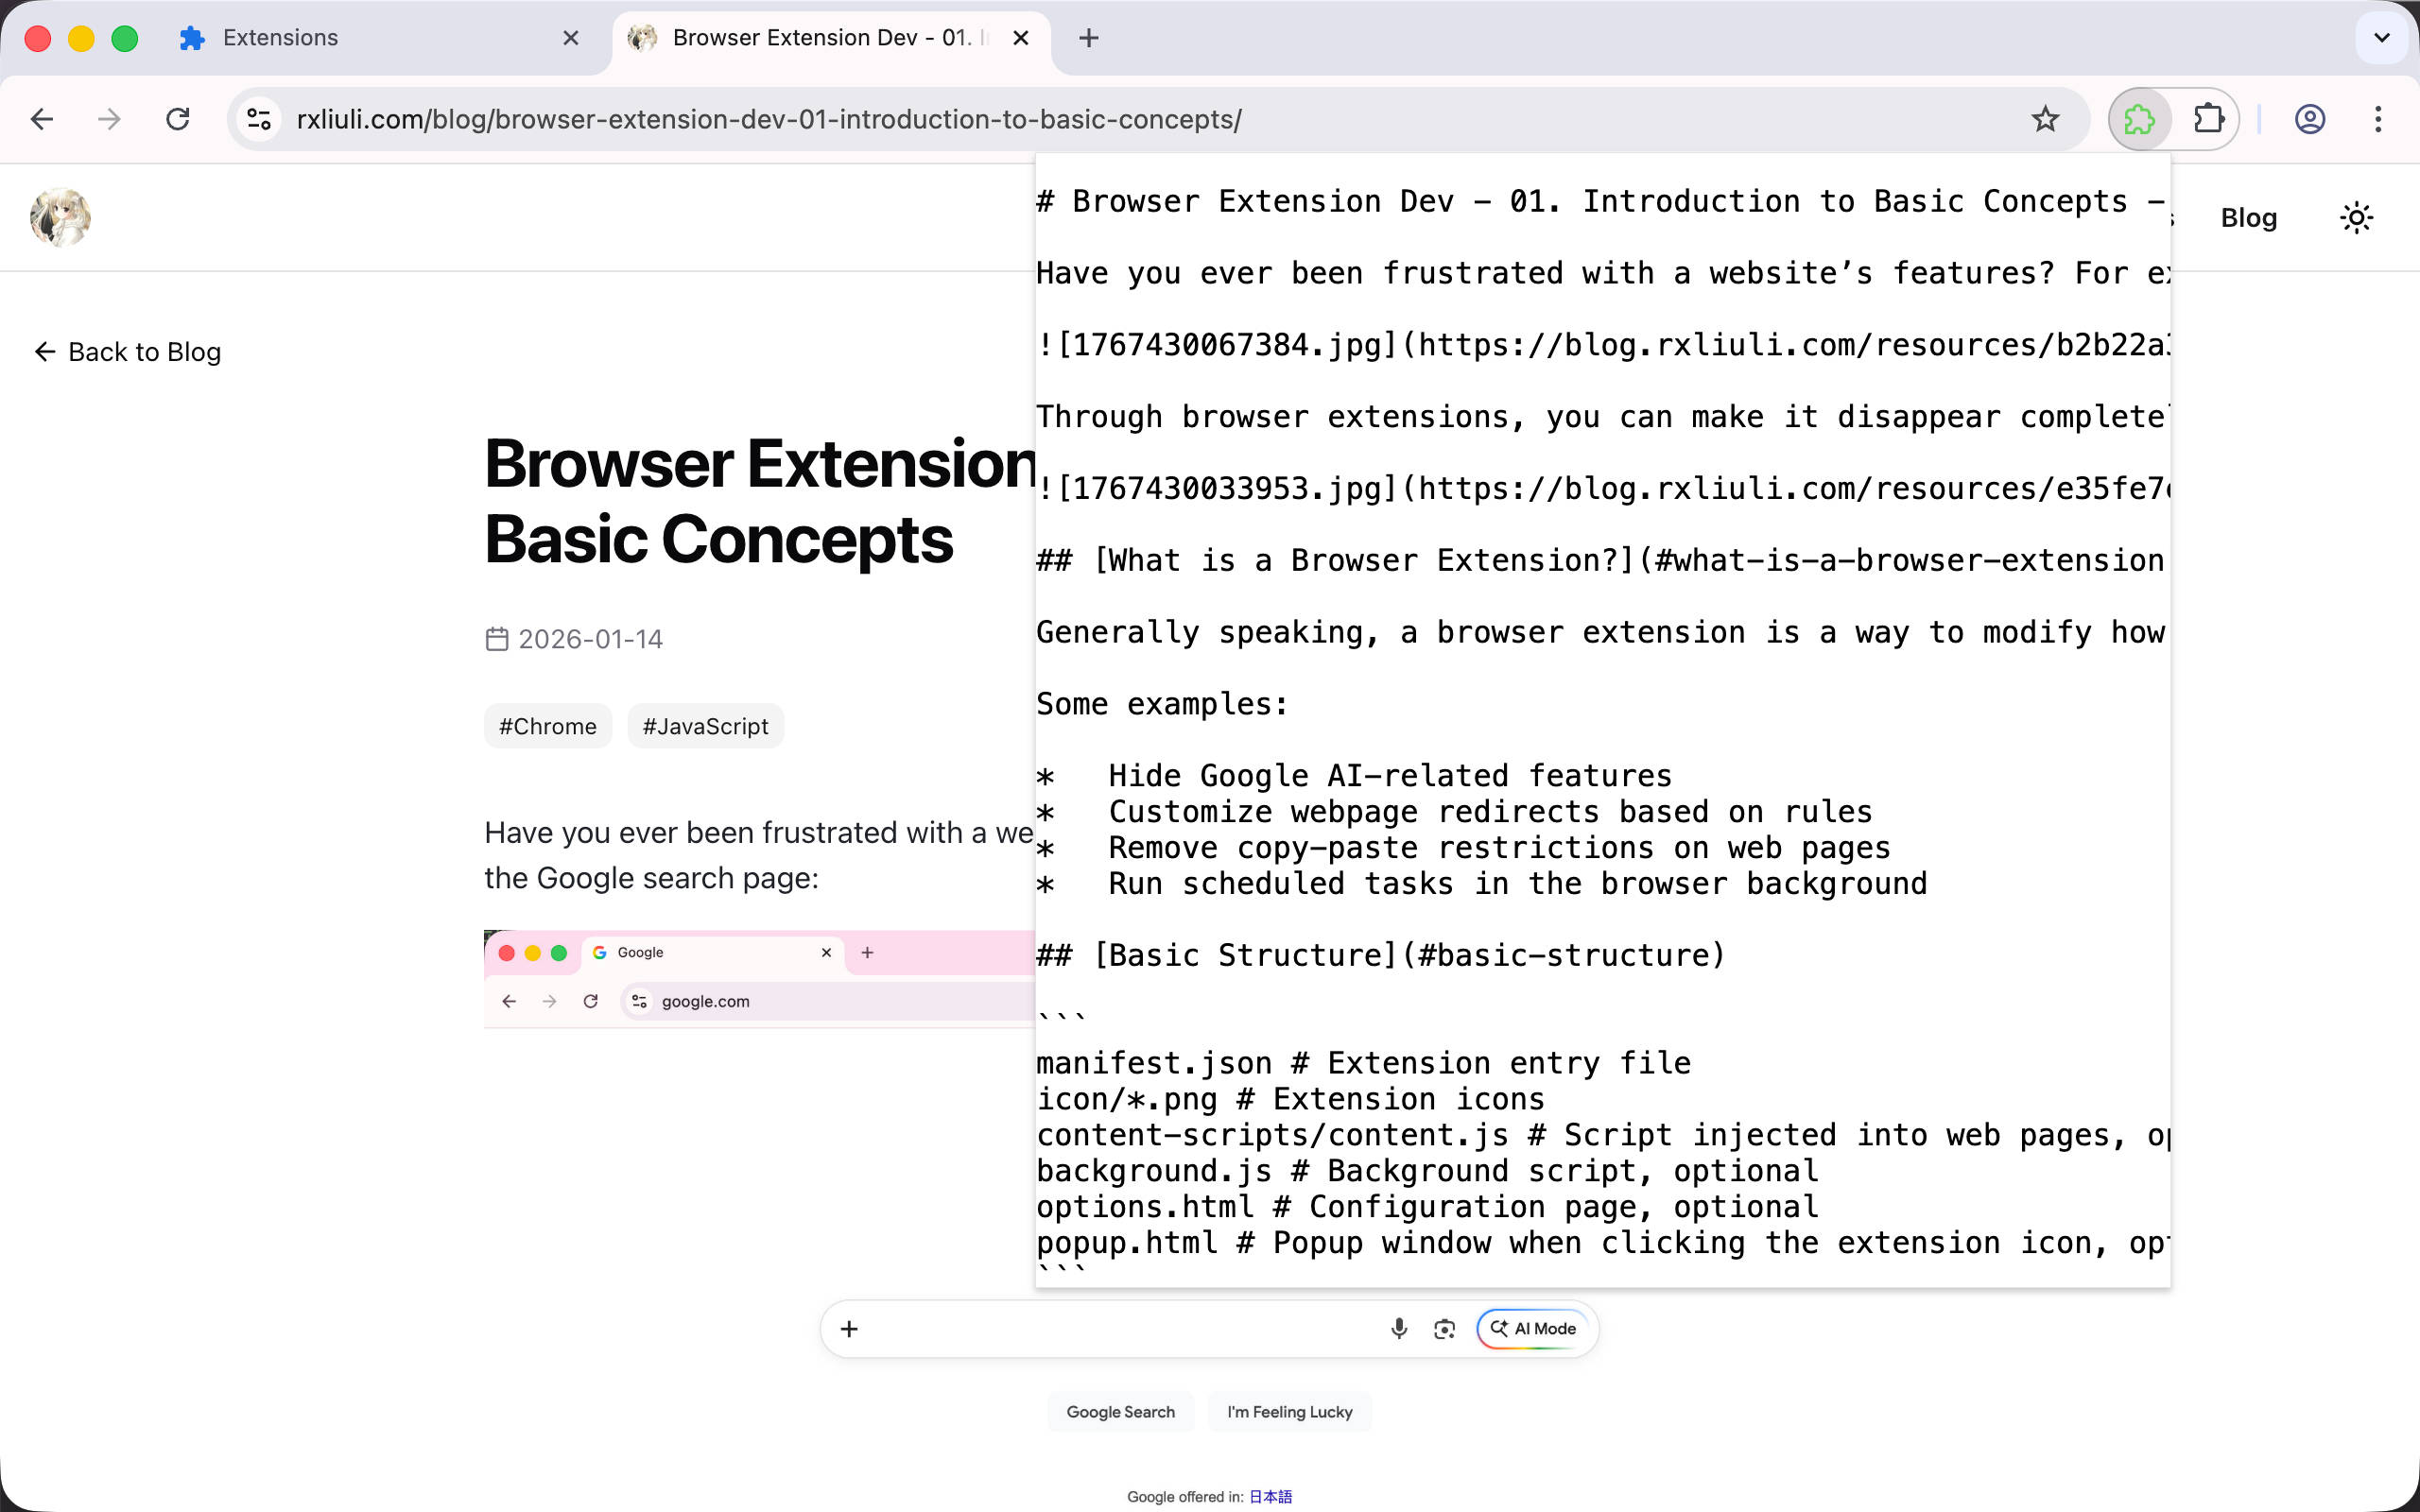
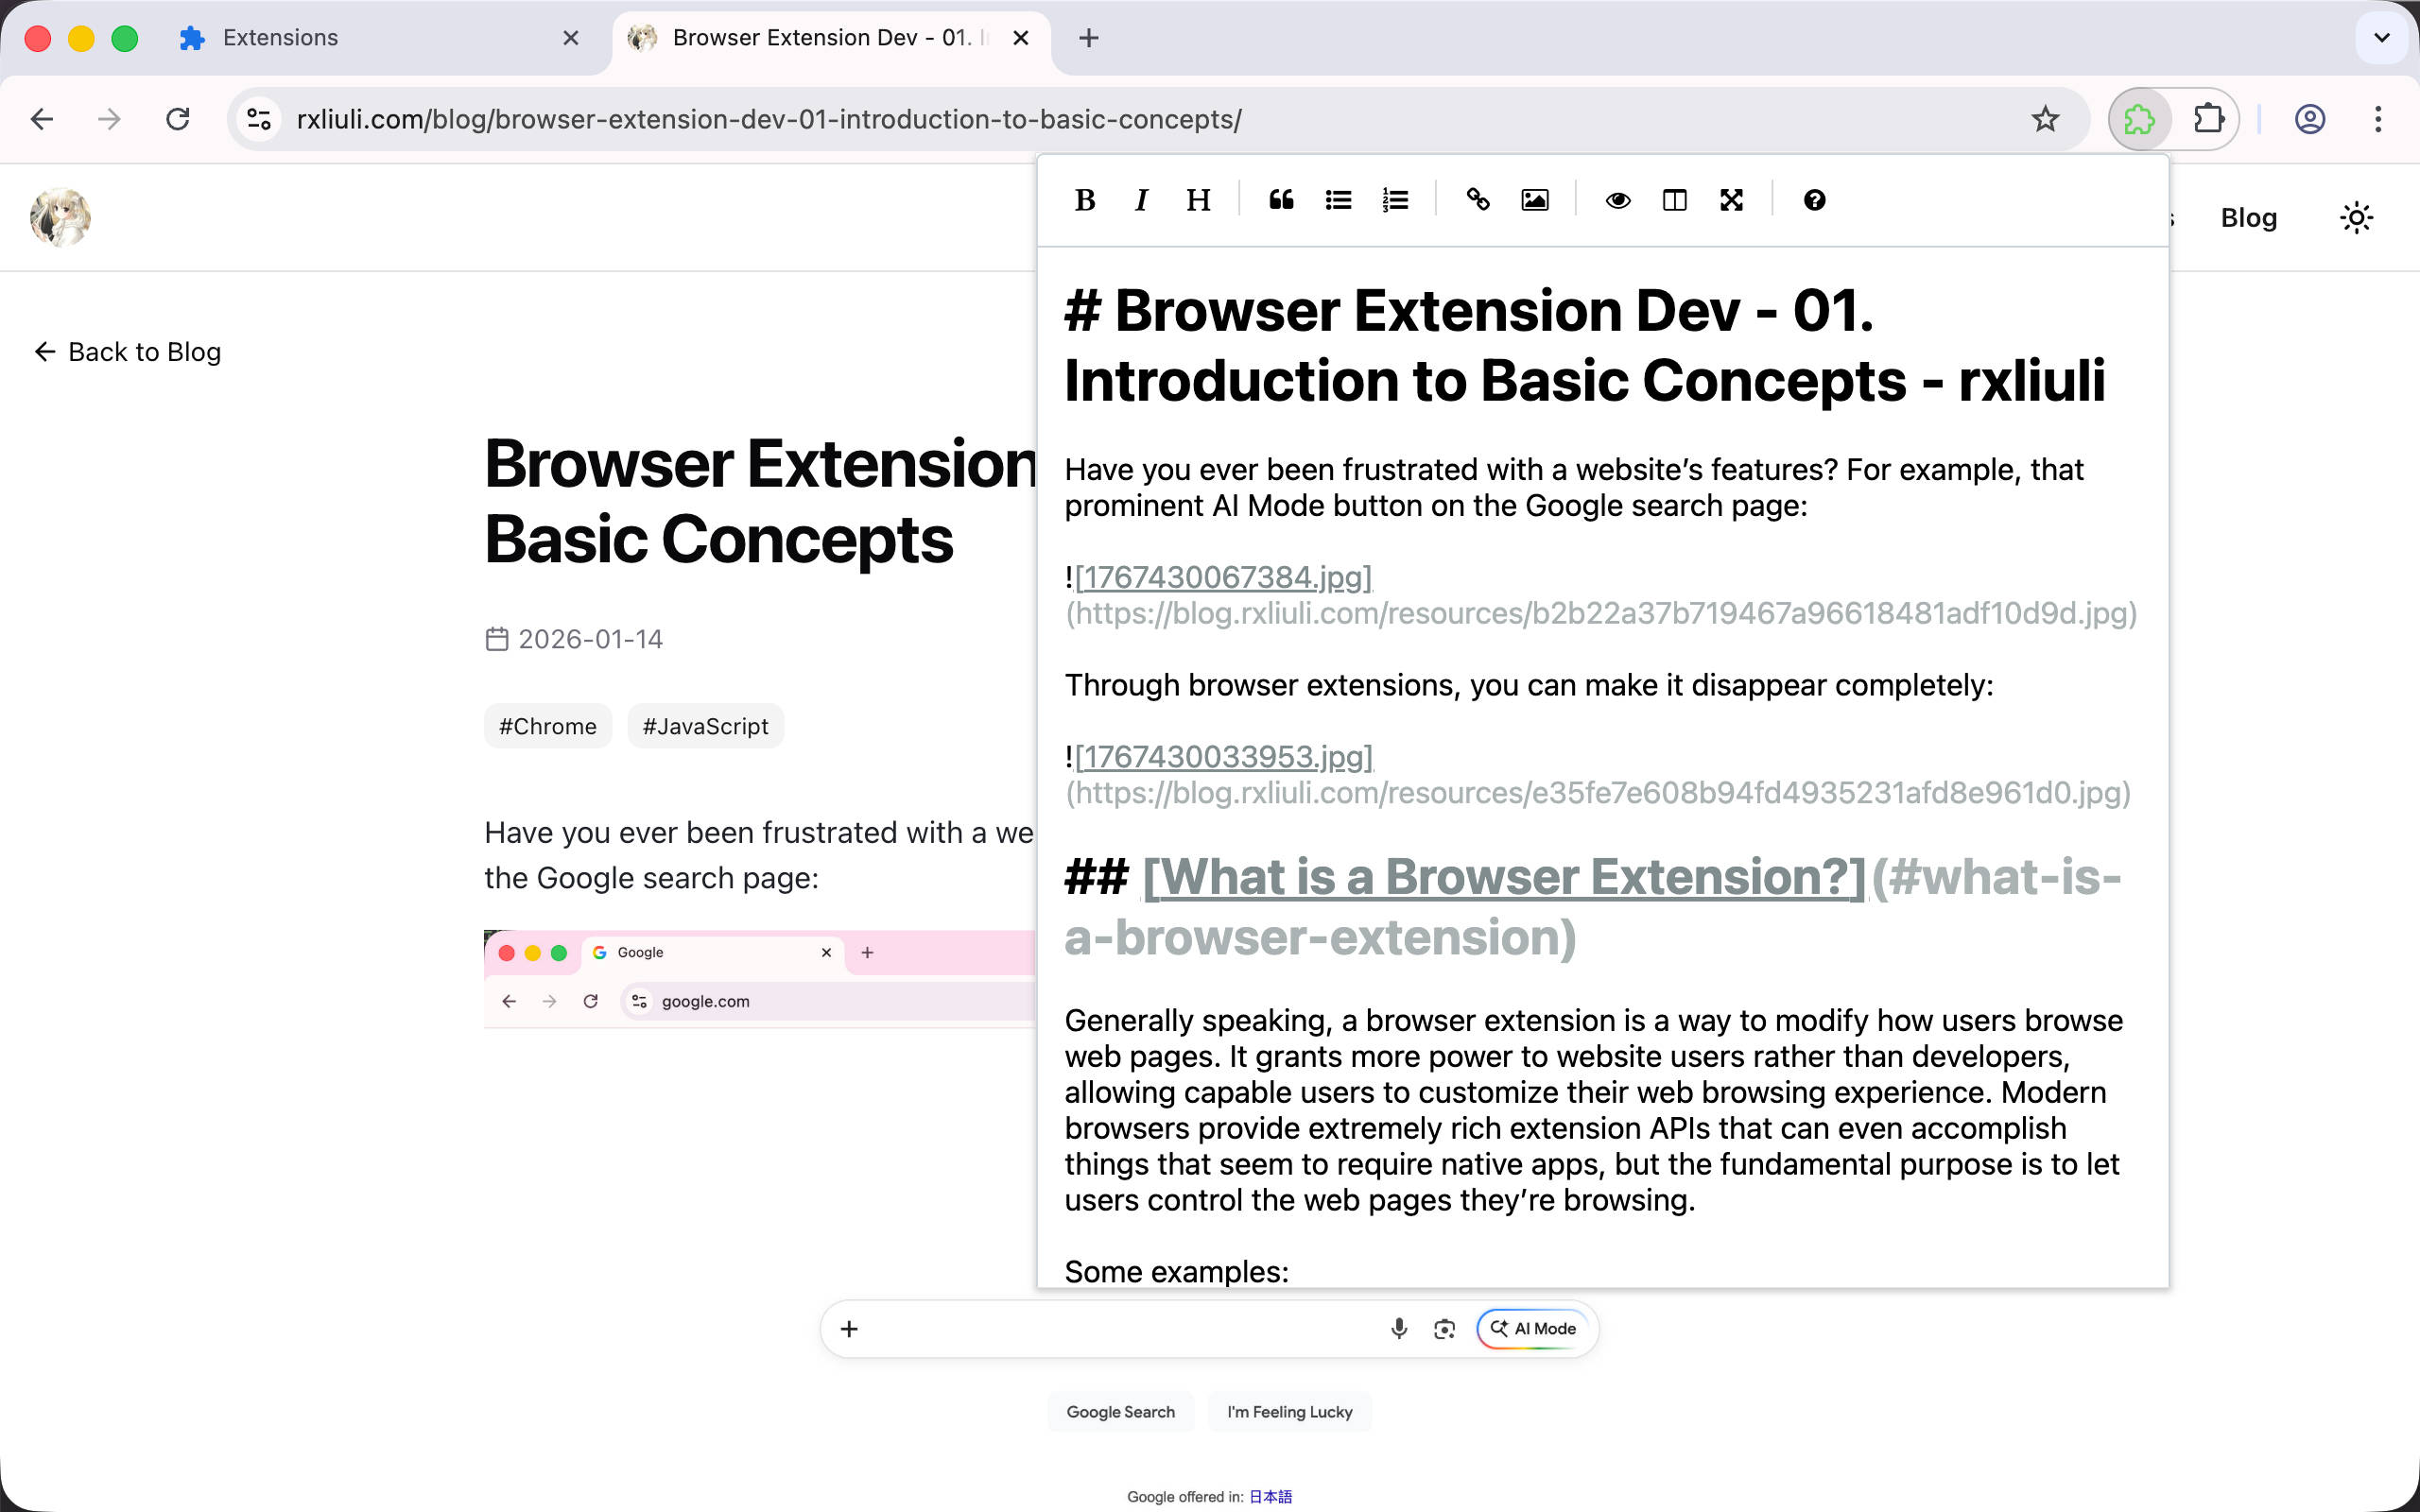
Adding a Markdown Editor
Since we’re not using React, we’ll directly use a vanilla JS Markdown editor called easymde.
First, install the dependency:
pnpm i easymdeThen use it in the Popup:
import 'easymde/dist/easymde.min.css'
import { messager } from '@/lib/messager'
import EasyMDE from 'easymde'

const root = document.getElementById('root')!
const textarea = document.createElement('textarea')
root.appendChild(textarea)
const md = await messager.sendMessage('getMarkdown')
new EasyMDE({
  element: textarea,
  initialValue: md as string,
})
Now you can see the final result.
Summary
In this chapter, we covered Popup use cases, communication between Popup and Background Script, and implementation of fetching data from web pages. In the next chapter, we’ll finally publish the extension - I’ll demonstrate how to publish an extension to the Chrome Web Store so others can use what you’ve developed.
Complete code: https://github.com/rxliuli/browser-extension-dev-examples/tree/main/packages/07-popup-ui