
Browser Extension Dev - 03. Injecting UI
Introduction
Previously, in Browser Extension Dev - 02. Using WXT, we learned about the basic structure of extensions and how to use WXT. Now we’ll go further and demonstrate how to inject complex UI into web pages using React, Tailwind CSS, shadcn, or any npm packages you need.
You might have a few questions:
- If a website also uses Tailwind CSS, won’t using it in the extension cause style conflicts?
- How can modern web frameworks like React be injected into existing websites?
I’ll demonstrate by implementing a YouTube video screenshot extension.
Planning
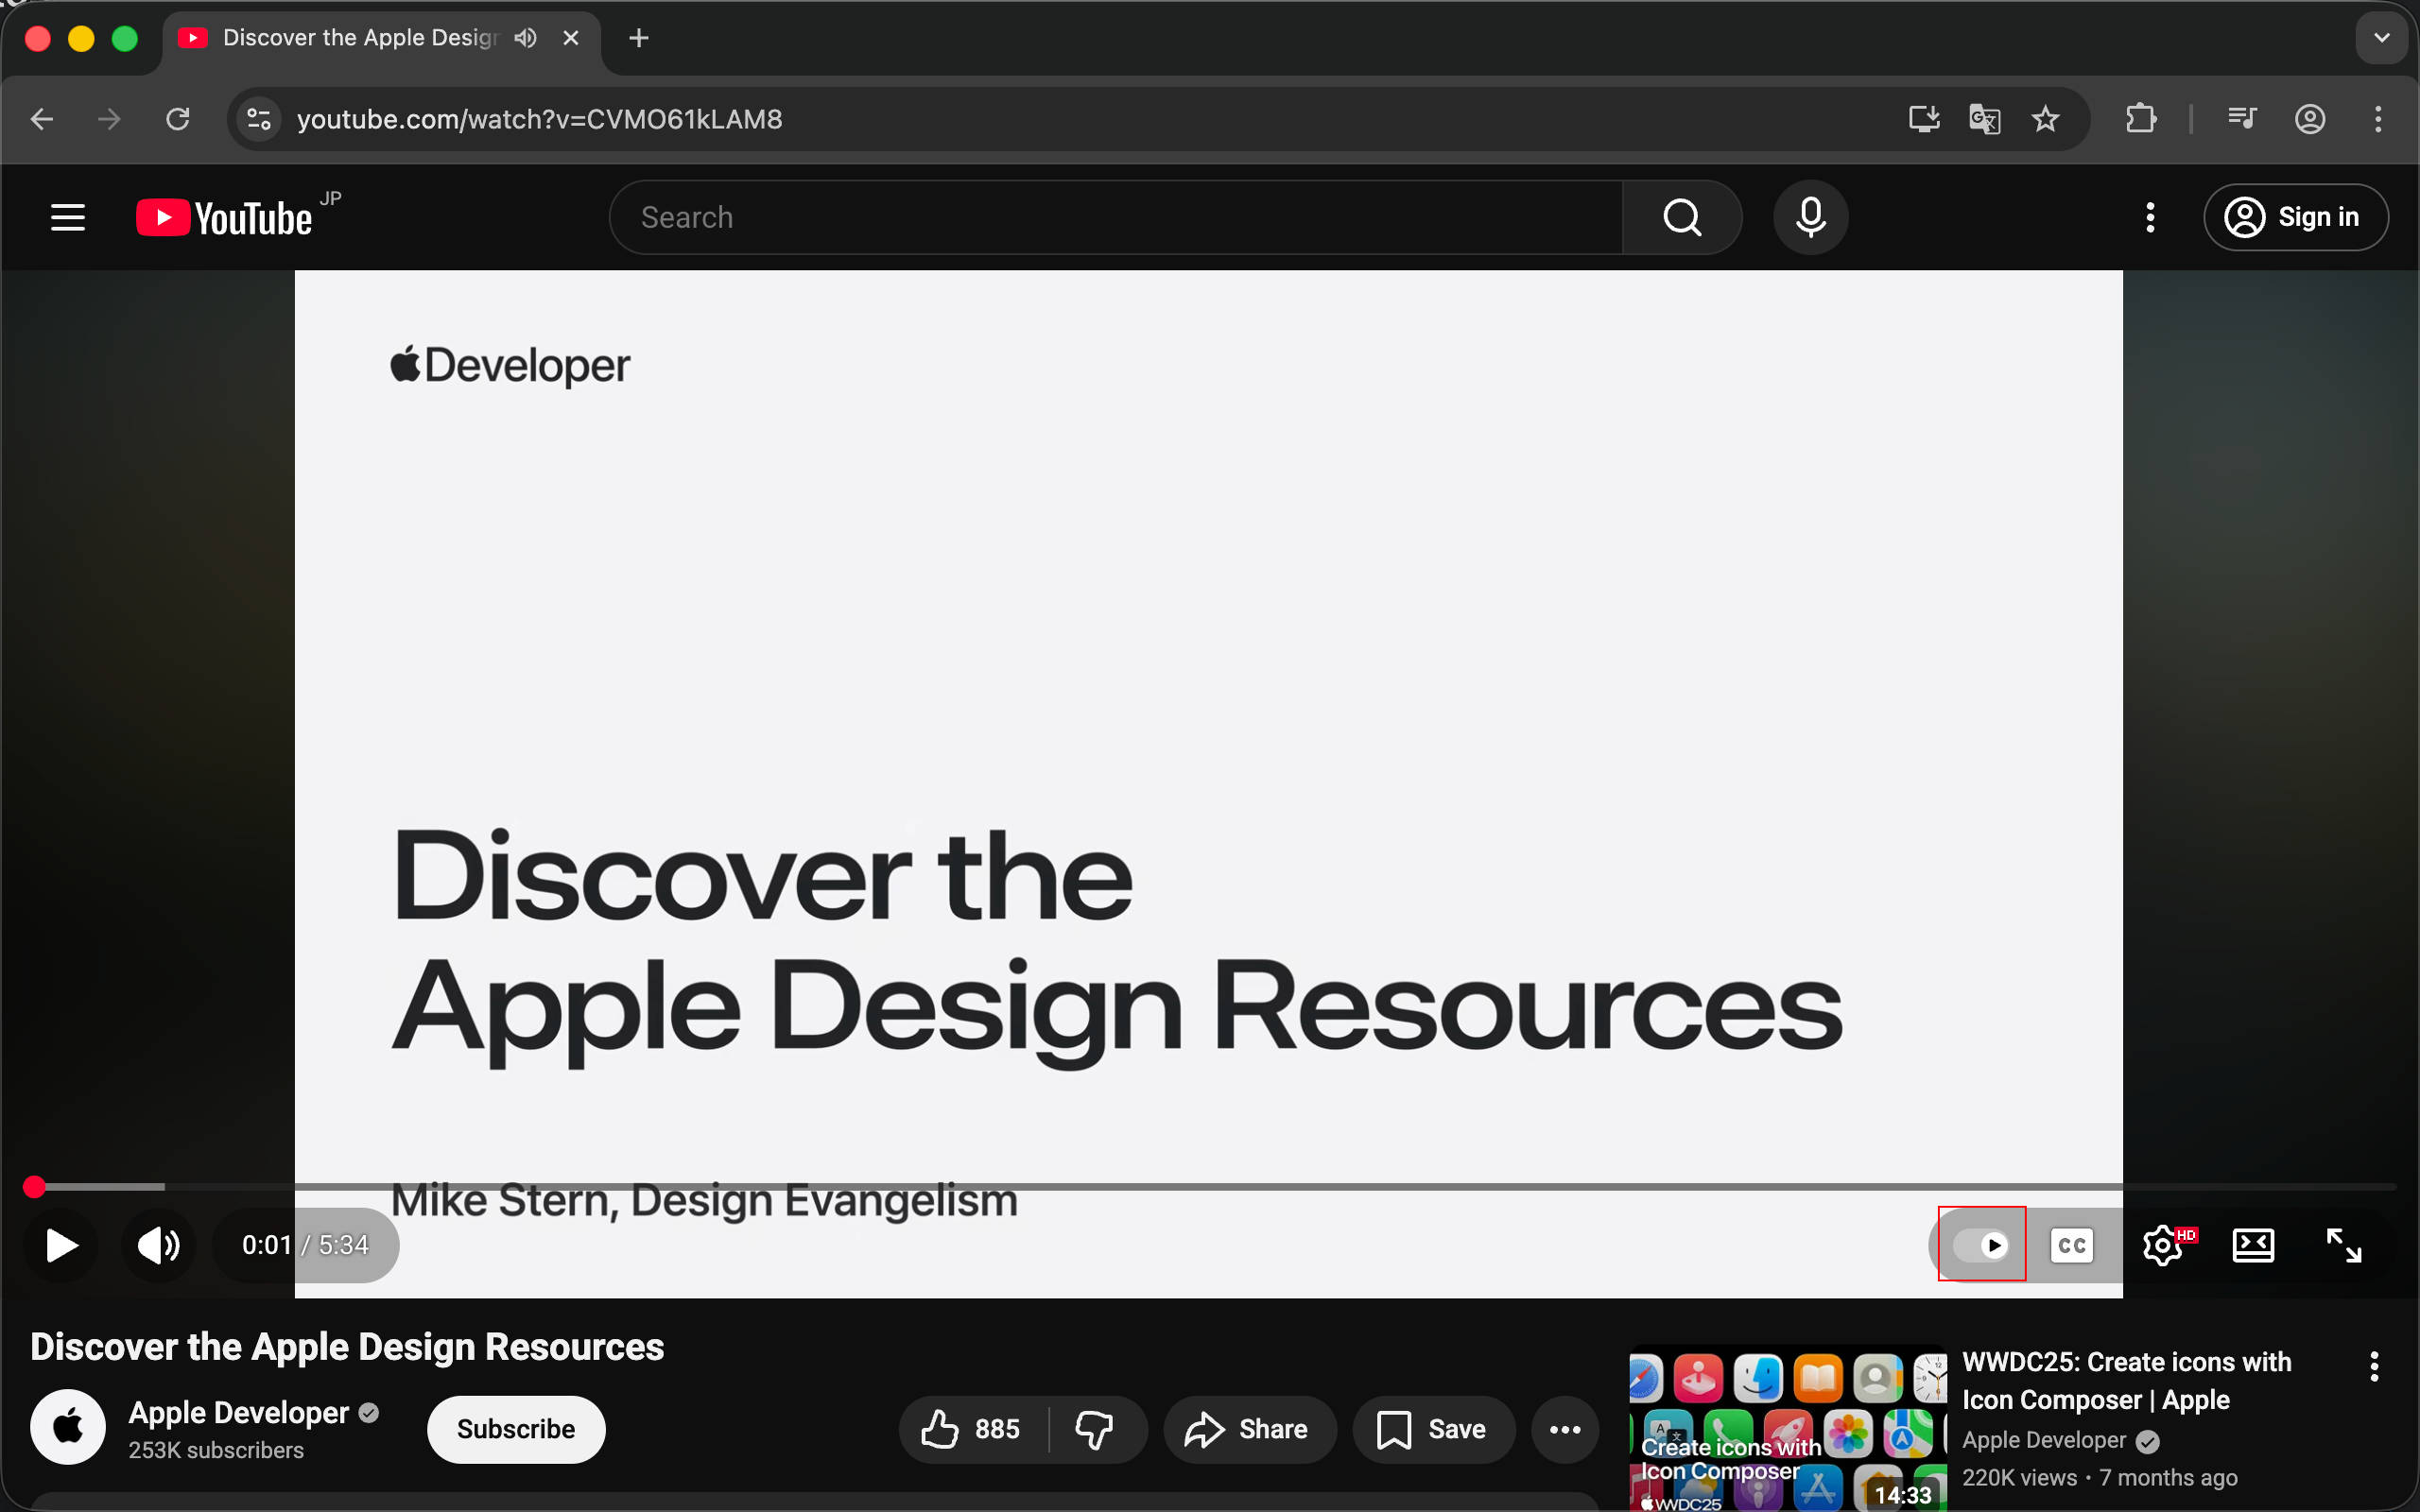
First, we need to clarify what the expected extension UI & UX should look like:
- The extension icon is automatically injected into the video toolbar at the bottom right
- Clicking the icon automatically captures the current video frame as an image
- Automatically copy the image to clipboard and download it
What are the potential challenges here?
- How to inject an icon into the YouTube toolbar → Injecting a Button into the Toolbar
- How to capture a video frame as an image → Implementing the Screenshot Feature
- How to copy an image to clipboard → Copy to Clipboard and Download
Implementation
First, use WXT to initialize a template project with React.
pnpm dlx wxt@latest init 03-inject-ui --template react --pm pnpmAdd some basic configuration to wxt.config.ts. The @wxt-dev/module-react module is WXT’s integration support for React, allowing us to use React directly in Content Scripts.
import { defineConfig } from 'wxt'

export default defineConfig({
  modules: ['@wxt-dev/module-react'],
  manifestVersion: 3,
  manifest: {
    name: 'Youtube Video Screenshot',
    description: 'Take screenshots of YouTube videos easily.',
  },
  webExt: {
    disabled: true,
  },
})
Then delete all content in the template project’s entrypoints directory.
rm -rf ./entrypoints/*Installing Tailwind CSS and shadcn Components
First, let’s set up Tailwind CSS and shadcn. Since this is an extension, shadcn’s automatic installation commands are mostly unusable, so we need to install and configure manually. Reference: https://ui.shadcn.com/docs/installation/manual.
Install the dependencies required for Tailwind CSS and shadcn:
pnpm i -D tailwindcss @tailwindcss/vite
pnpm i clsx tailwind-merge tw-animate-css class-variance-authority
Update tsconfig.json to add the baseUrl and paths fields:
{
  "extends": "./.wxt/tsconfig.json",
  "compilerOptions": {
    "allowImportingTsExtensions": true,
    "jsx": "react-jsx",
    "baseUrl": ".",
    "paths": {
      "@/*": ["./*"]
    }
  }
}
Update wxt.config.ts to add the Tailwind CSS plugin:
import { defineConfig } from 'wxt'
import tailwindcss from '@tailwindcss/vite'

export default defineConfig({
  // other config...
  vite: () => ({
    plugins: [tailwindcss() as any],
  }),
})
Add a CSS global styles file. Note that WXT uses all: initial !important; in Shadow DOM mode to reset all styles, so we need to explicitly specify the html height here, otherwise buttons may not display correctly. Reference: https://wxt.dev/api/reference/wxt/utils/content-script-ui/shadow-root/type-aliases/ShadowRootContentScriptUiOptions.html#inheritstyles
entrypoints/content/styles.css
@import 'tailwindcss';
@import 'tw-animate-css';

@custom-variant dark (&:is(.dark *));

:root {
  --background: oklch(1 0 0);
  --foreground: oklch(0.145 0 0);
  --card: oklch(1 0 0);
  --card-foreground: oklch(0.145 0 0);
  --popover: oklch(1 0 0);
  --popover-foreground: oklch(0.145 0 0);
  --primary: oklch(0.205 0 0);
  --primary-foreground: oklch(0.985 0 0);
  --secondary: oklch(0.97 0 0);
  --secondary-foreground: oklch(0.205 0 0);
  --muted: oklch(0.97 0 0);
  --muted-foreground: oklch(0.556 0 0);
  --accent: oklch(0.97 0 0);
  --accent-foreground: oklch(0.205 0 0);
  --destructive: oklch(0.577 0.245 27.325);
  --destructive-foreground: oklch(0.577 0.245 27.325);
  --border: oklch(0.922 0 0);
  --input: oklch(0.922 0 0);
  --ring: oklch(0.708 0 0);
  --chart-1: oklch(0.646 0.222 41.116);
  --chart-2: oklch(0.6 0.118 184.704);
  --chart-3: oklch(0.398 0.07 227.392);
  --chart-4: oklch(0.828 0.189 84.429);
  --chart-5: oklch(0.769 0.188 70.08);
  --radius: 0.625rem;
  --sidebar: oklch(0.985 0 0);
  --sidebar-foreground: oklch(0.145 0 0);
  --sidebar-primary: oklch(0.205 0 0);
  --sidebar-primary-foreground: oklch(0.985 0 0);
  --sidebar-accent: oklch(0.97 0 0);
  --sidebar-accent-foreground: oklch(0.205 0 0);
  --sidebar-border: oklch(0.922 0 0);
  --sidebar-ring: oklch(0.708 0 0);
}

.dark {
  --background: oklch(0.145 0 0);
  --foreground: oklch(0.985 0 0);
  --card: oklch(0.145 0 0);
  --card-foreground: oklch(0.985 0 0);
  --popover: oklch(0.145 0 0);
  --popover-foreground: oklch(0.985 0 0);
  --primary: oklch(0.985 0 0);
  --primary-foreground: oklch(0.205 0 0);
  --secondary: oklch(0.269 0 0);
  --secondary-foreground: oklch(0.985 0 0);
  --muted: oklch(0.269 0 0);
  --muted-foreground: oklch(0.708 0 0);
  --accent: oklch(0.269 0 0);
  --accent-foreground: oklch(0.985 0 0);
  --destructive: oklch(0.396 0.141 25.723);
  --destructive-foreground: oklch(0.637 0.237 25.331);
  --border: oklch(0.269 0 0);
  --input: oklch(0.269 0 0);
  --ring: oklch(0.439 0 0);
  --chart-1: oklch(0.488 0.243 264.376);
  --chart-2: oklch(0.696 0.17 162.48);
  --chart-3: oklch(0.769 0.188 70.08);
  --chart-4: oklch(0.627 0.265 303.9);
  --chart-5: oklch(0.645 0.246 16.439);
  --sidebar: oklch(0.205 0 0);
  --sidebar-foreground: oklch(0.985 0 0);
  --sidebar-primary: oklch(0.488 0.243 264.376);
  --sidebar-primary-foreground: oklch(0.985 0 0);
  --sidebar-accent: oklch(0.269 0 0);
  --sidebar-accent-foreground: oklch(0.985 0 0);
  --sidebar-border: oklch(0.269 0 0);
  --sidebar-ring: oklch(0.439 0 0);
}

@theme inline {
  --color-background: var(--background);
  --color-foreground: var(--foreground);
  --color-card: var(--card);
  --color-card-foreground: var(--card-foreground);
  --color-popover: var(--popover);
  --color-popover-foreground: var(--popover-foreground);
  --color-primary: var(--primary);
  --color-primary-foreground: var(--primary-foreground);
  --color-secondary: var(--secondary);
  --color-secondary-foreground: var(--secondary-foreground);
  --color-muted: var(--muted);
  --color-muted-foreground: var(--muted-foreground);
  --color-accent: var(--accent);
  --color-accent-foreground: var(--accent-foreground);
  --color-destructive: var(--destructive);
  --color-destructive-foreground: var(--destructive-foreground);
  --color-border: var(--border);
  --color-input: var(--input);
  --color-ring: var(--ring);
  --color-chart-1: var(--chart-1);
  --color-chart-2: var(--chart-2);
  --color-chart-3: var(--chart-3);
  --color-chart-4: var(--chart-4);
  --color-chart-5: var(--chart-5);
  --radius-sm: calc(var(--radius) - 4px);
  --radius-md: calc(var(--radius) - 2px);
  --radius-lg: var(--radius);
  --radius-xl: calc(var(--radius) + 4px);
  --color-sidebar: var(--sidebar);
  --color-sidebar-foreground: var(--sidebar-foreground);
  --color-sidebar-primary: var(--sidebar-primary);
  --color-sidebar-primary-foreground: var(--sidebar-primary-foreground);
  --color-sidebar-accent: var(--sidebar-accent);
  --color-sidebar-accent-foreground: var(--sidebar-accent-foreground);
  --color-sidebar-border: var(--sidebar-border);
  --color-sidebar-ring: var(--sidebar-ring);
}

@layer base {
  * {
    @apply border-border outline-ring/50;
  }
  html {
    height: 40px;
  }
  body {
    height: 100%;
    display: flex;
    align-items: center;
  }
}
Add the utility function file required by shadcn at lib/utils.ts:
import { clsx, type ClassValue } from 'clsx'
import { twMerge } from 'tailwind-merge'

export function cn(...inputs: ClassValue[]) {
  return twMerge(clsx(inputs))
}
Then add the shadcn configuration file components.json:
{
  "$schema": "https://ui.shadcn.com/schema.json",
  "style": "new-york",
  "rsc": false,
  "tsx": true,
  "tailwind": {
    "config": "",
    "css": "entrypoints/content/styles.css",
    "baseColor": "neutral",
    "cssVariables": true,
    "prefix": ""
  },
  "aliases": {
    "components": "@/components",
    "utils": "@/lib/utils",
    "ui": "@/components/ui",
    "lib": "@/lib",
    "hooks": "@/hooks"
  },
  "iconLibrary": "lucide"
}
Now, try using the shadcn command to install a button component. If you see output similar to below, your configuration is correct and you can proceed to the next step.
$ pnpm dlx shadcn@latest add button --yes
✔ Checking registry.
✔ Installing dependencies.
✔ Created 1 file:
  - components/ui/button.tsx
Using shadcn in Content Scripts
This is where many people get stuck, but shadcn is ultimately just JavaScript and CSS, and extensions allow us to inject these. So yes, we can absolutely use it.
The first step is to create the entry file at entrypoints/content/index.tsx:
export default defineContentScript({
  matches: ['https://www.youtube.com/*'],
  main() {},
})
Then we use Shadow Root mode to inject the UI. This provides excellent style isolation - the website’s CSS won’t affect the extension, and vice versa. Reference: https://developer.mozilla.org/en-US/docs/Web/API/Web_components/Using_shadow_DOM. This solves the first problem we mentioned initially (style conflicts).
As for React being a JavaScript library, it gets bundled into .output/chrome-mv3/content-scripts/content.js at build time and is injected along with the Content Script. In other words: Content Scripts can run any JavaScript, so we can use any JavaScript framework - React, Vue, Svelte, you name it. This solves the second problem. You can see examples of multiple web frameworks in the WXT official documentation: https://wxt.dev/guide/essentials/content-scripts.html#shadow-root
import './styles.css' // Import CSS, automatically handled during bundling
import { Button } from '@/components/ui/button'
import { createRoot } from 'react-dom/client'

function App() {
  return (
    <div className={'fixed z-[999999] top-0 left-0 w-full py-2 bg-white text-center'}>
      <Button>Click me</Button>
    </div>
  )
}

export default defineContentScript({
  matches: ['https://www.youtube.com/*'],
  cssInjectionMode: 'ui', // This configuration tells WXT to dynamically inject CSS into the page
  async main(ctx) {
    // Here we use Shadow Root mode to inject UI, which properly prevents our Tailwind CSS from "polluting" the webpage itself
    const ui = await createShadowRootUi(ctx, {
      name: 'inject-ui-app',
      position: 'inline',
      anchor: 'body',
      onMount: (container) => {
        const root = createRoot(container)
        root.render(<App />)
        return root
      },
      onRemove: (root) => {
        root?.unmount()
      },
    })

    ui.mount()
  },
})
As you can see, we successfully injected a button at the top. In DevTools > Elements, you can also see the injected inject-ui-app Shadow DOM element.
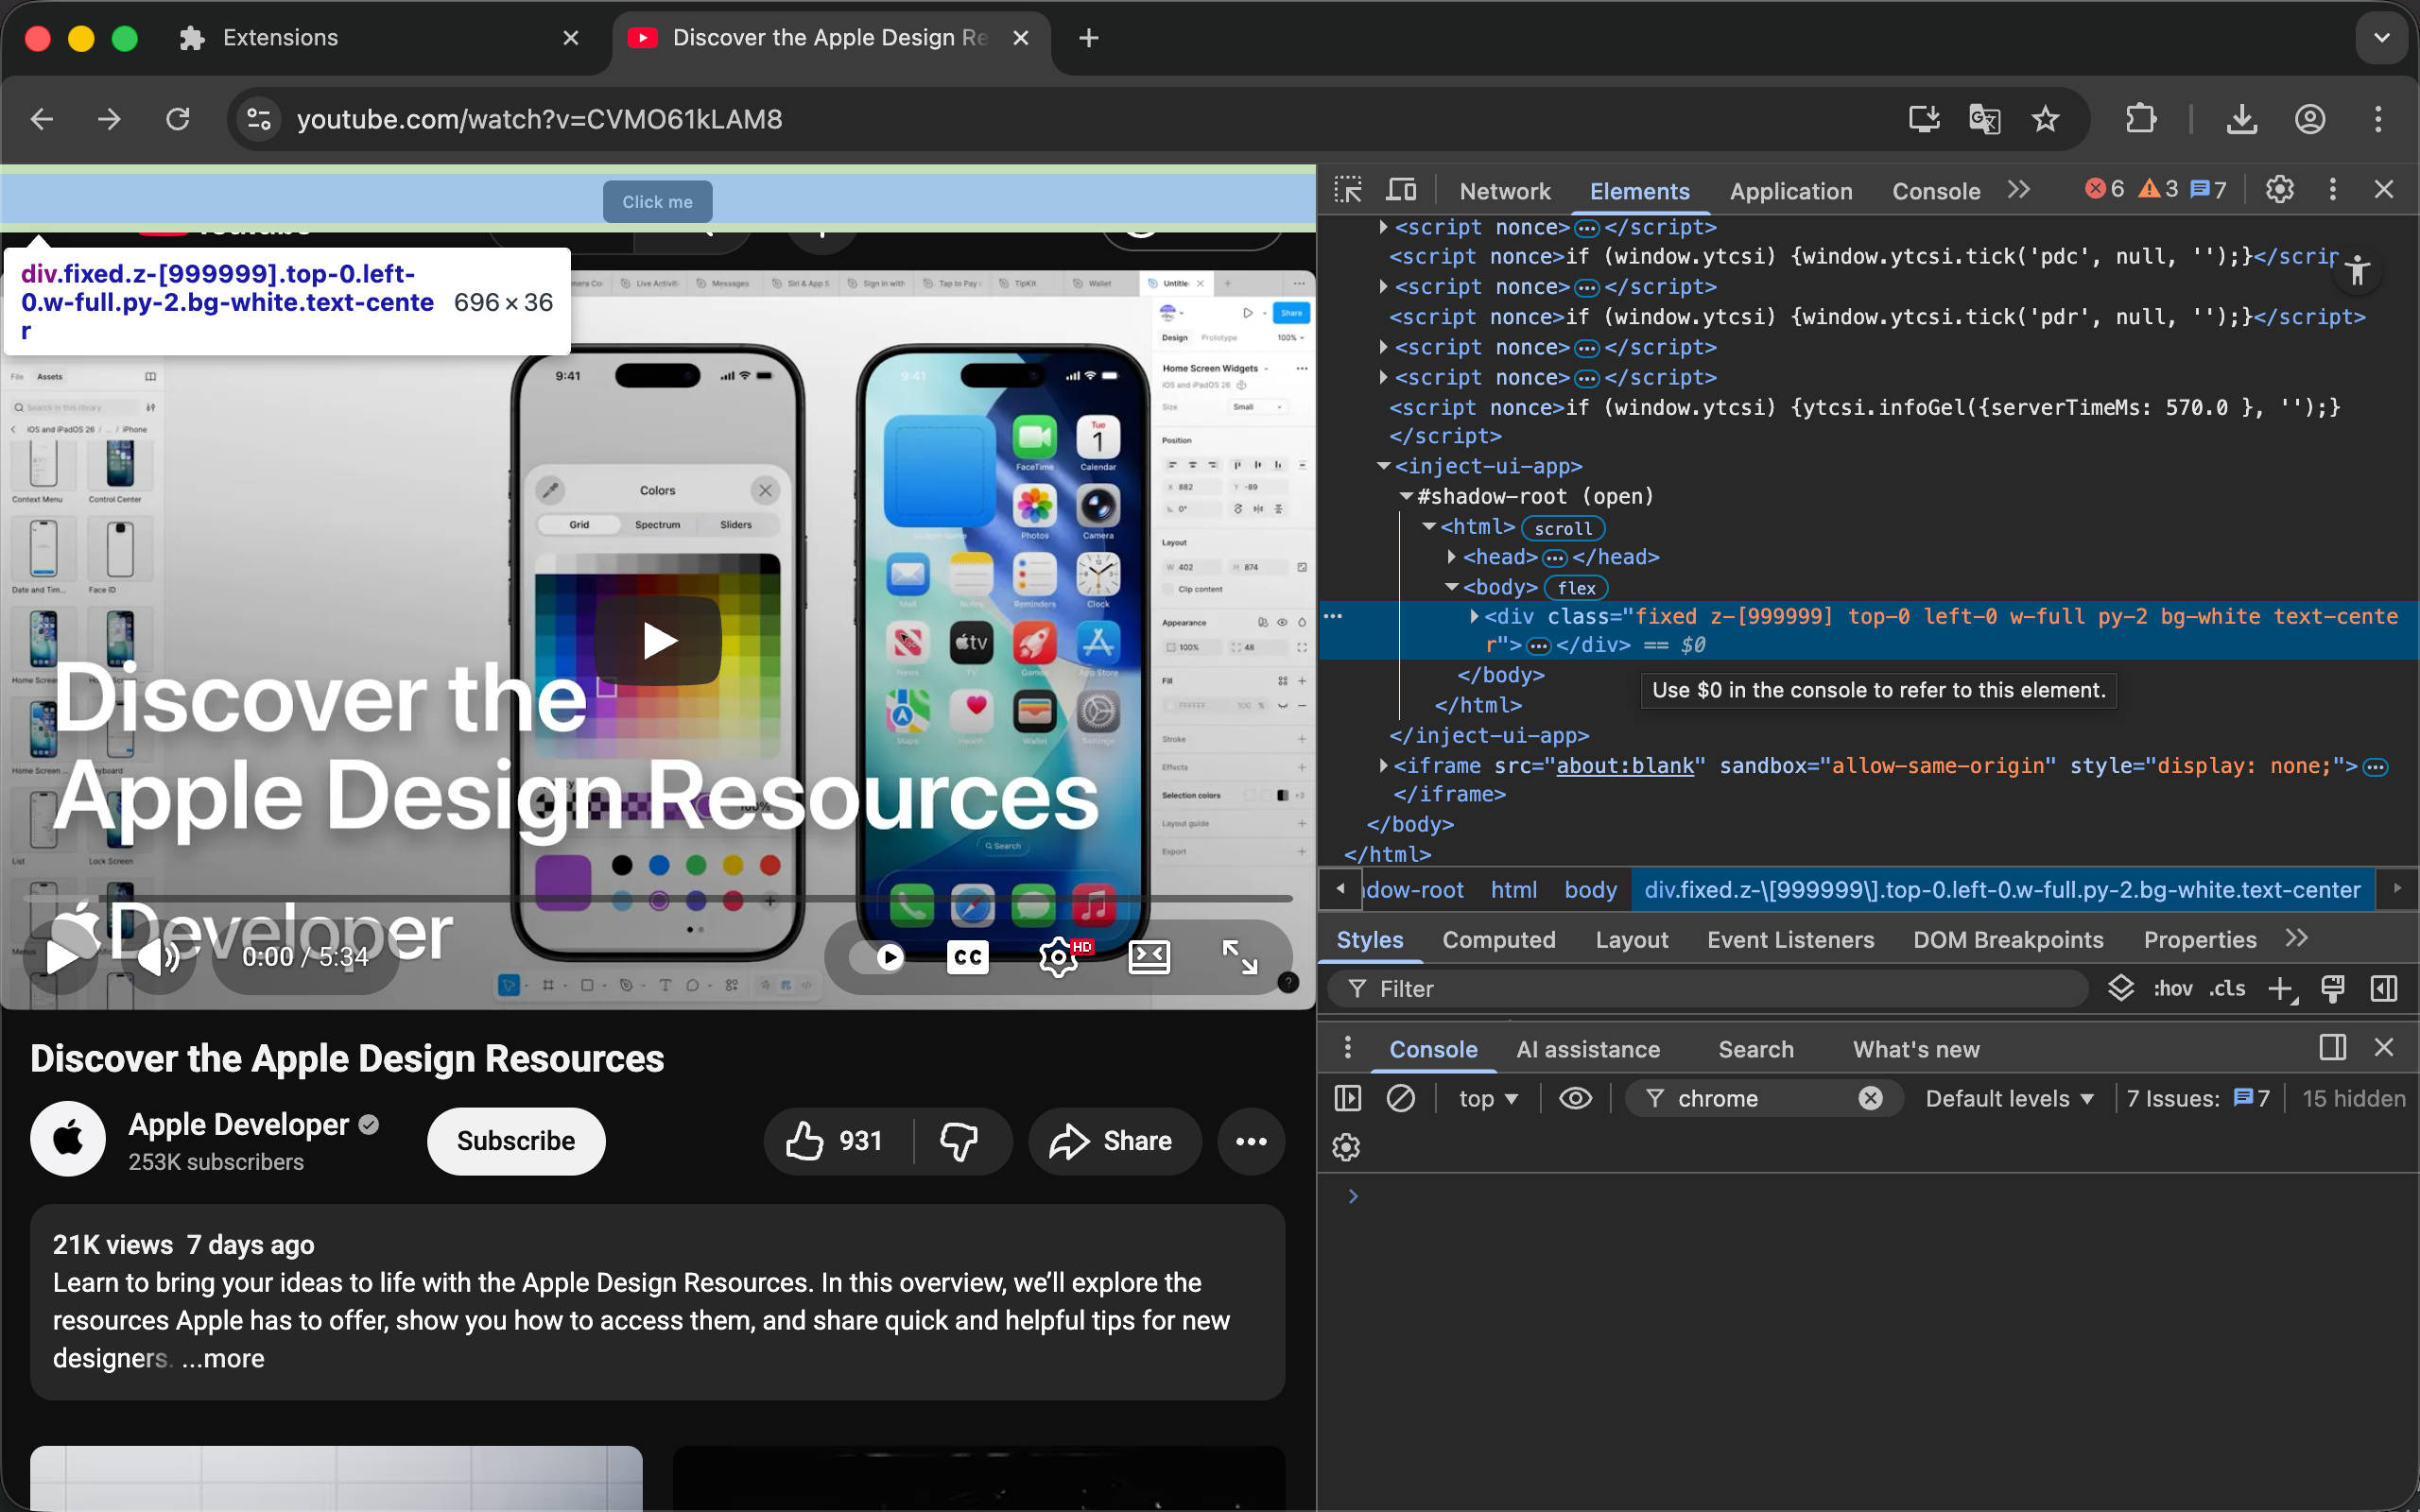
Next, we need to find a suitable location to inject the icon and then inject the UI.
For different UI injection modes in Content Scripts, reference: https://wxt.dev/guide/essentials/content-scripts.html#ui
Injecting a Button into the Toolbar
First, we need to find where to inject. Since we want to add an extra icon to the toolbar in the bottom right, we can find the container element. Specifically, it’s #movie_player .ytp-right-controls-left.
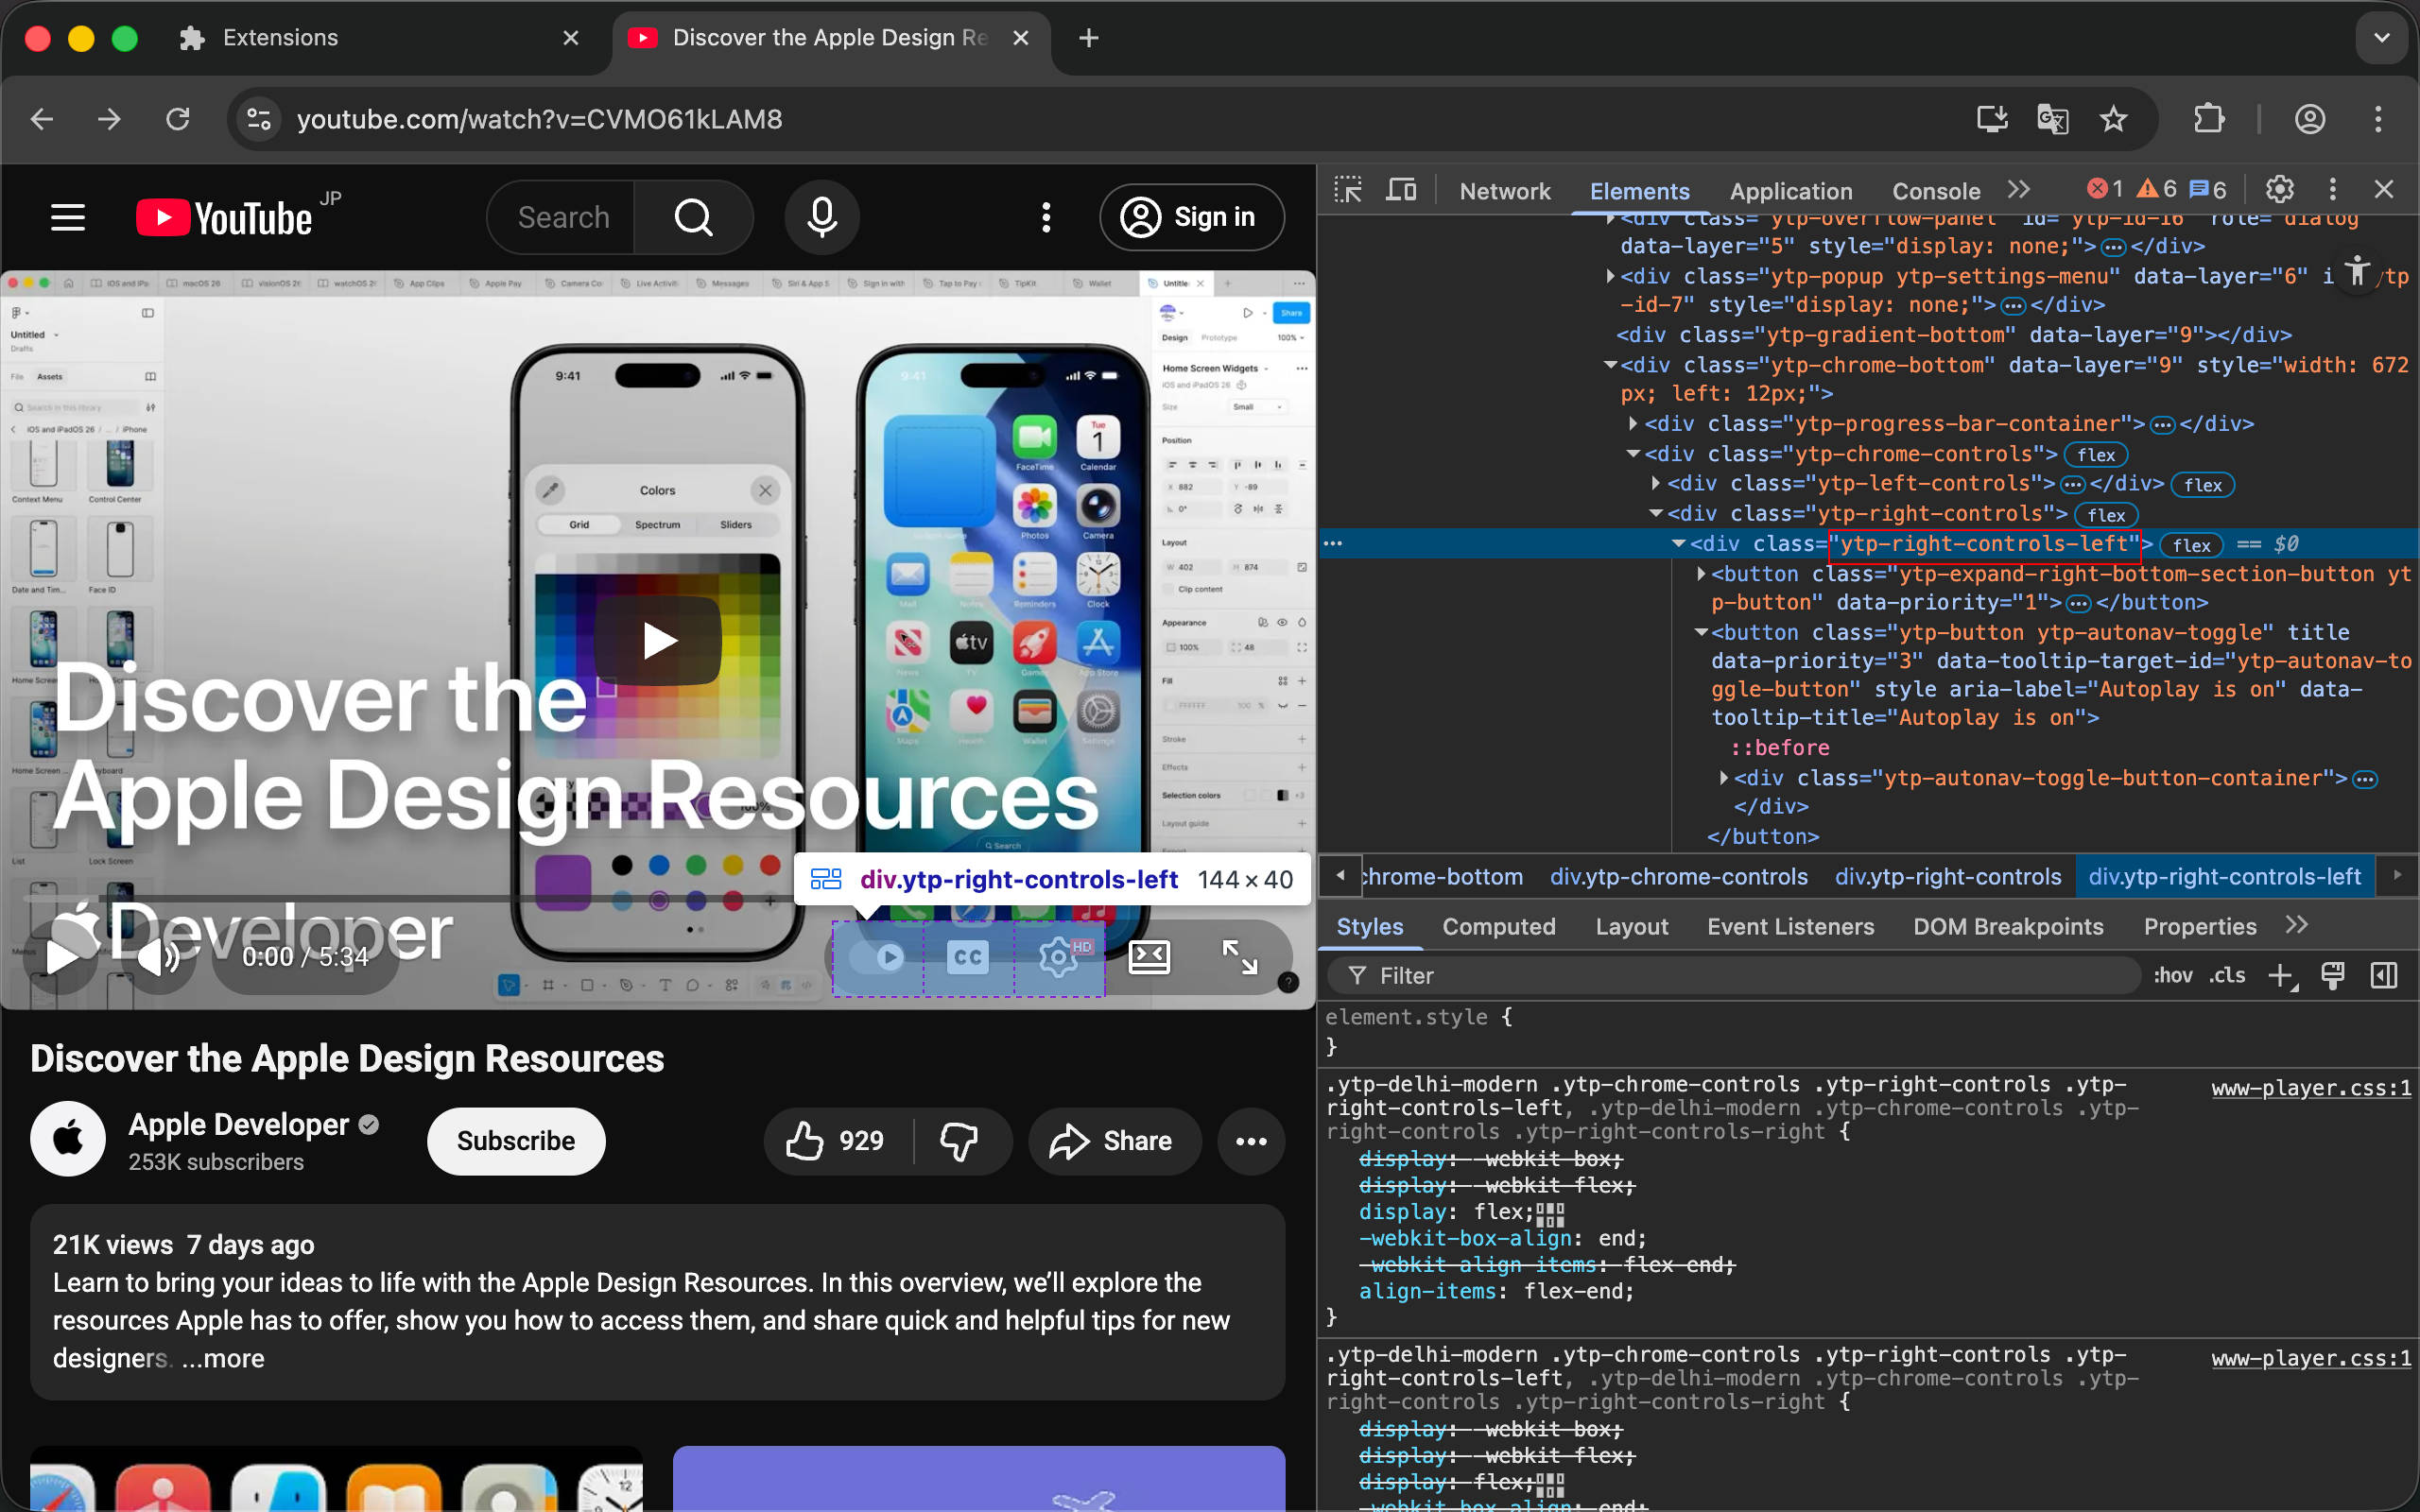
Then modify the previous Content Script by updating the App component:
function App() {
  function onTakeScreenshot() {
    alert('Take screenshot!')
  }
  return (
    <Button
      className={'h-[80%] px-6 bg-transparent hover:bg-white/10 rounded-full'}
      onClick={onTakeScreenshot}
    >
      <img
        src={browser.runtime.getURL('/icon/32.png')} // Using the extension icon directly as the action icon
        alt={'icon'}
        className={'w-[20px] h-[20px]'}
      />
    </Button>
  )
}
When creating the Shadow DOM container, use anchor to specify where to place it, and use insertBefore to add it to the leftmost position of the toolbar. The specified container element may not exist, but WXT will correctly mount and unmount the UI when the container element appears and disappears. Reference: https://wxt.dev/guide/essentials/content-scripts.html#mounting-ui-to-dynamic-element
const ui = await createShadowRootUi(ctx, {
  anchor: '#movie_player .ytp-right-controls-left', // The container element to inject into
  append(anchor, ui) {
    anchor.insertBefore(ui, anchor.firstChild) // Add to the leftmost position
  },
  // other code...
})
Now, we should see our injected icon in the bottom right. But actually, we only get an error saying the resource cannot be loaded.
Denying load of chrome-extension://aheclehodijmphbifdolliophgjiagof/icon/32.png. Resources must be listed in the web_accessible_resources manifest key in order to be loaded by pages outside the extension.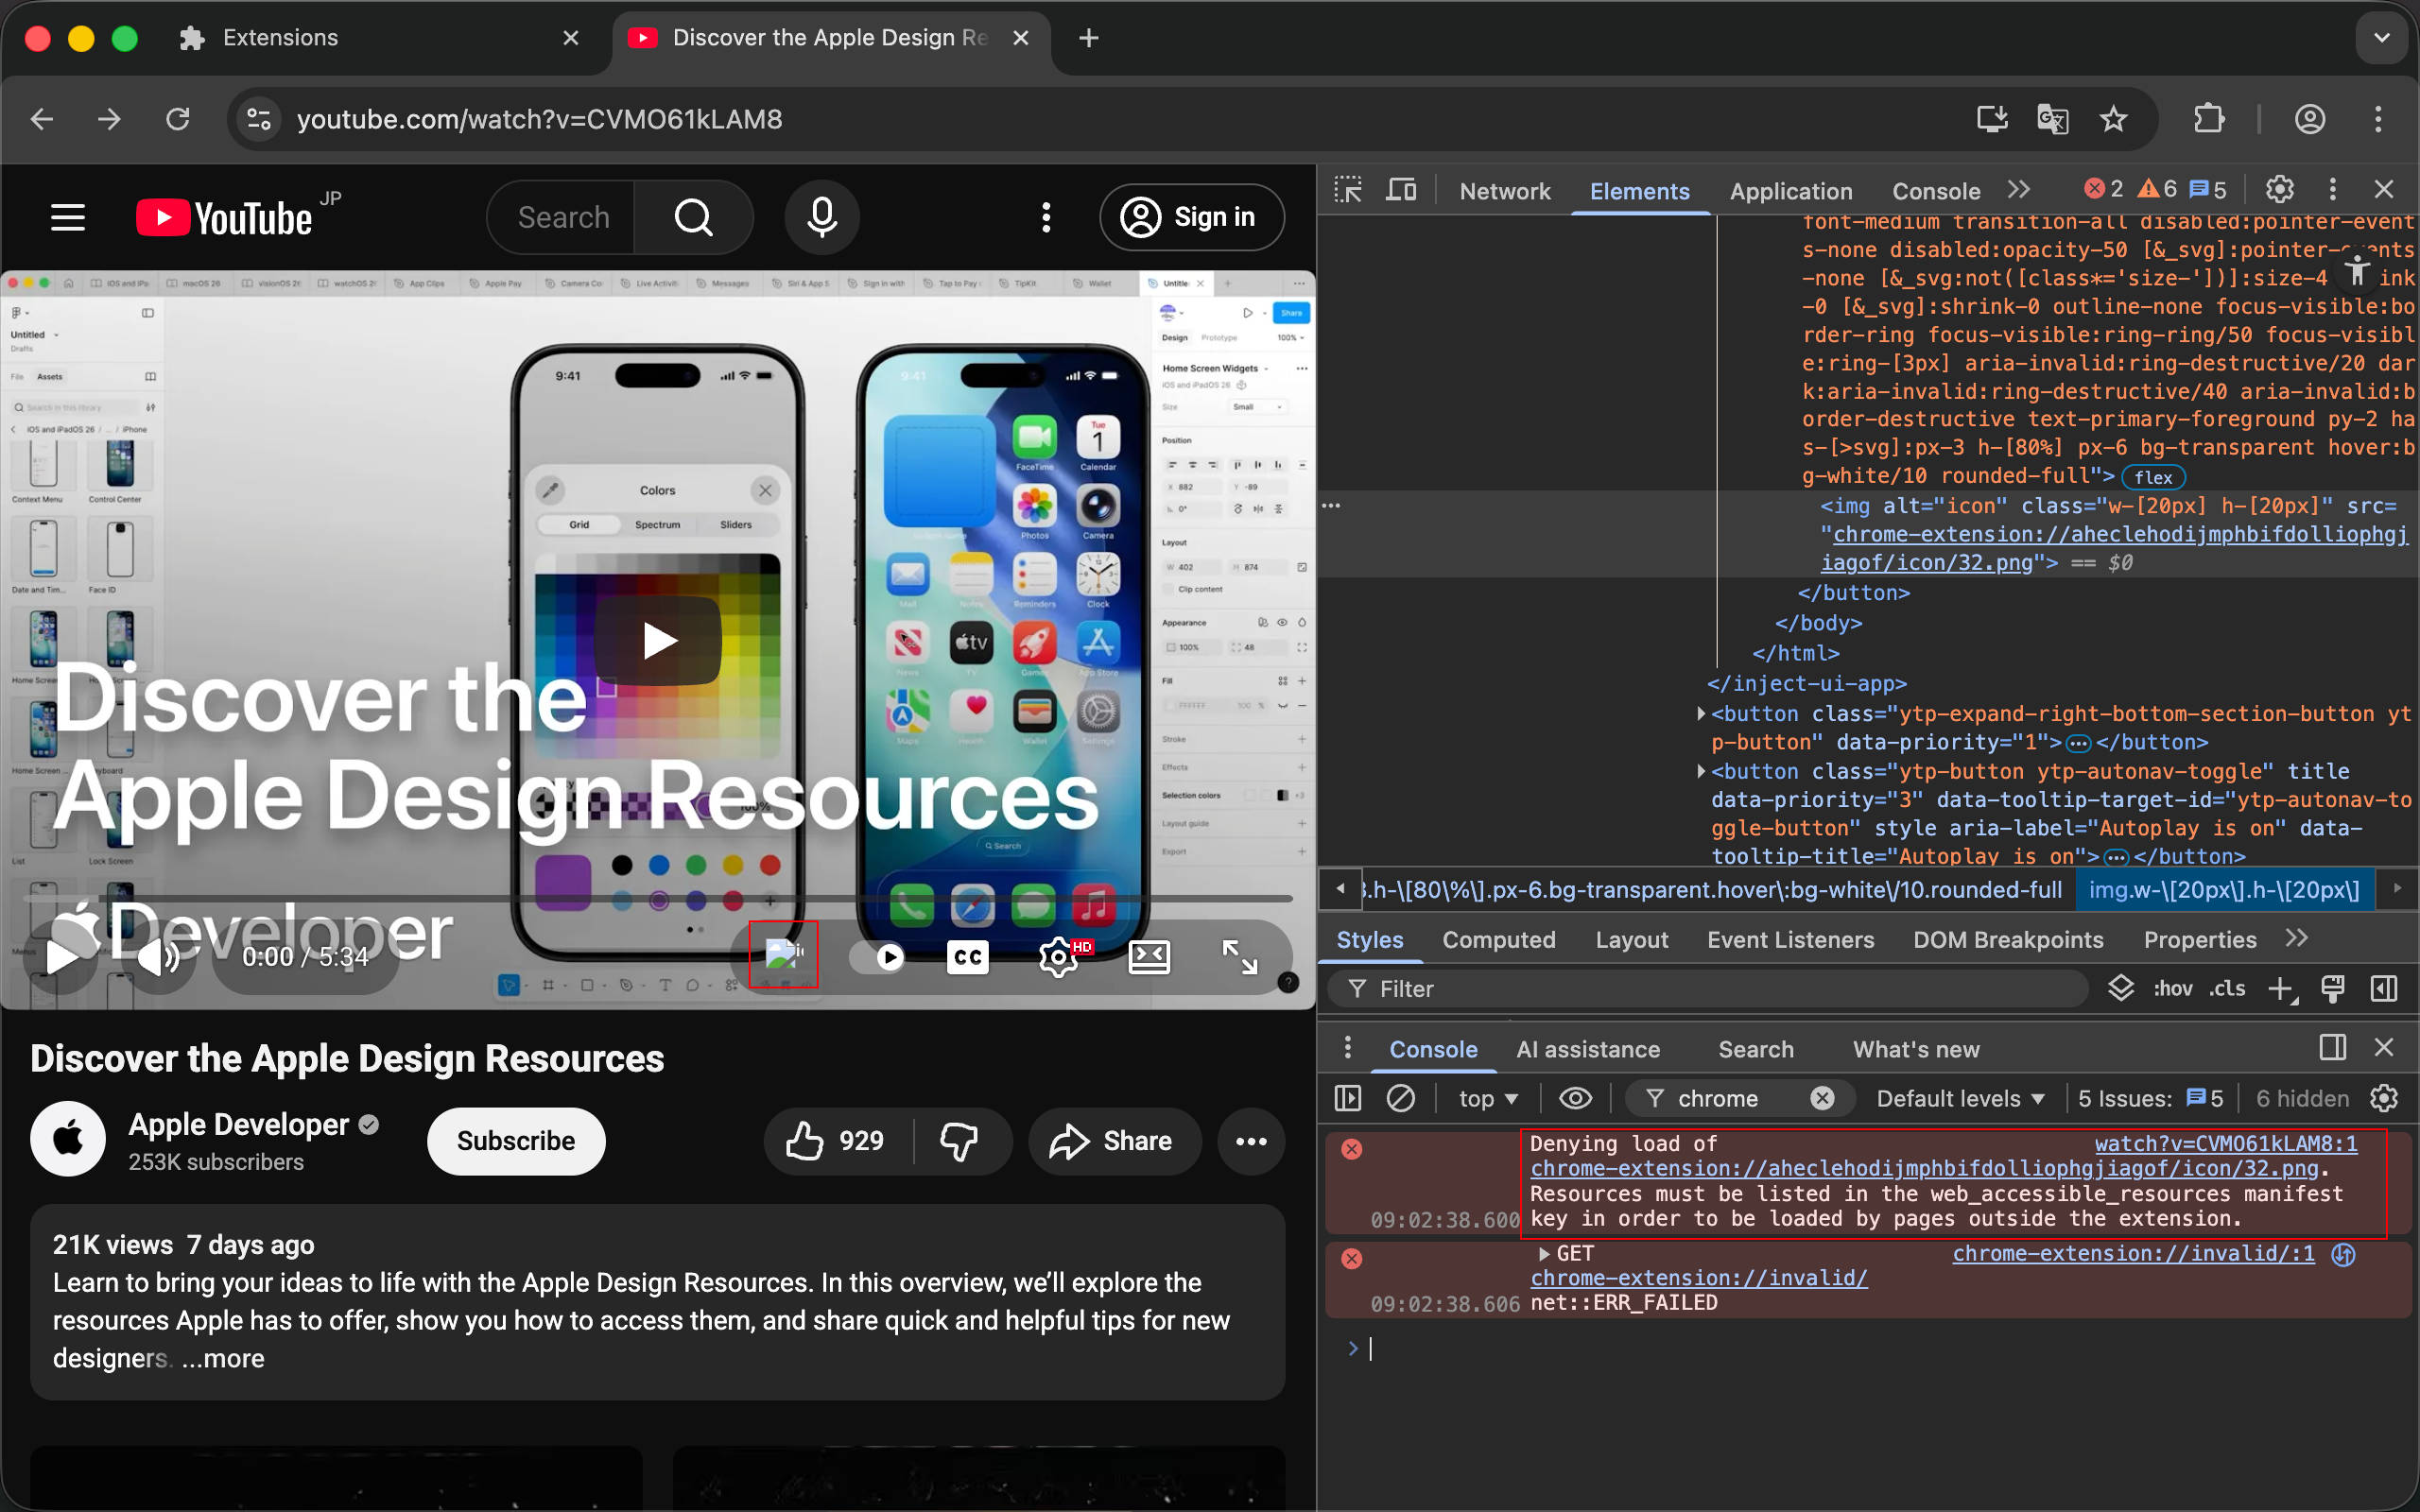
We actually need to configure web_accessible_resources in wxt.config.ts to allow web pages to access extension resources.
export default defineConfig({
  // other config...
  manifest: {
    // other config...
    web_accessible_resources: [
      {
        resources: ['icon/*'],
        matches: ['https://www.youtube.com/*'],
      },
    ],
  },
  // other config...
})
Then, we can see the injected icon button in the webpage. Clicking it will show Take screenshot!.
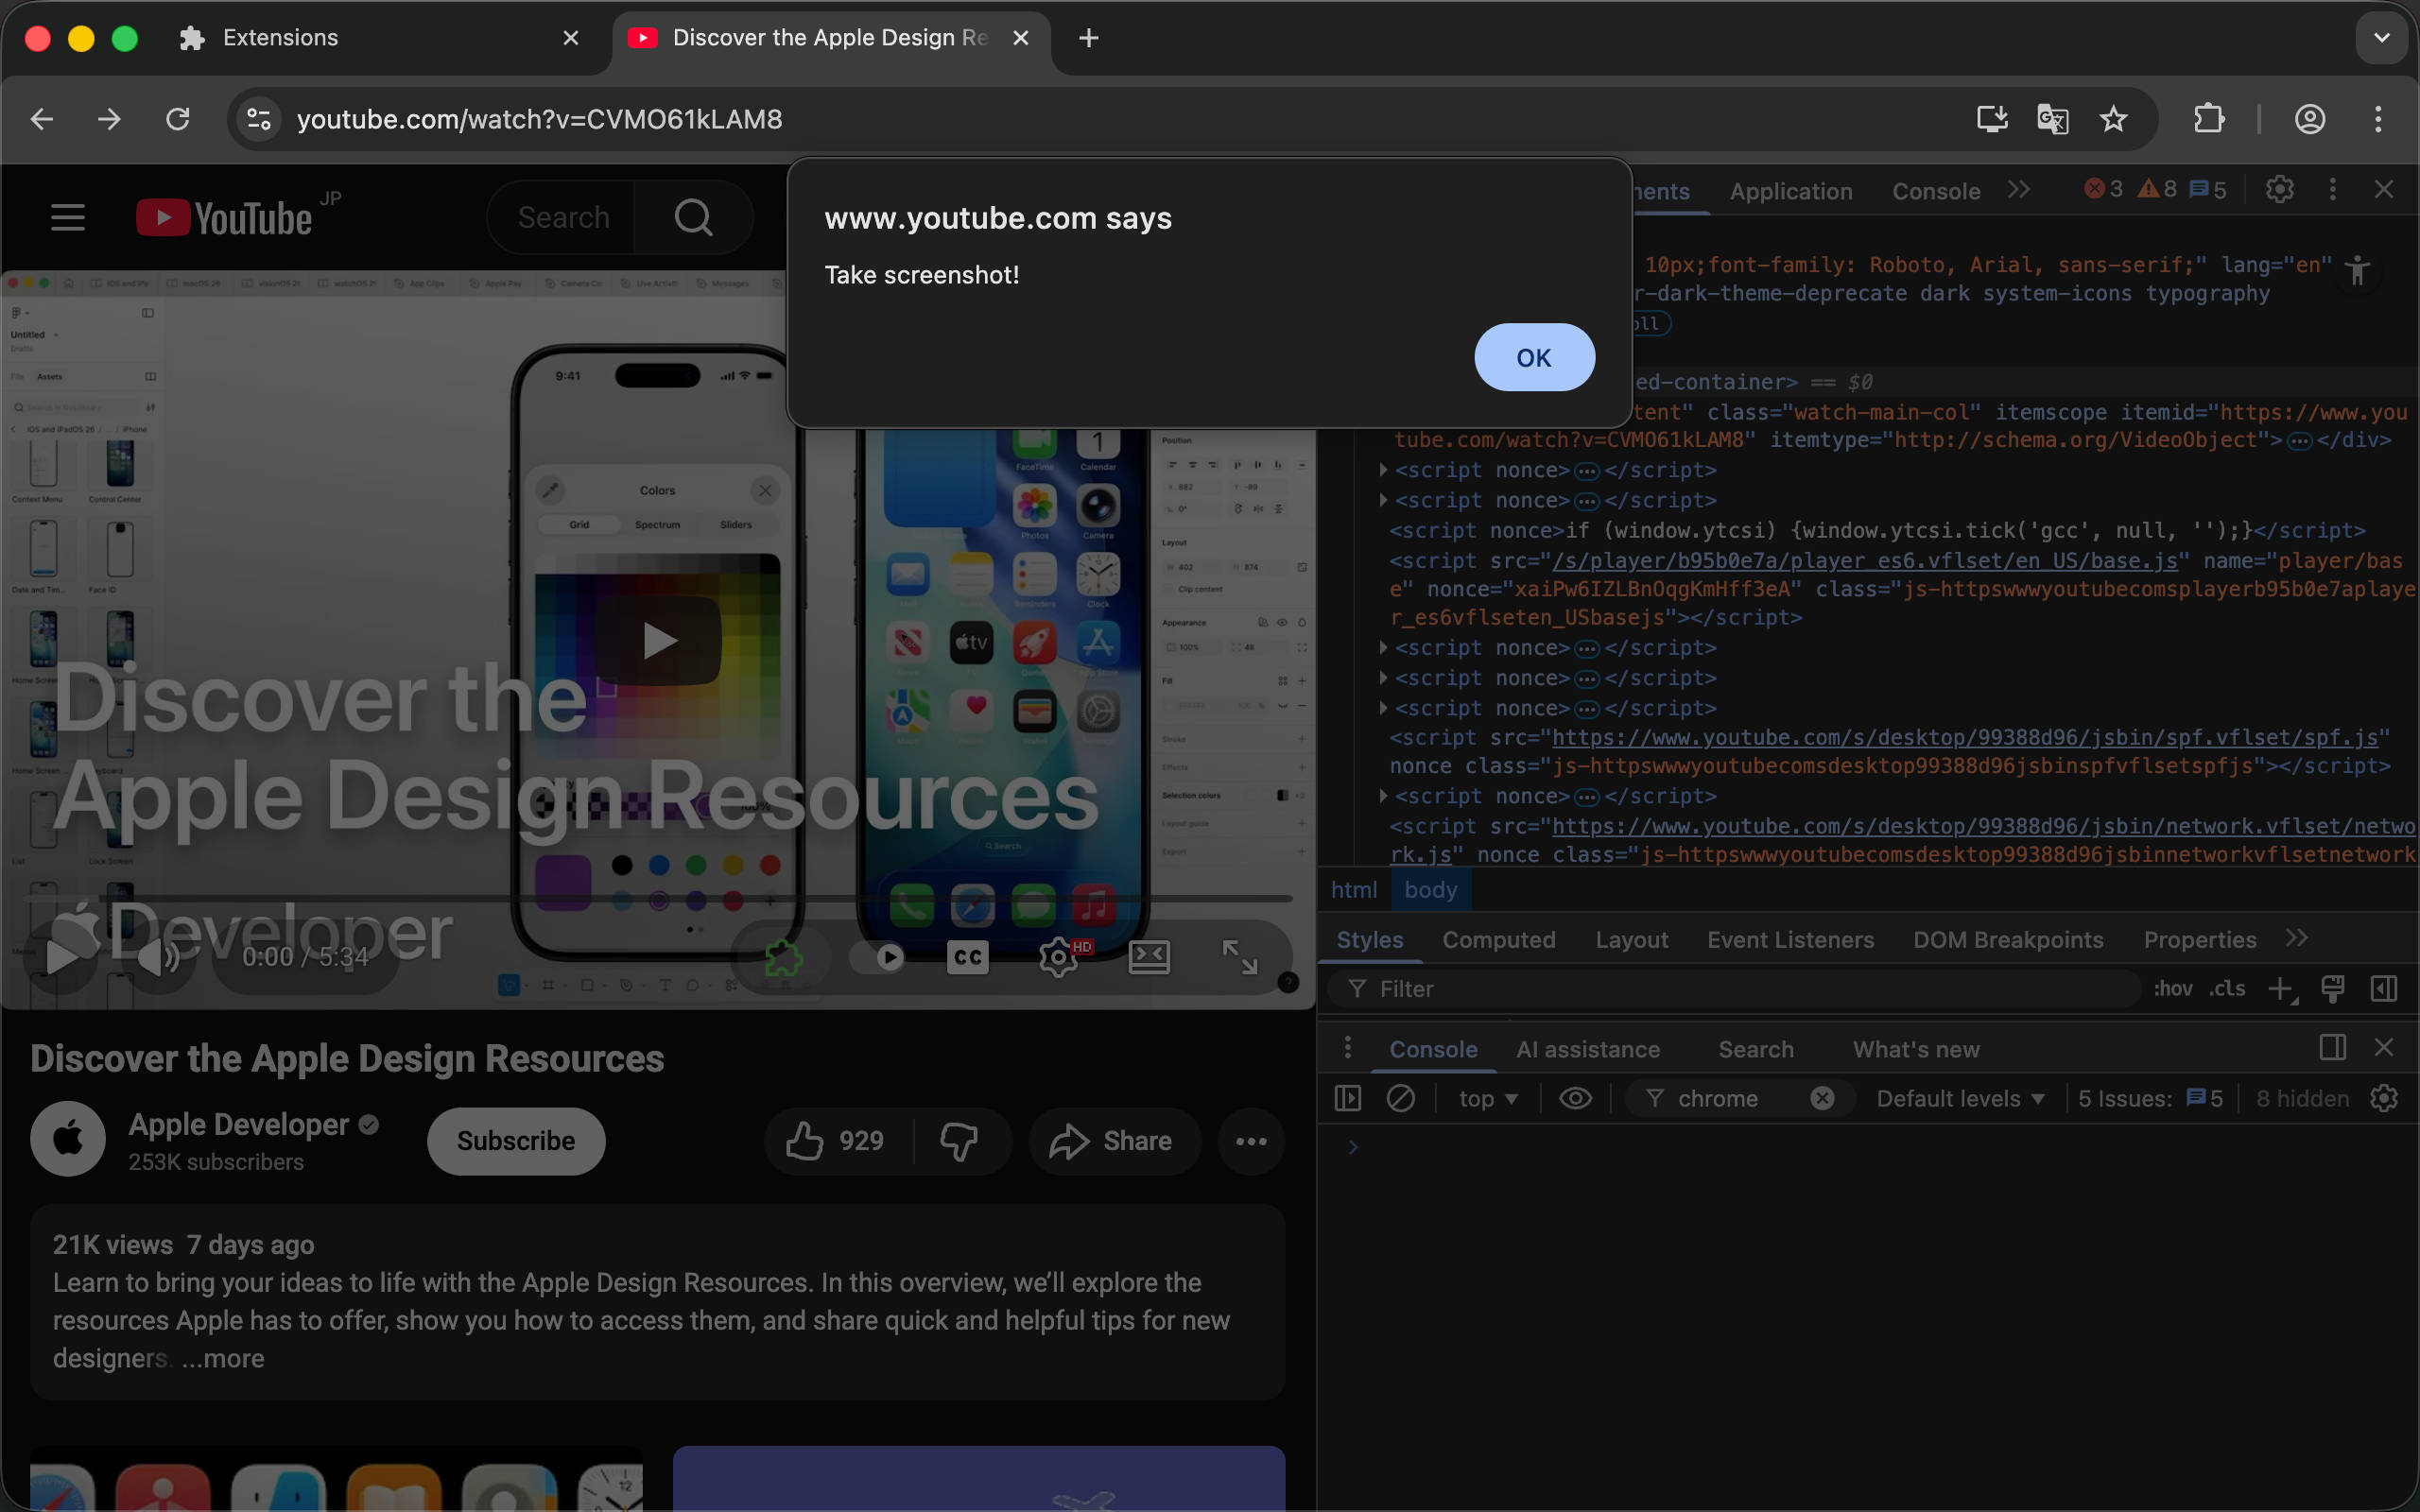
Reference the official Chrome documentation: https://developer.chrome.com/docs/extensions/reference/manifest/web-accessible-resources
Complete code
import './styles.css'
import { Button } from '@/components/ui/button'
import { createRoot } from 'react-dom/client'

function App() {
  function onTakeScreenshot() {
    alert('Take screenshot!')
  }
  return (
    <Button className={'h-[80%] px-6 bg-transparent hover:bg-white/10 rounded-full'} onClick={onTakeScreenshot}>
      <img src={browser.runtime.getURL('/icon/32.png')} alt={'icon'} className={'w-[20px] h-[20px]'} />
    </Button>
  )
}

export default defineContentScript({
  matches: ['https://www.youtube.com/*'],
  cssInjectionMode: 'ui',
  async main(ctx) {
    const ui = await createShadowRootUi(ctx, {
      name: 'inject-ui-app',
      position: 'inline',
      anchor: '#movie_player .ytp-right-controls-left',
      append(anchor, ui) {
        anchor.insertBefore(ui, anchor.firstChild)
      },
      onMount: (container) => {
        const root = createRoot(container)
        root.render(<App />)
        return root
      },
      onRemove: (root) => {
        root?.unmount()
      },
    })

    ui.mount()
  },
})
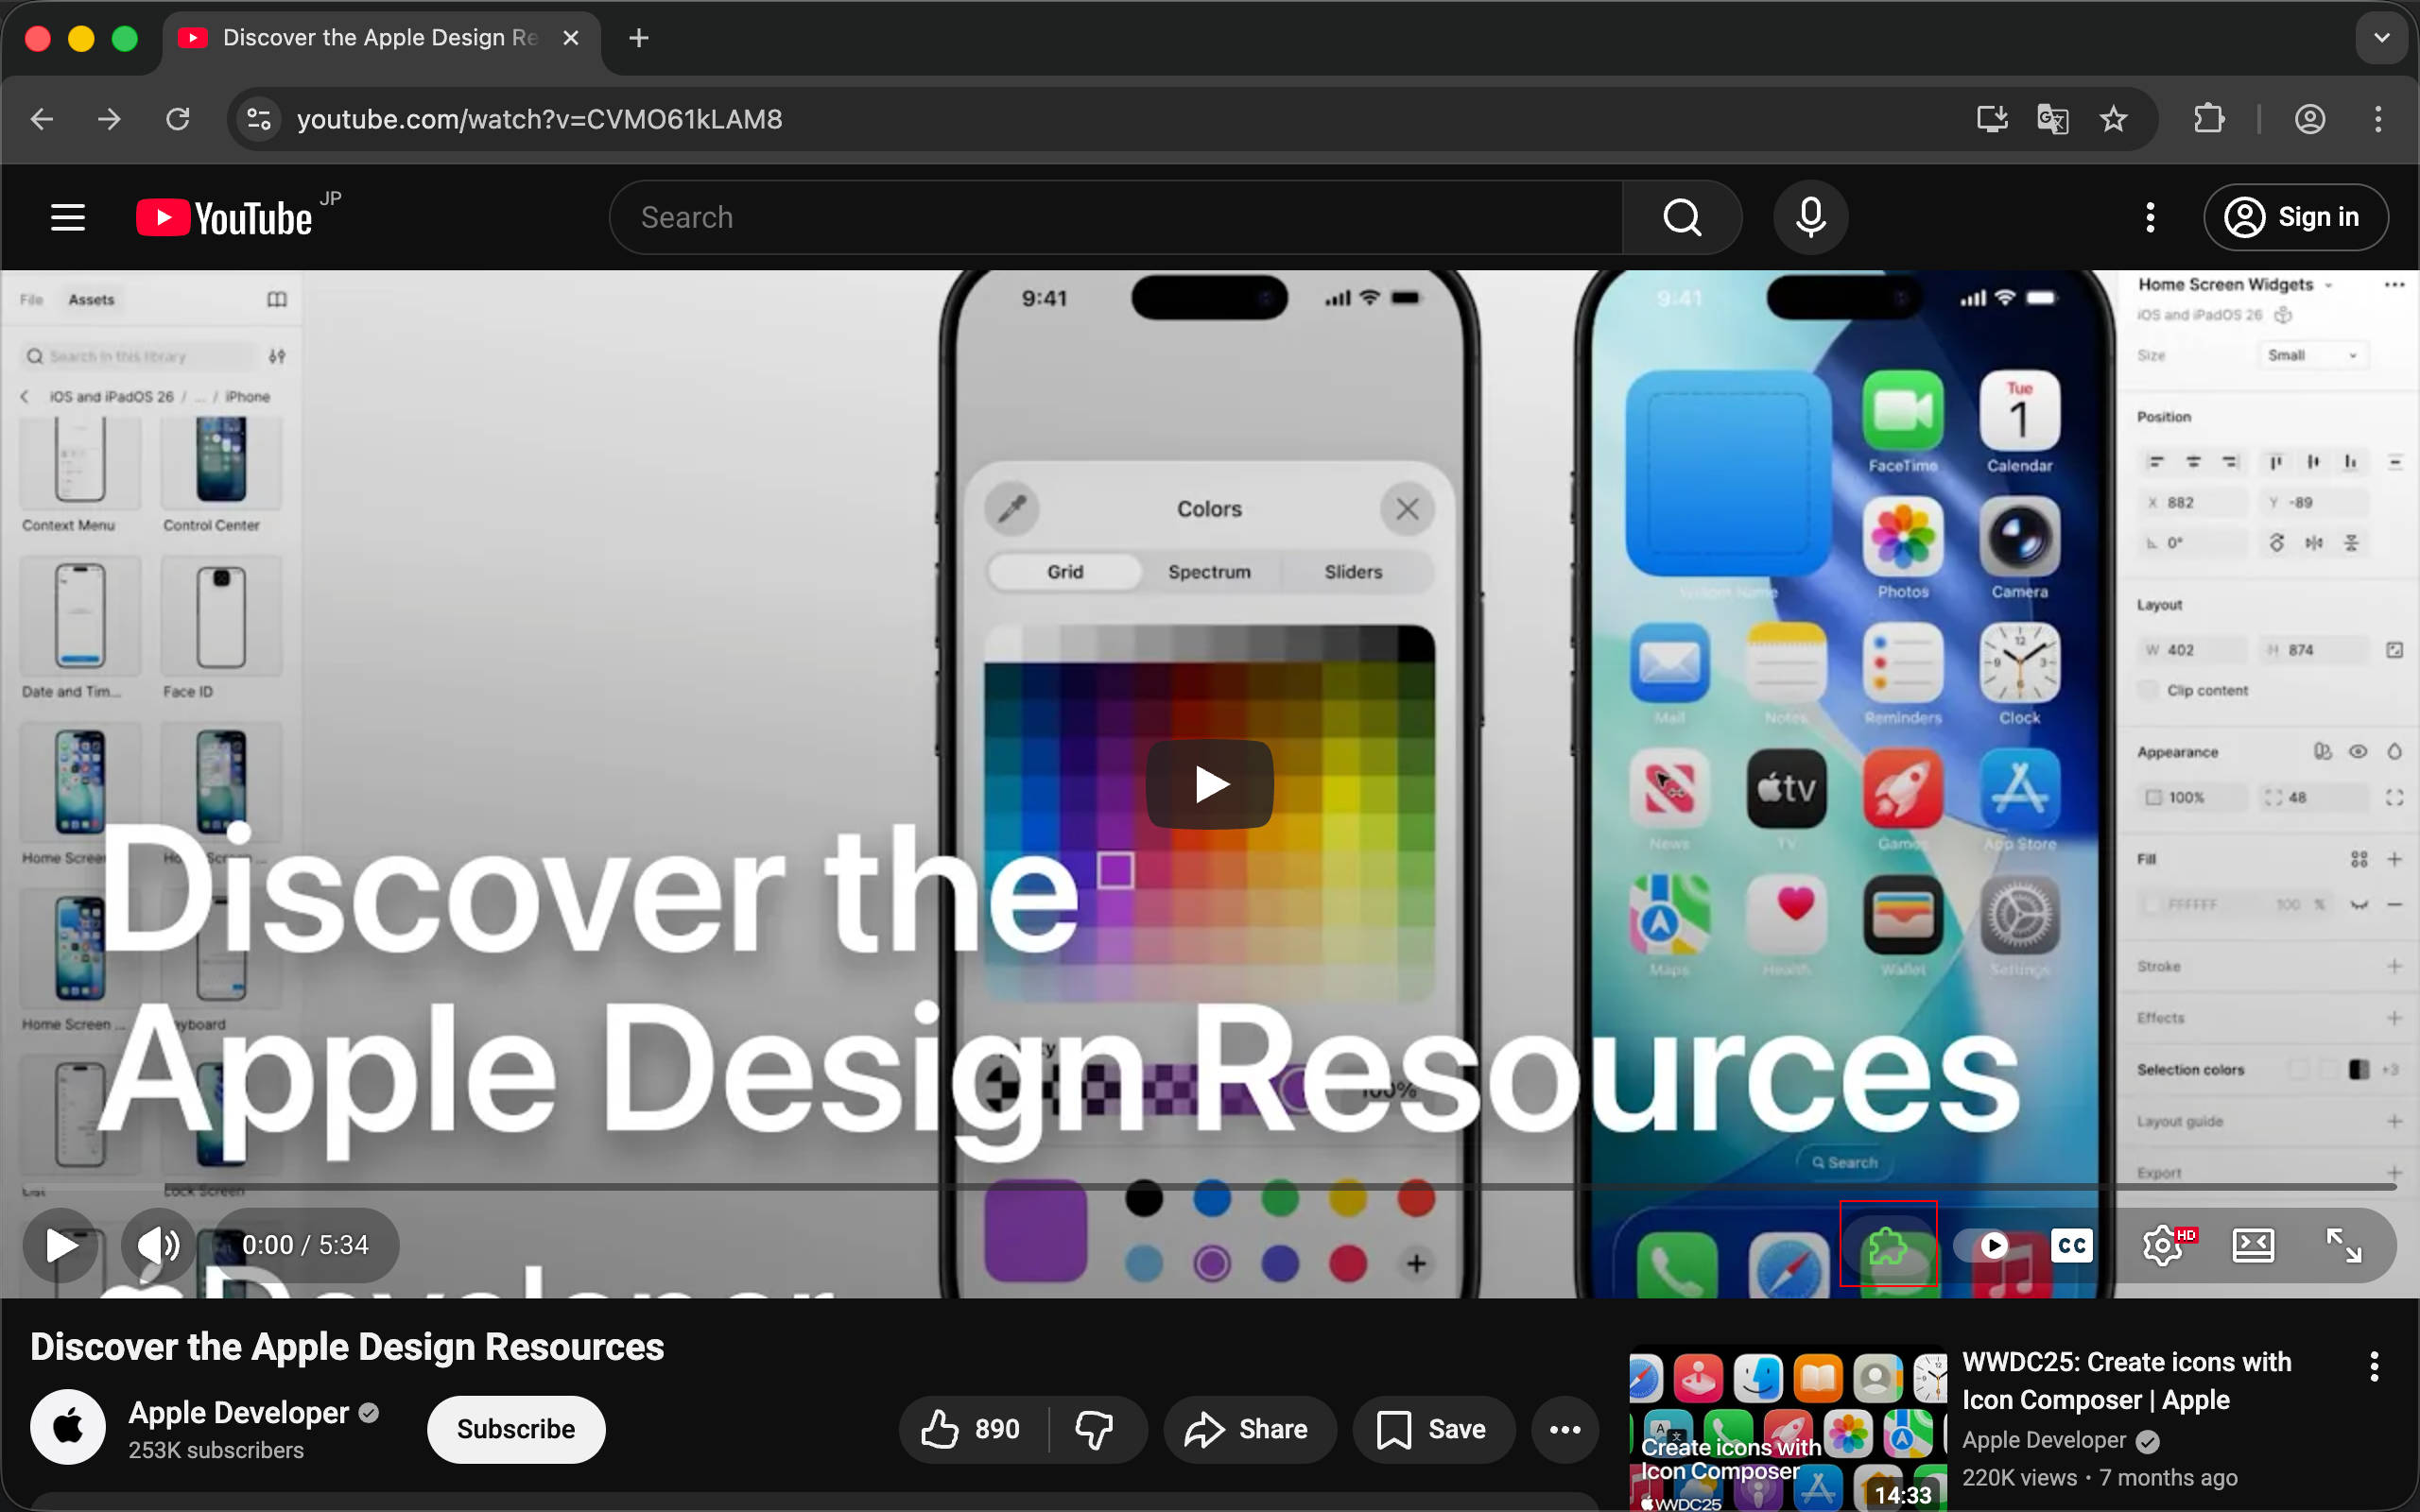
As you can see, we’ve successfully injected an icon button into the toolbar.
Implementing the Screenshot Feature
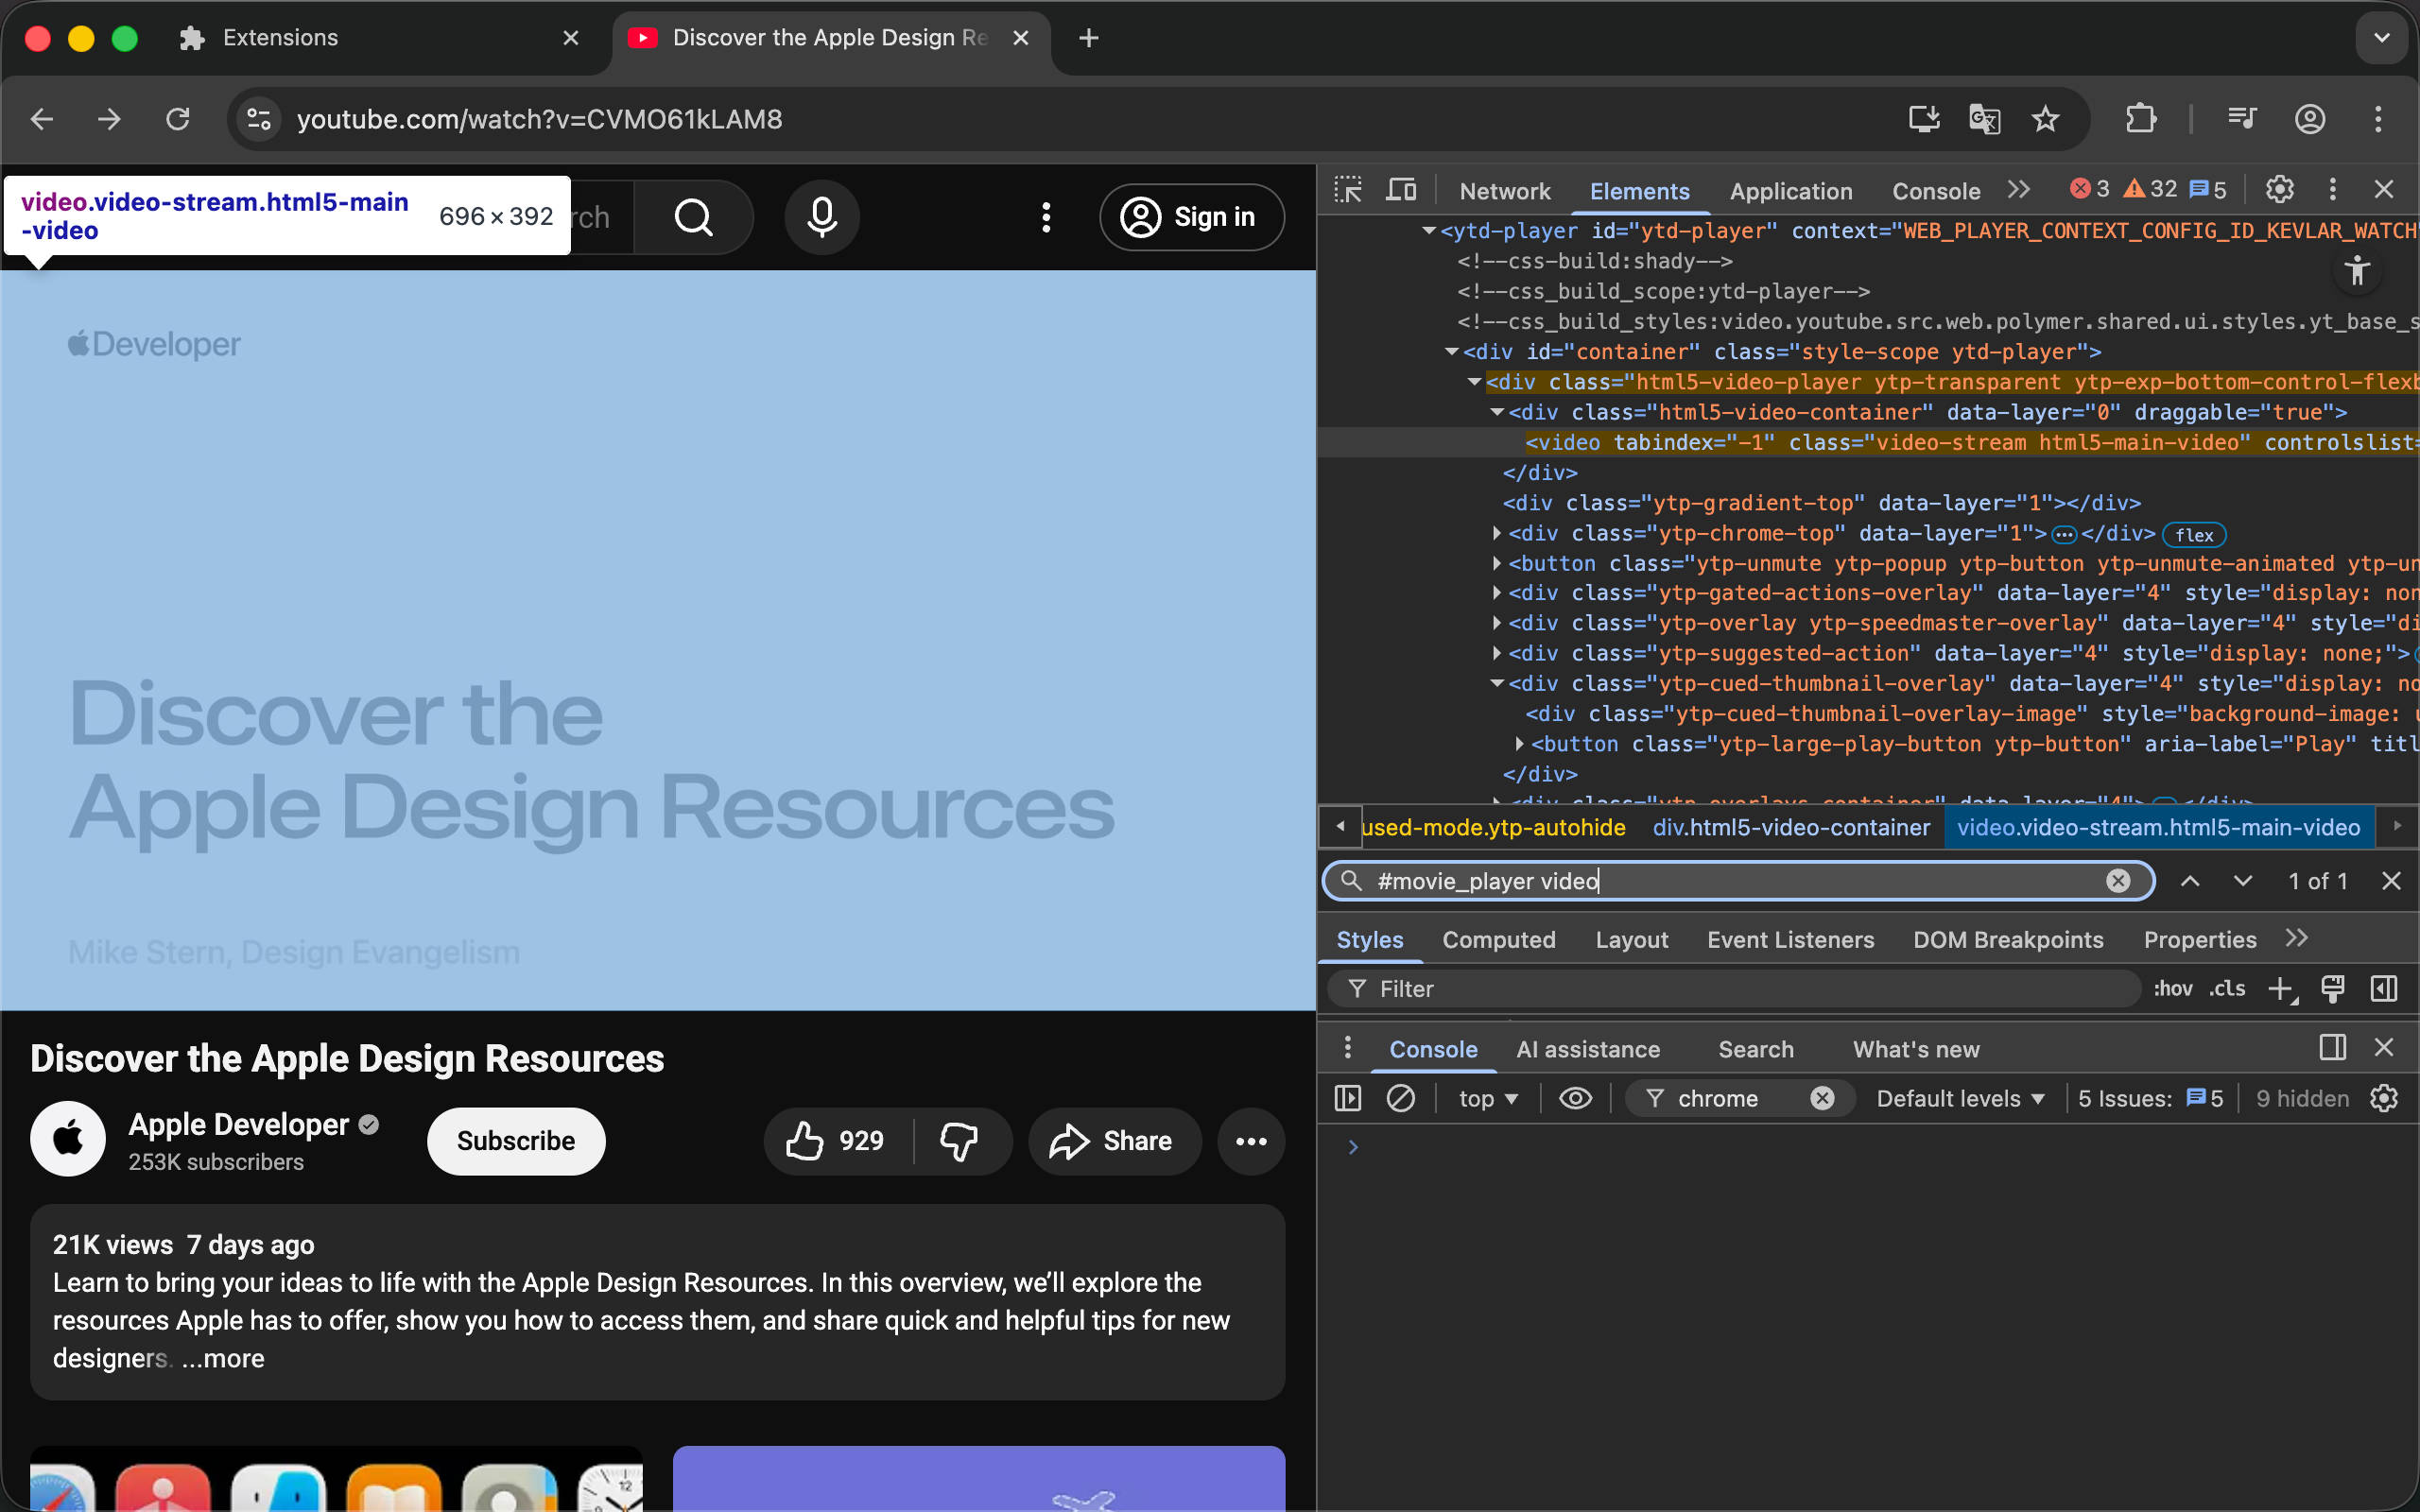
Now, let’s implement the core screenshot feature. First, we need to find the video element, which is located at #movie_player video.
Then we need to use canvas to capture a frame from the video. The most magical-looking code is ctx.drawImage(video, 0, 0), which passes a video to the canvas. But this is actually supported. Reference the drawImage documentation: https://developer.mozilla.org/en-US/docs/Web/API/CanvasRenderingContext2D/drawImage#image. You can see that it not only allows HTMLImageElement (images), but also HTMLVideoElement (videos) and even HTMLCanvasElement (other canvases).
const video = document.querySelector('#movie_player video')
const canvas = document.createElement('canvas')
canvas.width = video.videoWidth
canvas.height = video.videoHeight
const ctx = canvas.getContext('2d')
ctx.drawImage(video, 0, 0)
const blob = await new Promise((r) => canvas.toBlob(r, 'image/png', 1))
blob
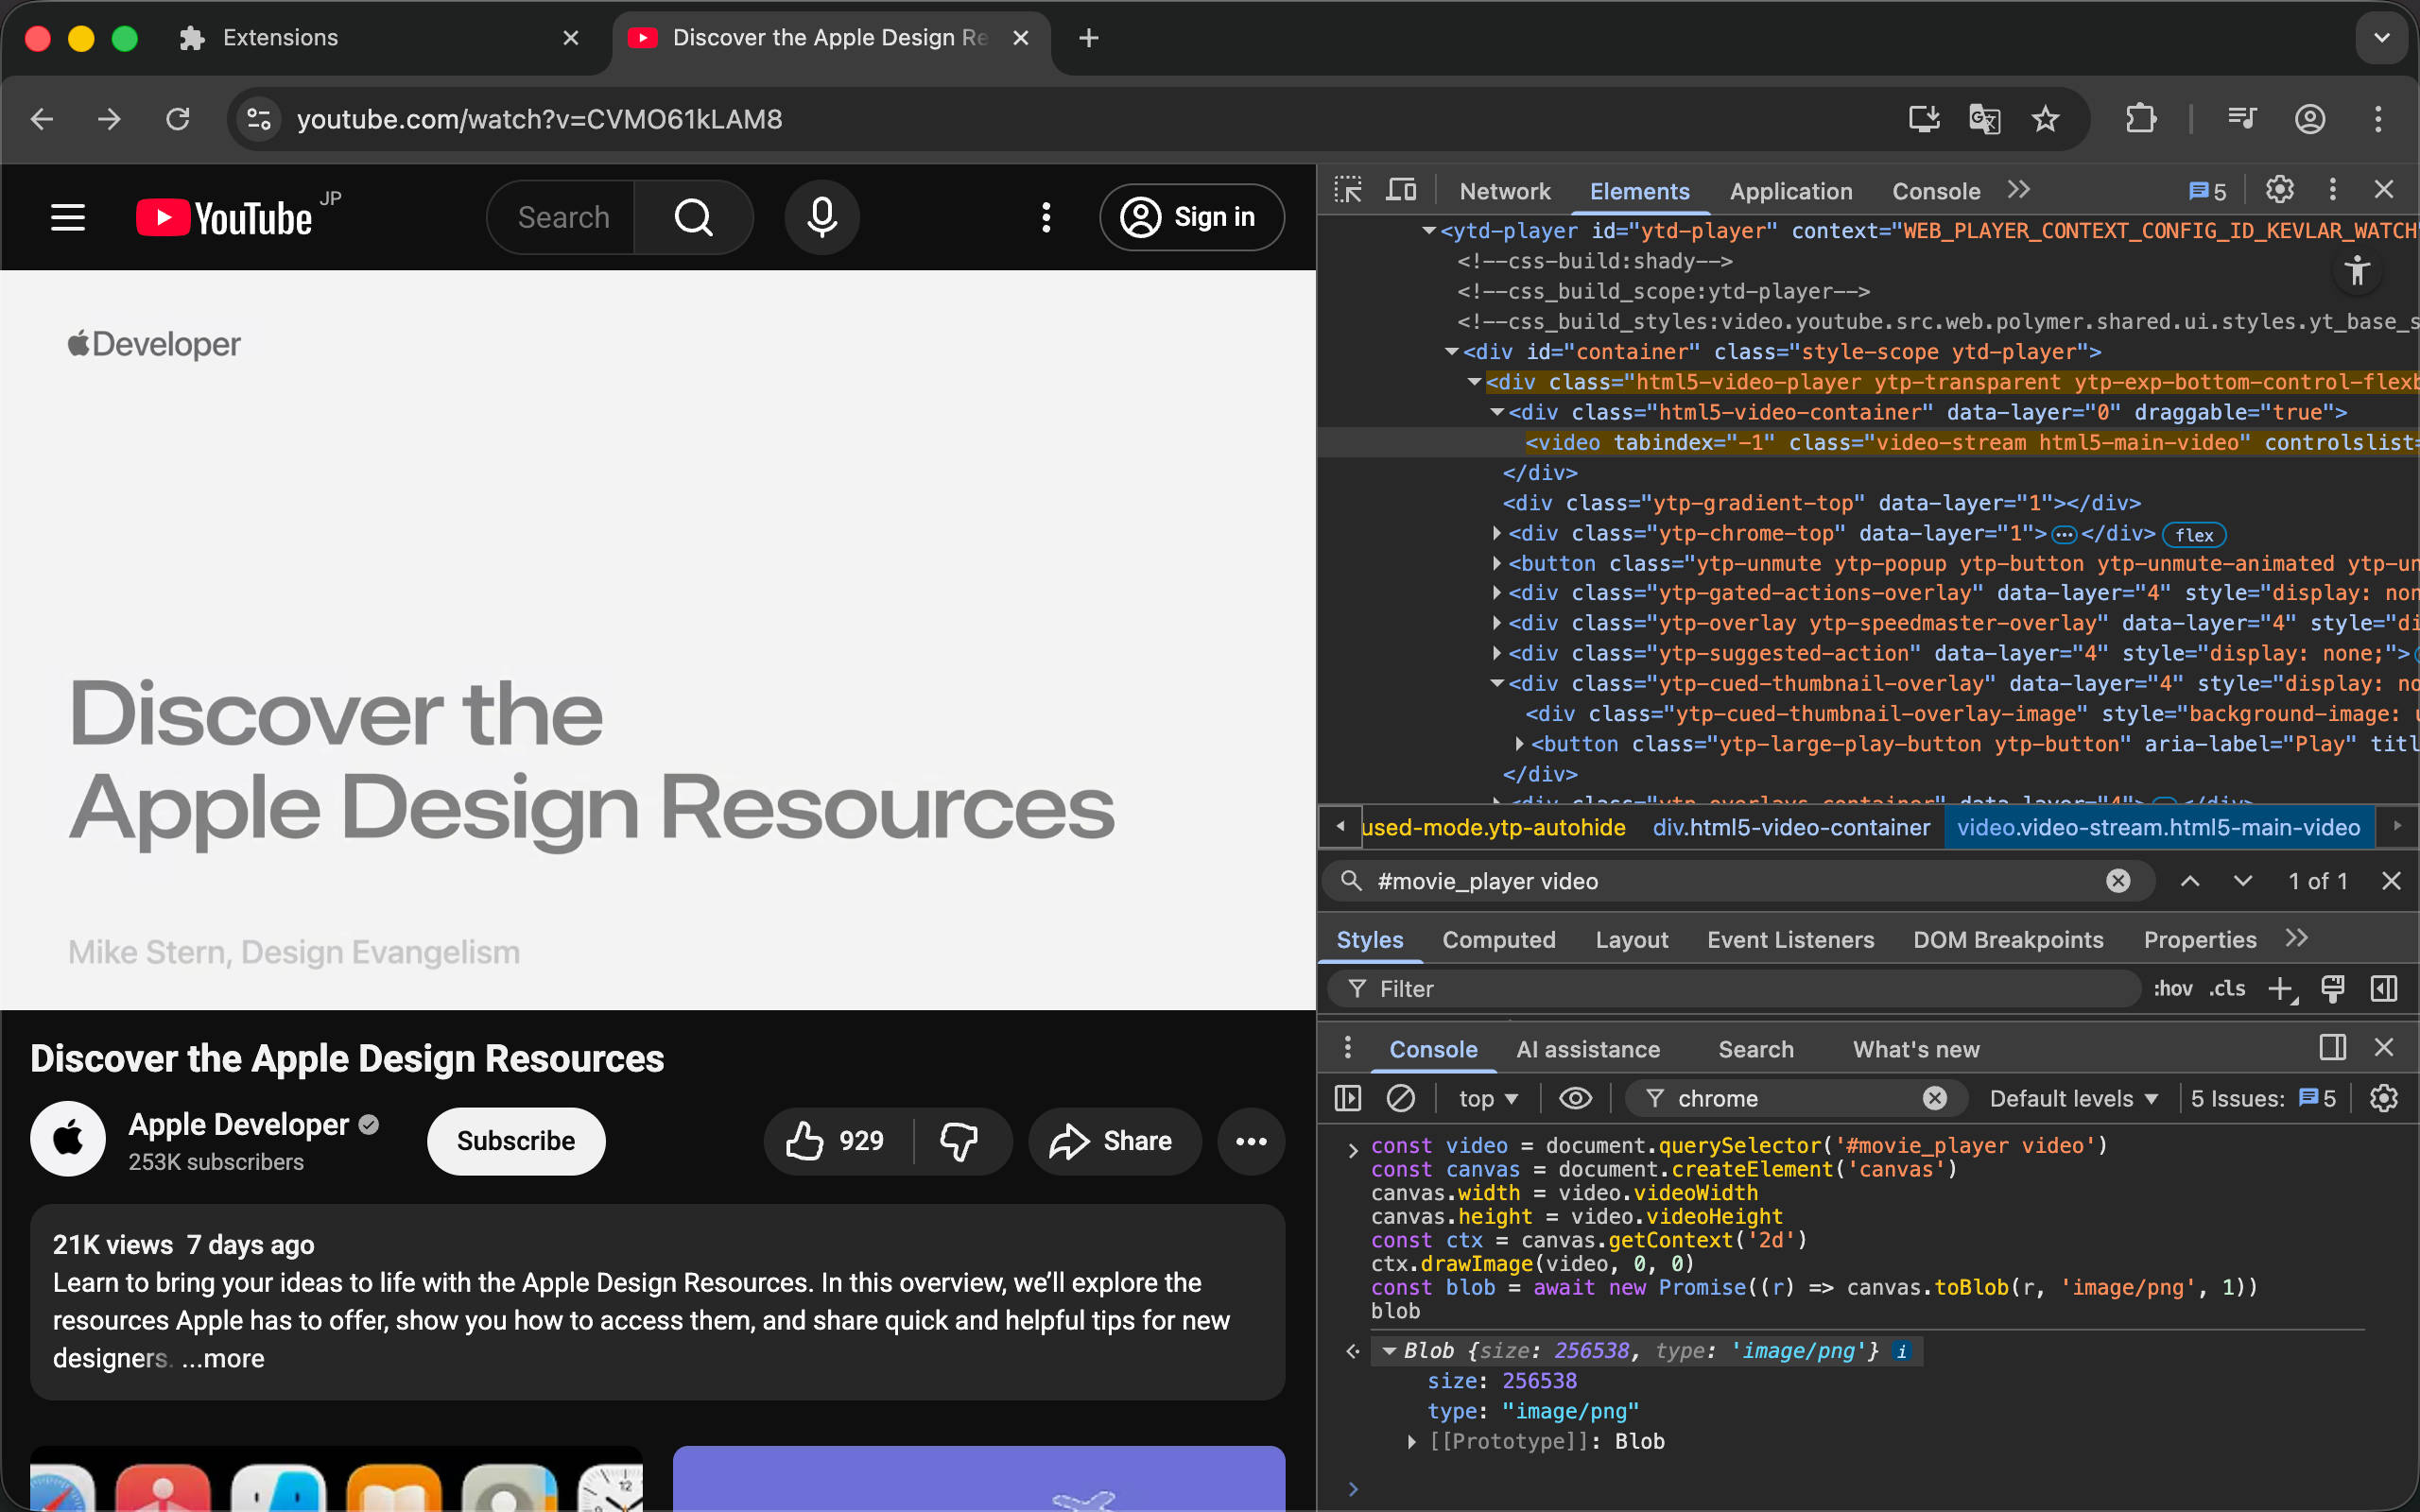
Running this code in DevTools > Console, you can see that we indeed get an image Blob.
Copy to Clipboard and Download
Now that we have a Blob, copying it to the clipboard is simple:
const data = [new ClipboardItem({ [blob.type]: blob })]
await navigator.clipboard.write(data)
If you paste this directly into DevTools > Console and execute it, you’ll get an error. This is because clipboard access can only be used when triggered by a user action. Reference: https://developer.mozilla.org/en-US/docs/Web/API/Clipboard_API#security_considerations. No worries though - we’ll connect all this code to the icon’s click event later.
Uncaught NotAllowedError: Failed to execute 'write' on 'Clipboard': Document is not focused.
    at <anonymous>:2:27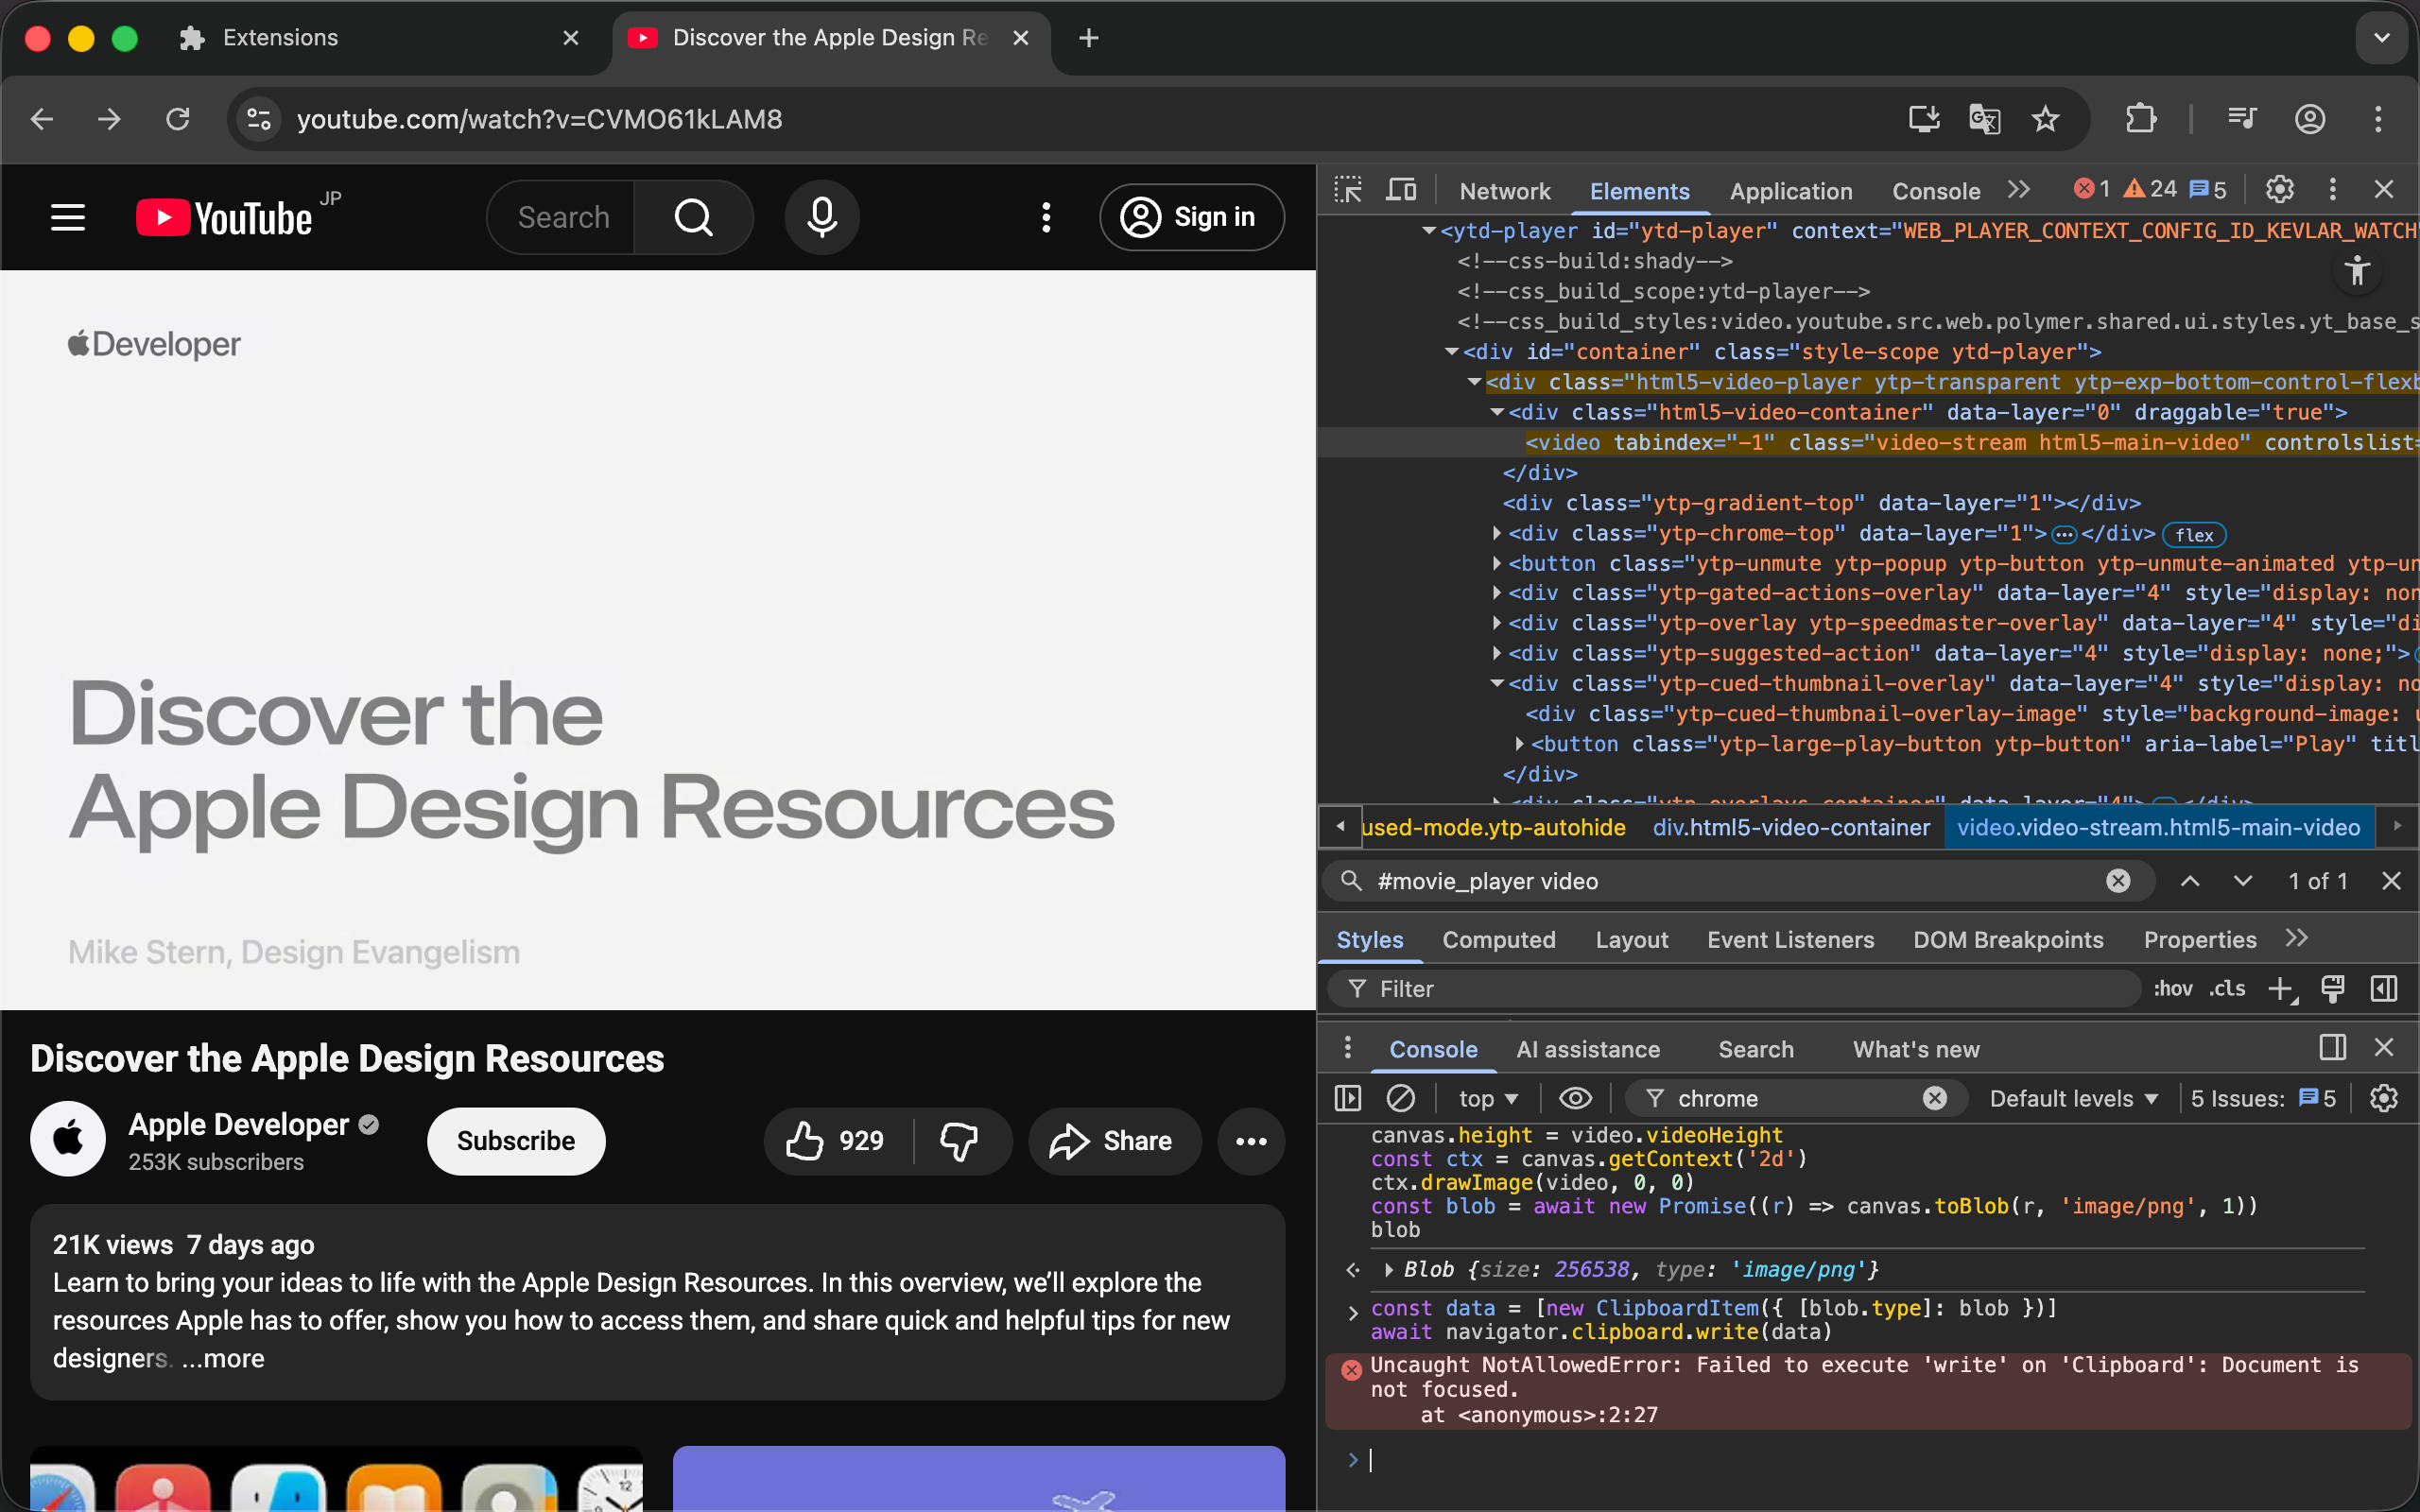
Next, let’s implement image saving. We’ll use file-saver to save the file. To generate a filename with the date, we’ll also need dayjs.
First, install the dependencies:
pnpm i file-saver dayjs
pnpm i -D @types/file-saver
Then just use the saveAs method to download the Blob.
import { saveAs } from 'file-saver'
import dayjs from 'dayjs'

const filename = `Youtube-Screenshot_${dayjs().format('YYYY-MM-DD_HH-mm-ss')}.png` // Results in something like Youtube-Screenshot_2026-01-14_09-49-06.png
saveAs(blob, filename)
Putting It All Together
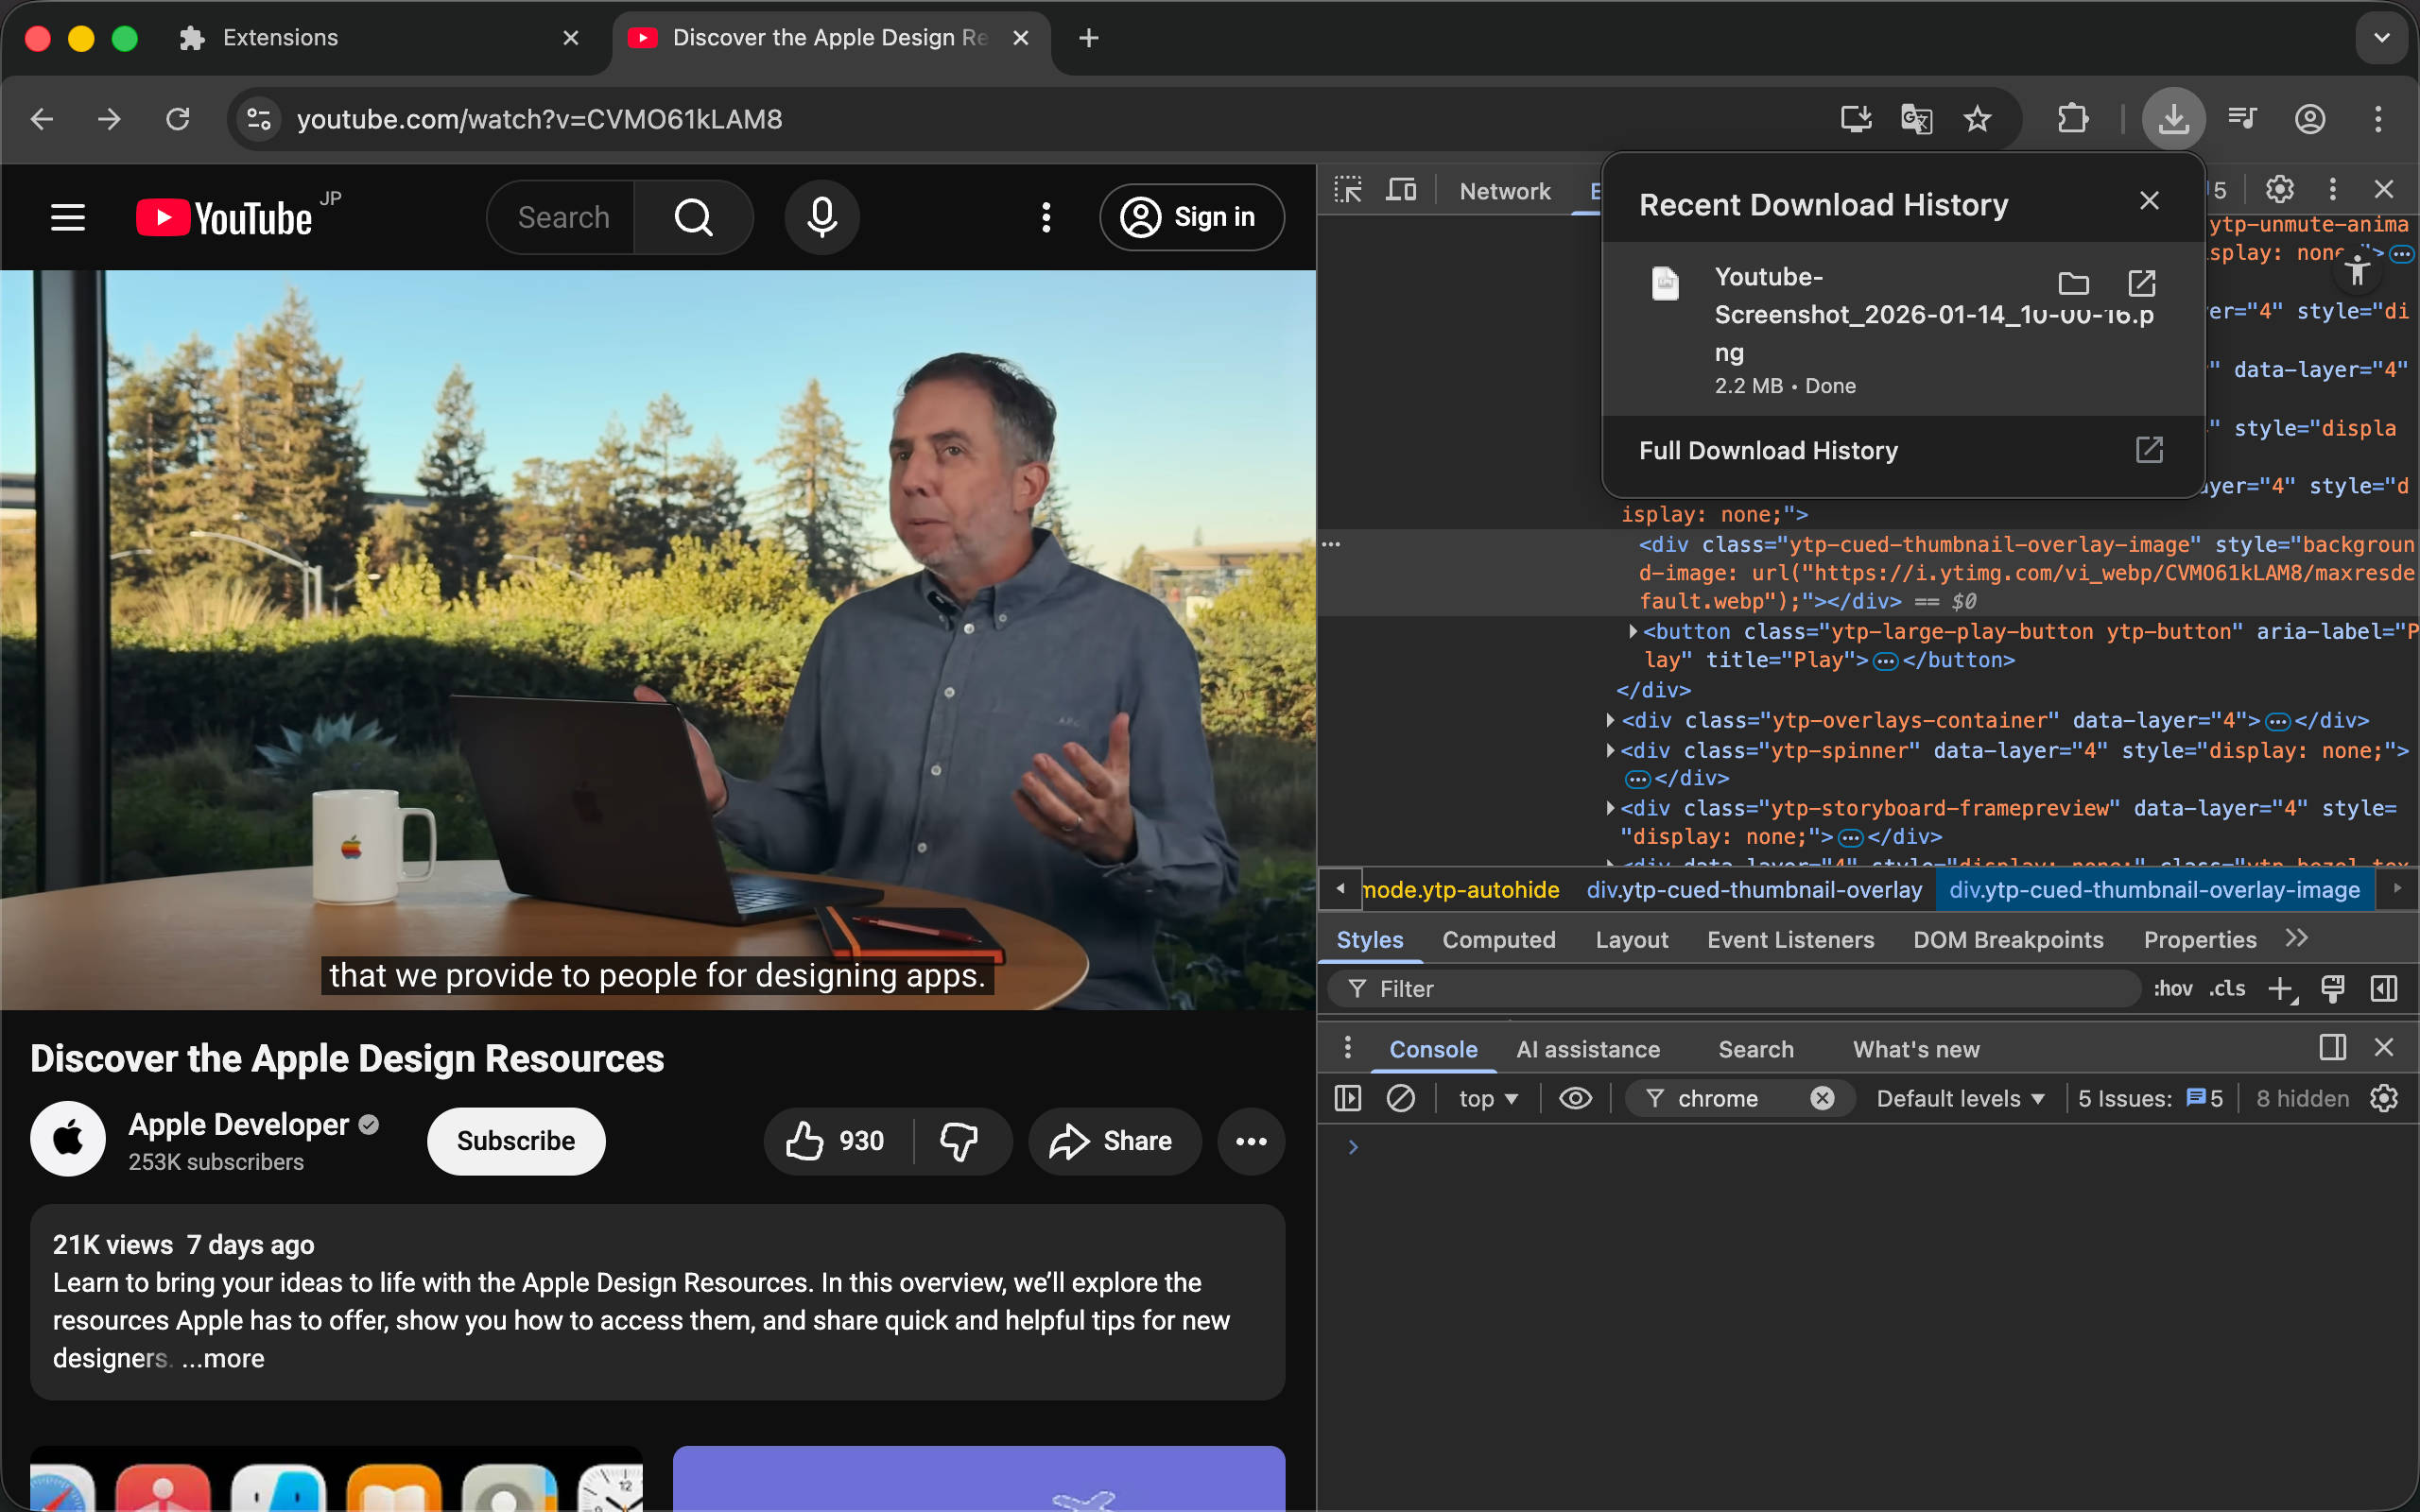
Now, modify the App component to execute the code above in the onTakeScreenshot function. When we click, we can see the image is indeed copied to the clipboard and a download is triggered.
Complete App component code
import './styles.css'
import { Button } from '@/components/ui/button'
import saveAs from 'file-saver'
import dayjs from 'dayjs'

function App() {
  // Errors may occur here, such as video element not found, clipboard permission denied, download failed, etc., but we'll ignore them for now
  async function onTakeScreenshot() {
    const video = document.querySelector('#movie_player video') as HTMLVideoElement
    const canvas = document.createElement('canvas')
    canvas.width = video.videoWidth
    canvas.height = video.videoHeight
    const ctx = canvas.getContext('2d')!
    ctx.drawImage(video, 0, 0)
    const blob = (await new Promise<Blob | null>((r) => canvas.toBlob(r, 'image/png', 1)))!

    const data = [new ClipboardItem({ [blob.type]: blob })]
    await navigator.clipboard.write(data)

    const filename = `Youtube-Screenshot_${dayjs().format('YYYY-MM-DD_HH-mm-ss')}.png` // Results in something like Youtube-Screenshot_2026-01-14_09-49-06.png
    saveAs(blob, filename)
  }
  return (
    <Button className={'h-[80%] px-6 bg-transparent hover:bg-white/10 rounded-full'} onClick={onTakeScreenshot}>
      <img src={browser.runtime.getURL('/icon/32.png')} alt={'icon'} className={'w-[20px] h-[20px]'} />
    </Button>
  )
}
Summary
We’ve now completed the YouTube video screenshot extension. There are still many edge cases not handled, such as:
- Exceptions that may occur when copying screenshots to clipboard
- Unable to get video frames when the video hasn’t started playing
- How to handle ads correctly
But the key functionality is implemented. And we used React, Tailwind CSS, shadcn, and some npm packages. What do you think? In the next chapter, we’ll introduce Background Scripts, which allow access to all extension APIs but cannot access the DOM API. We’ll demonstrate things that only Background Scripts can do.
Complete code: https://github.com/rxliuli/browser-extension-dev-examples/tree/main/packages/03-inject-ui