
Browser Extension Dev - 01. Introduction to Basic Concepts
Have you ever been frustrated with a website’s features? For example, that prominent AI Mode button on the Google search page:
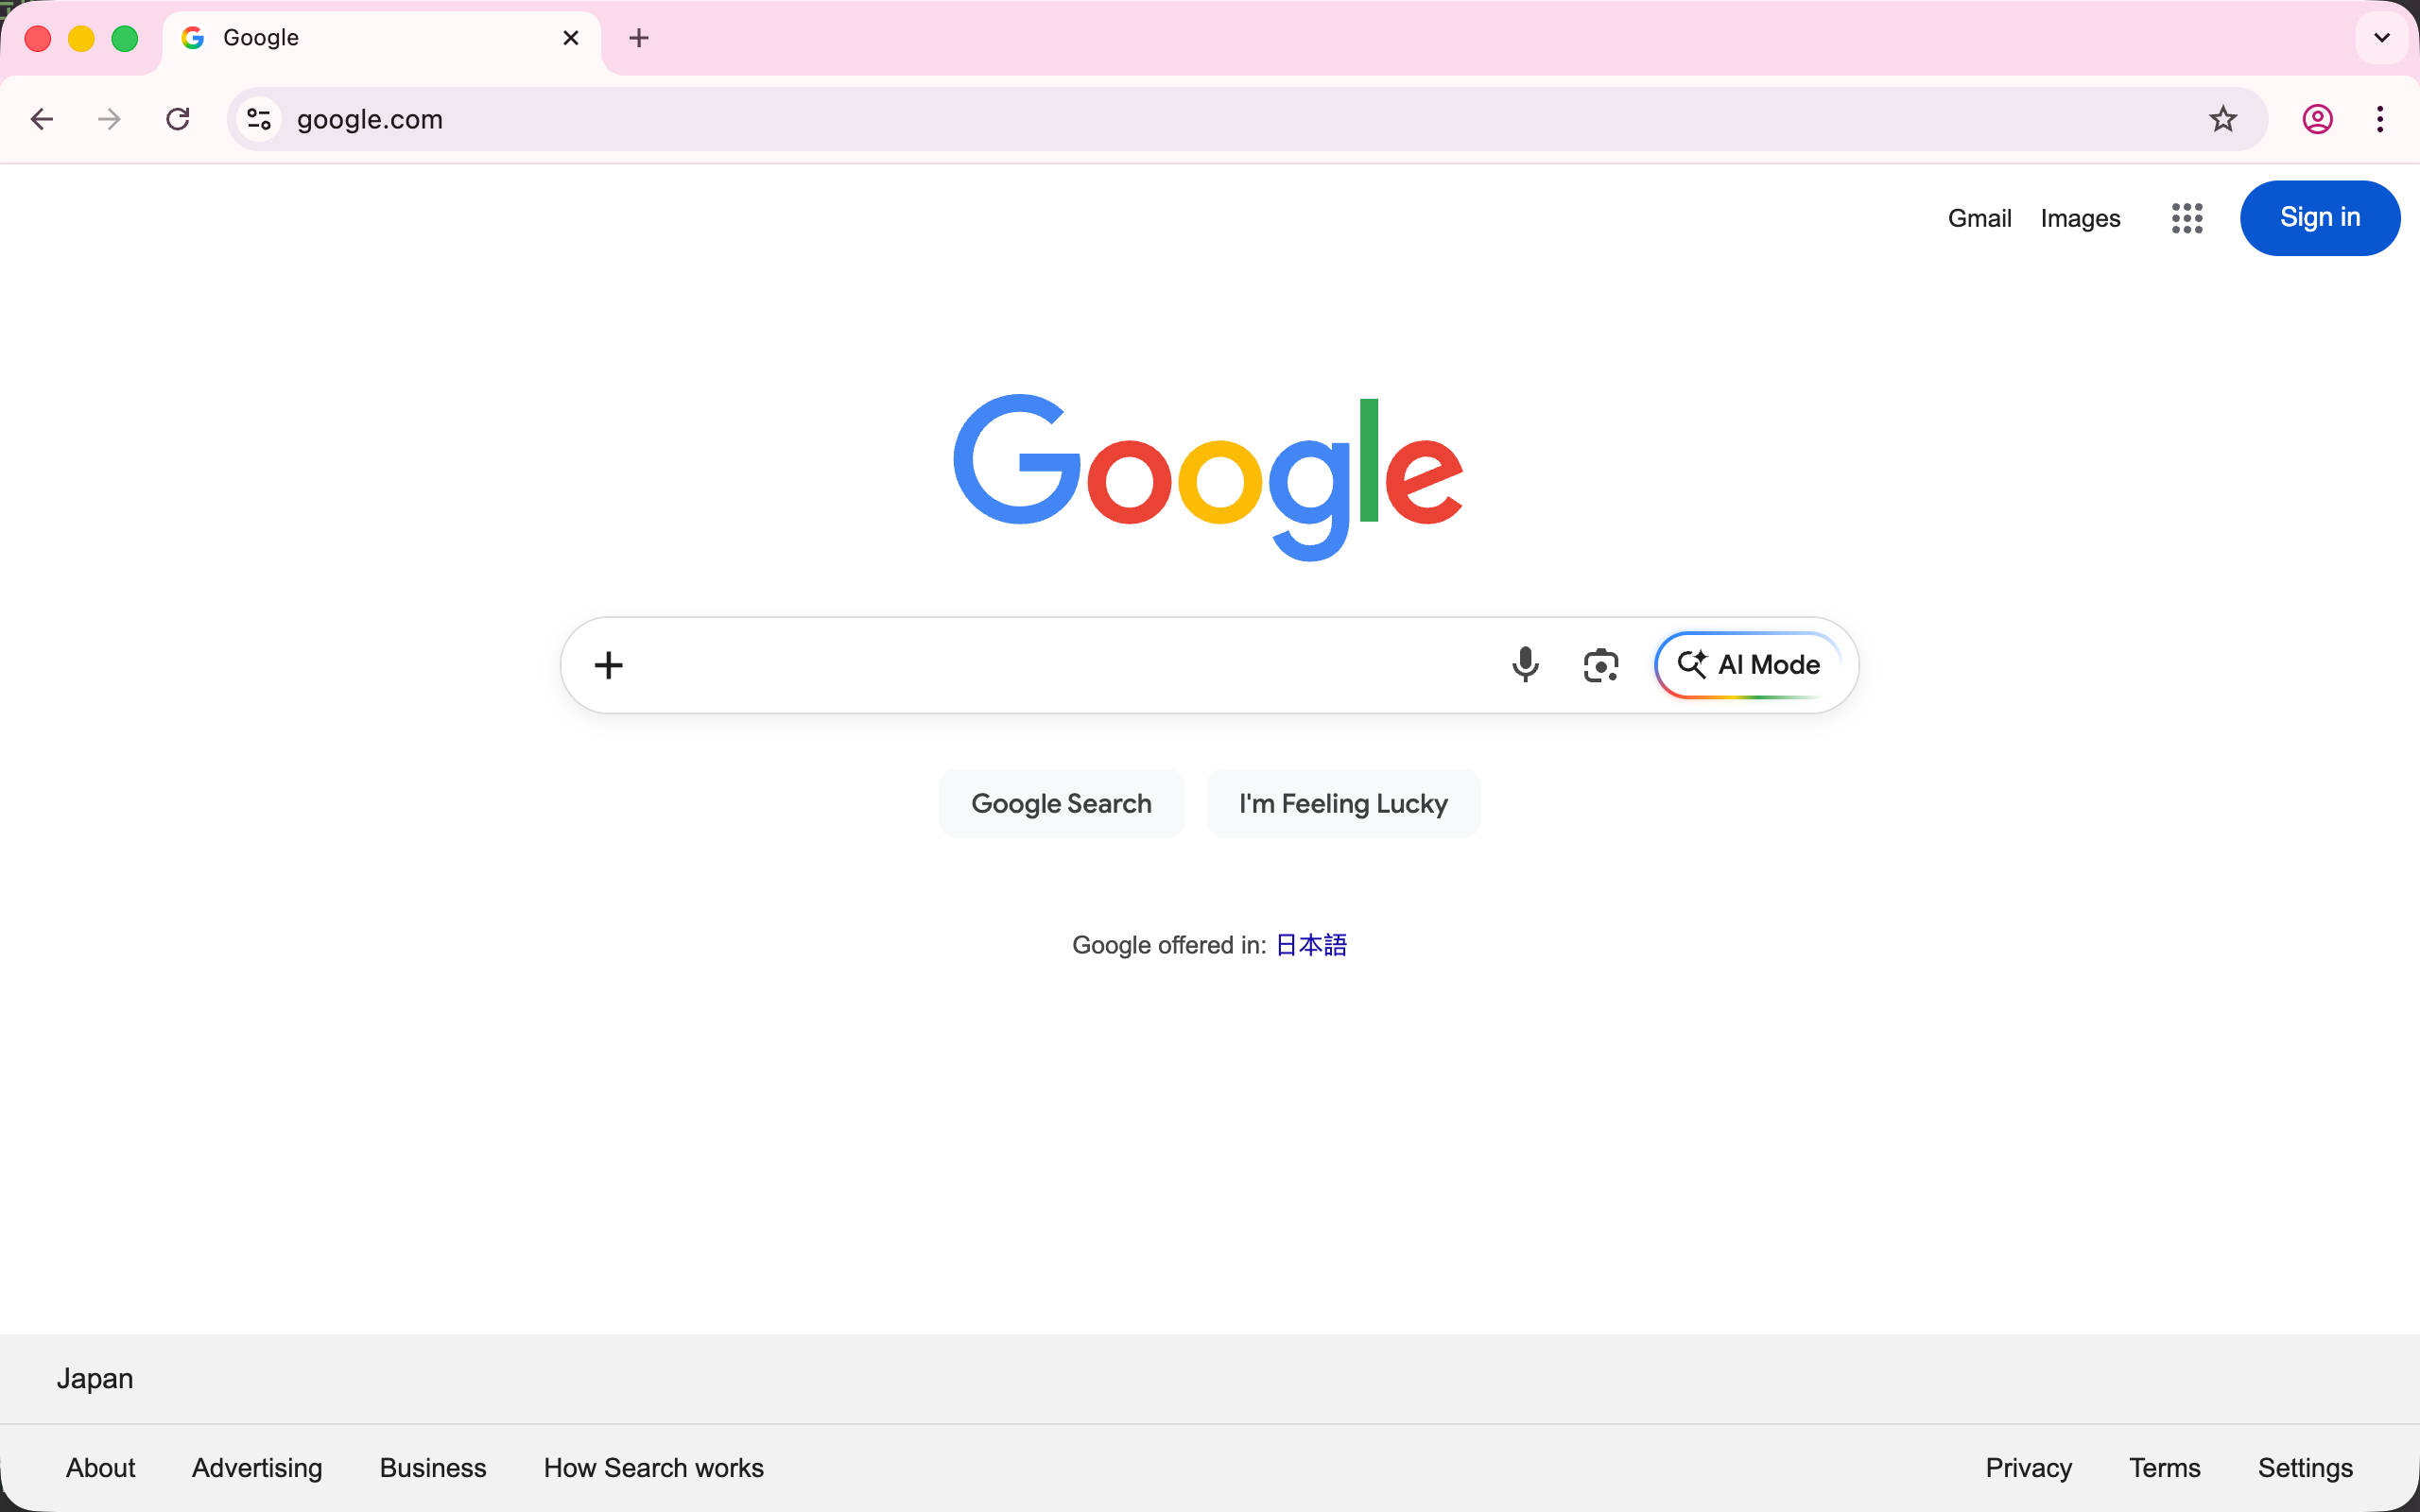
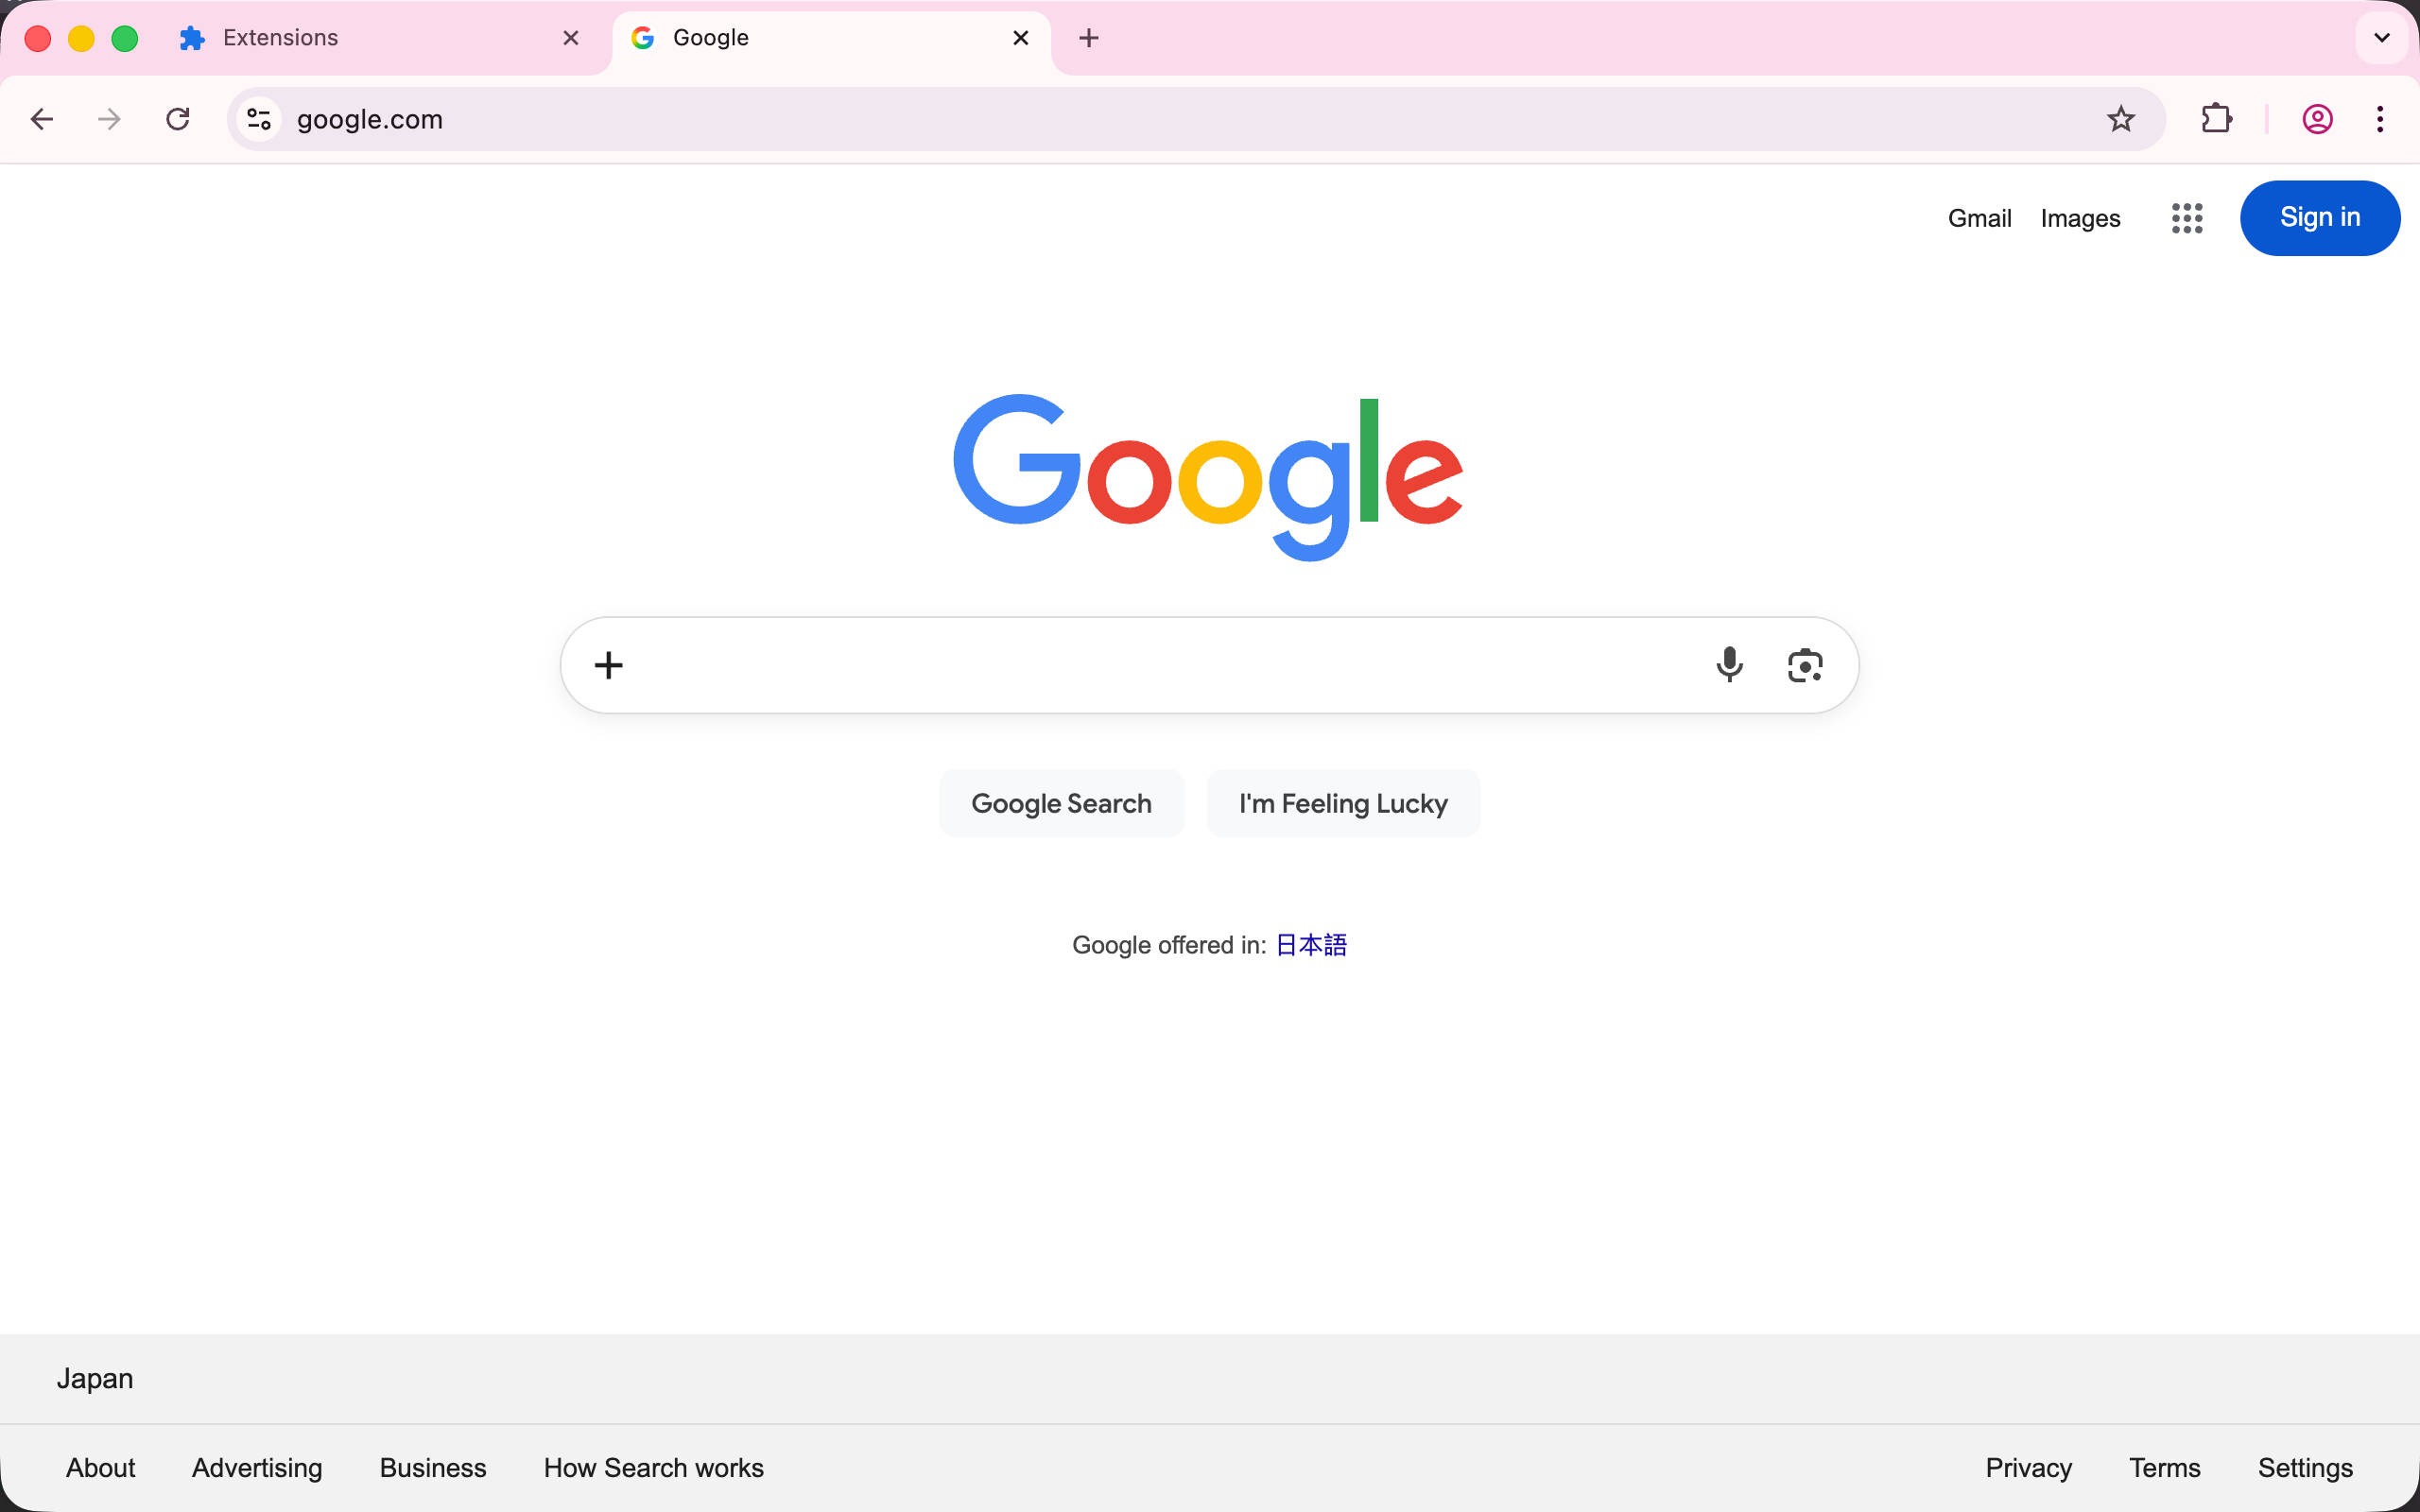
Through browser extensions, you can make it disappear completely:
What is a Browser Extension?
Generally speaking, a browser extension is a way to modify how users browse web pages. It grants more power to website users rather than developers, allowing capable users to customize their web browsing experience. Modern browsers provide extremely rich extension APIs that can even accomplish things that seem to require native apps, but the fundamental purpose is to let users control the web pages they’re browsing.
Some examples:
- Hide Google AI-related features
- Customize webpage redirects based on rules
- Remove copy-paste restrictions on web pages
- Run scheduled tasks in the browser background
Basic Structure
manifest.json # Extension entry file
icon/*.png # Extension icons
content-scripts/content.js # Script injected into web pages, optional
background.js # Background script, optional
options.html # Configuration page, optional
popup.html # Popup window when clicking the extension icon, optional
Creating the Manifest
Now, let’s create a basic extension without using any package managers, TypeScript, or web frameworks - just basic JavaScript. In the next chapter, we’ll rewrite it using a modern development toolchain (WXT). This is just to help us understand the actual structure of an extension. As an example, we’ll create an extension to hide the AI Mode button on google.com.
First, create a manifest.json with some basic information. The manifest_version is a fixed value representing the third major version of the extension API.
{
  "manifest_version": 3,
  "name": "Hide AI Mode on Google Search",
  "version": "0.0.1",
  "description": "Hide the AI Mode button on Google Search pages."
}
Implementing the Content Script
Next, we need to create a content-scripts/content.js script (this path isn’t fixed, just a common practice) that automatically hides the AI Mode button when the page loads.
The basic approach is simple:
- Find the CSS selector for the AI Mode button on google.com
- Inject a JS script when google.com loads to automatically hide it
Analyzing to Get the CSS Selector
Open google.com, then open DevTools > Elements. You can see that AI Mode is a button element, but it doesn’t appear to have anything that could serve as a stable CSS selector.

For modern websites, classes are usually compressed by build tools to the point of being unrecognizable. So we need some creative approaches. For example, the SVG contained in the button seems suitable as a selector (icons on websites don’t change frequently). This way, using the :has child selector and attribute selectors, we can create a stable selector.
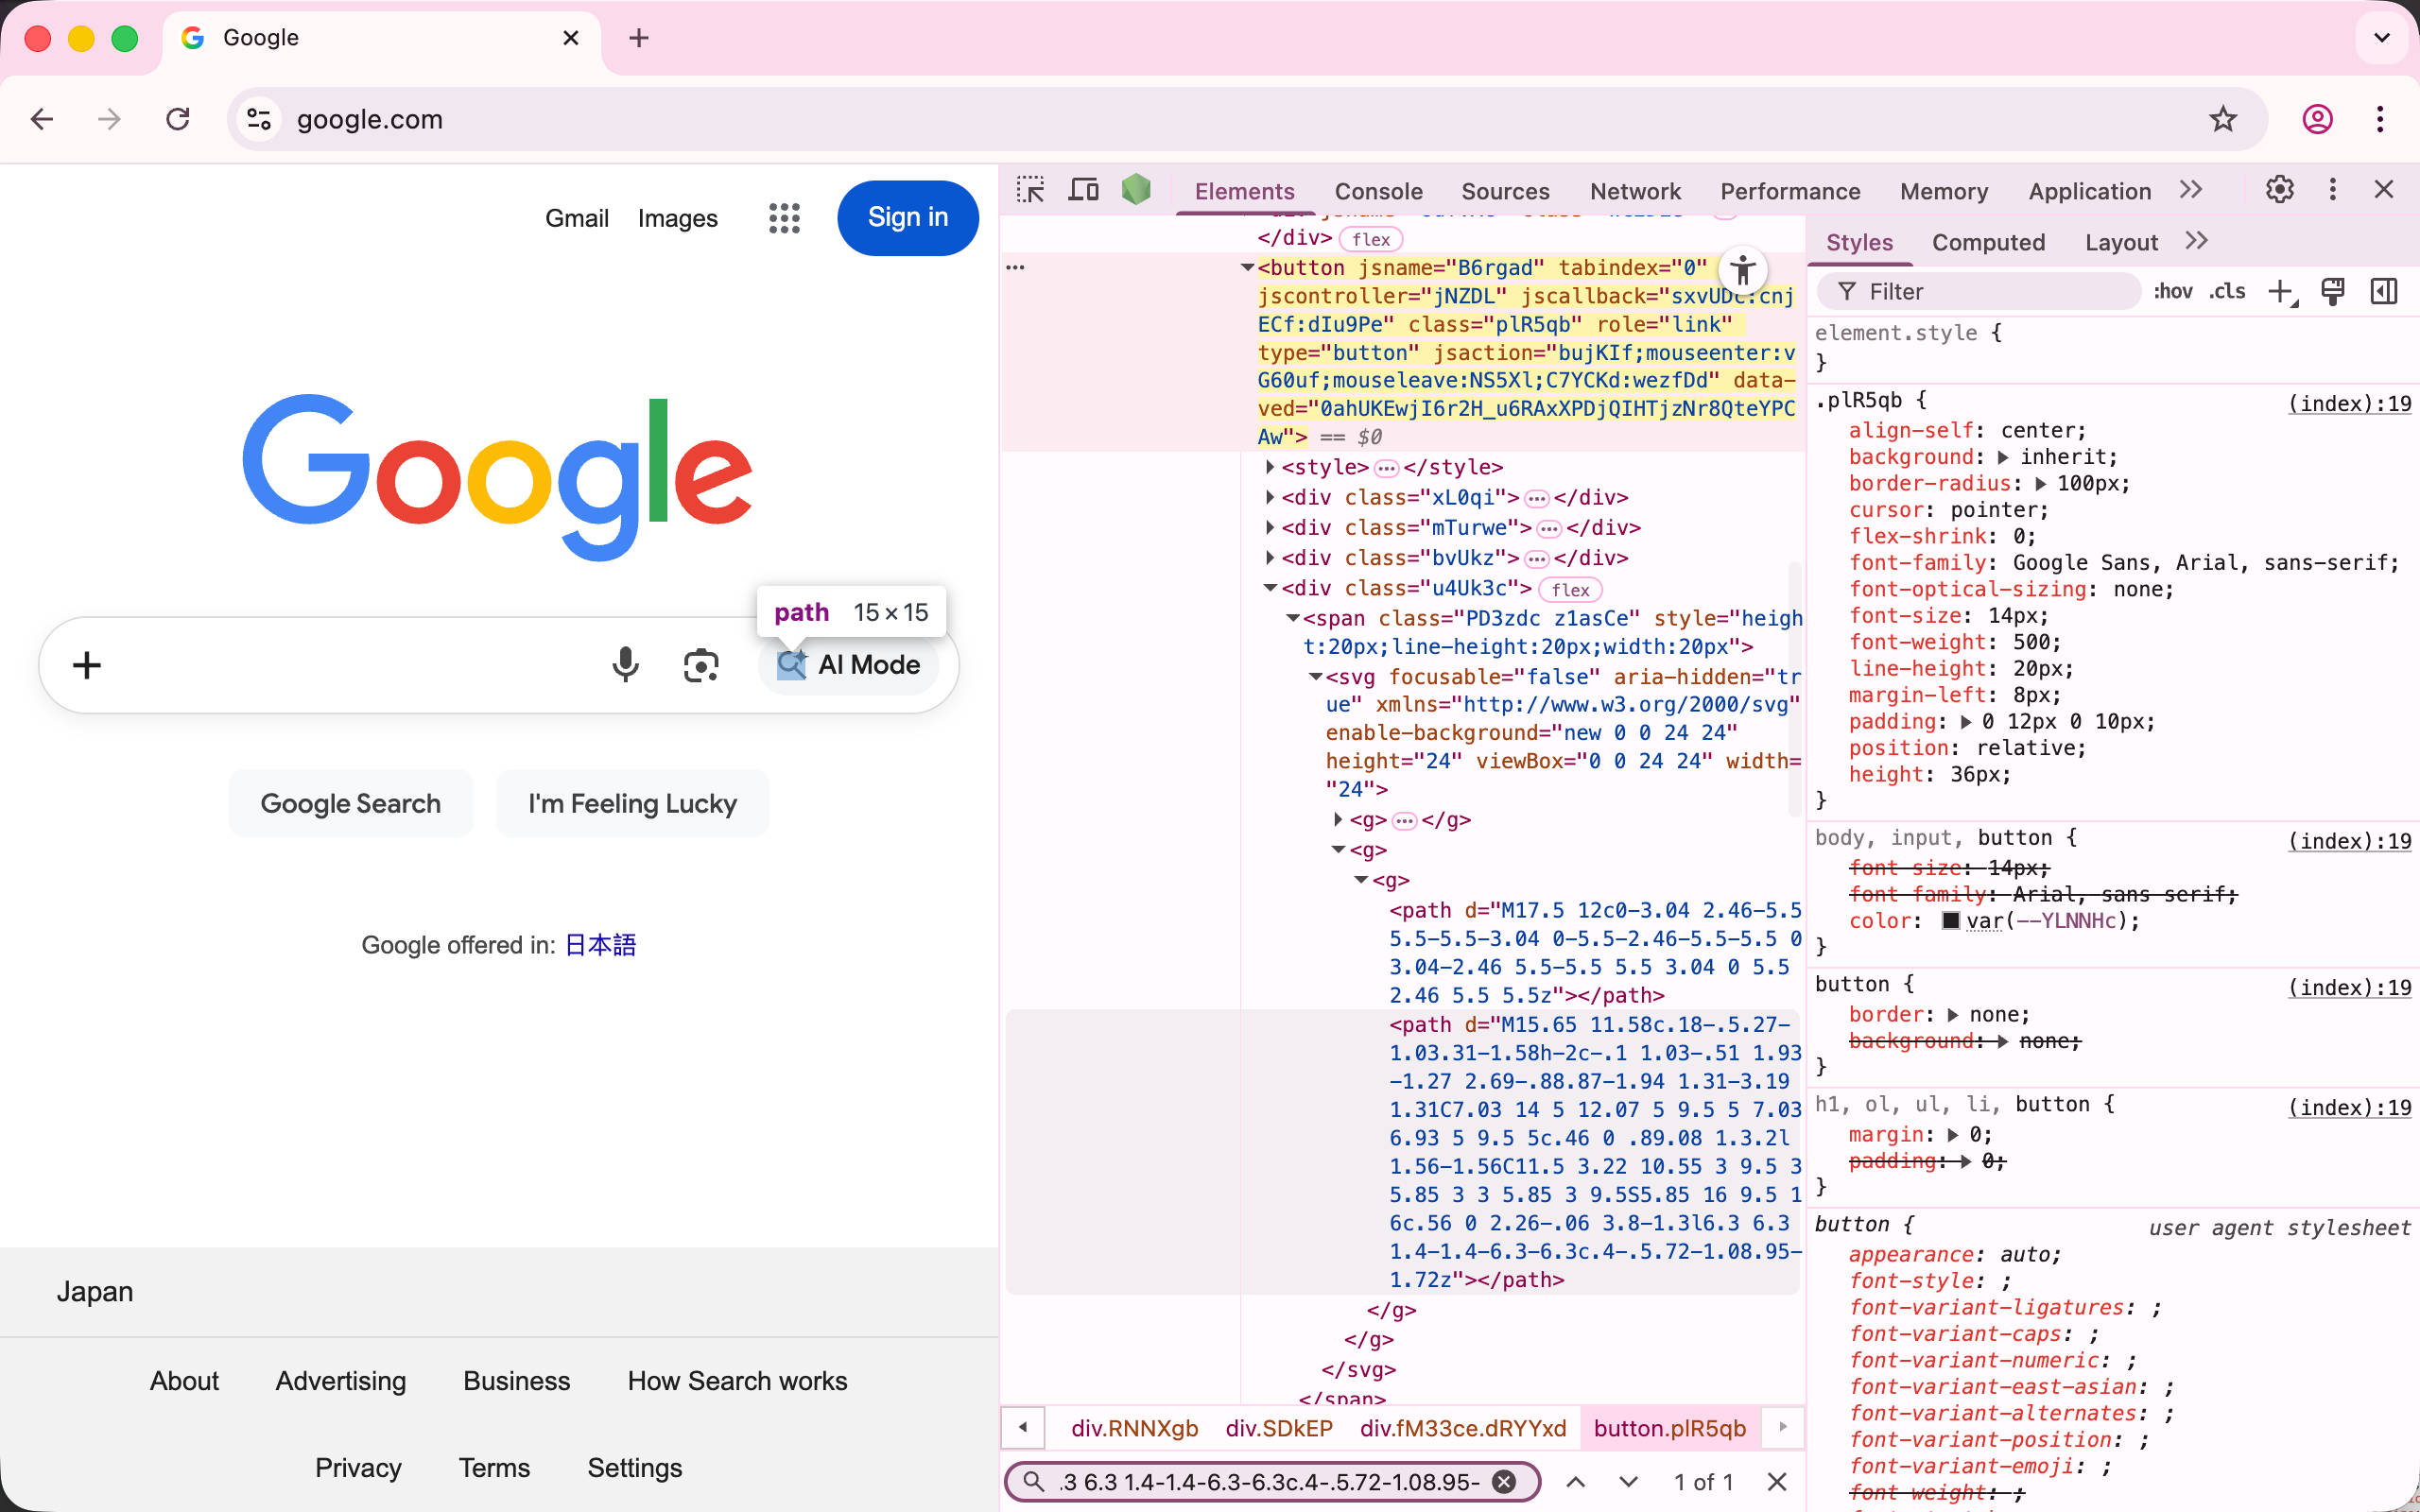
button:has([d="M15.65 11.58c.18-.5.27-1.03.31-1.58h-2c-.1 1.03-.51 1.93-1.27 2.69-.88.87-1.94 1.31-3.19 1.31C7.03 14 5 12.07 5 9.5 5 7.03 6.93 5 9.5 5c.46 0 .89.08 1.3.2l1.56-1.56C11.5 3.22 10.55 3 9.5 3 5.85 3 3 5.85 3 9.5S5.85 16 9.5 16c.56 0 2.26-.06 3.8-1.3l6.3 6.3 1.4-1.4-6.3-6.3c.4-.5.72-1.08.95-1.72z"])
:hasmeans that if an element contains a child element matching the specified selector, it matches. For this selector, it means only button elements containing the specific AI Mode SVG icon will be matched.
Implementing the Content Script
Next, create the content.js script. Since we only want to hide this button, the simplest approach is to inject a CSS style:
const style = document.createElement('style')
style.textContent =
  'button:has([d="M15.65 11.58c.18-.5.27-1.03.31-1.58h-2c-.1 1.03-.51 1.93-1.27 2.69-.88.87-1.94 1.31-3.19 1.31C7.03 14 5 12.07 5 9.5 5 7.03 6.93 5 9.5 5c.46 0 .89.08 1.3.2l1.56-1.56C11.5 3.22 10.55 3 9.5 3 5.85 3 3 5.85 3 9.5S5.85 16 9.5 16c.56 0 2.26-.06 3.8-1.3l6.3 6.3 1.4-1.4-6.3-6.3c.4-.5.72-1.08.95-1.72z"]) { display: none; }'
document.head.appendChild(style)
Declaring in the Manifest
Next, we need to declare this content script in manifest.json, telling the browser which websites to inject it into. Since we only need to inject it on google.com, we need to modify it to:
{
  // before config...
  "content_scripts": [
    {
      "matches": ["https://www.google.com/"], // Only match the homepage since the AI Mode button only appears there
      "js": ["content-scripts/content.js"]
    }
  ]
}
Debugging the Extension
Next, we need to load this extension in Chrome.
First, open chrome://extensions/ and enable Developer Mode
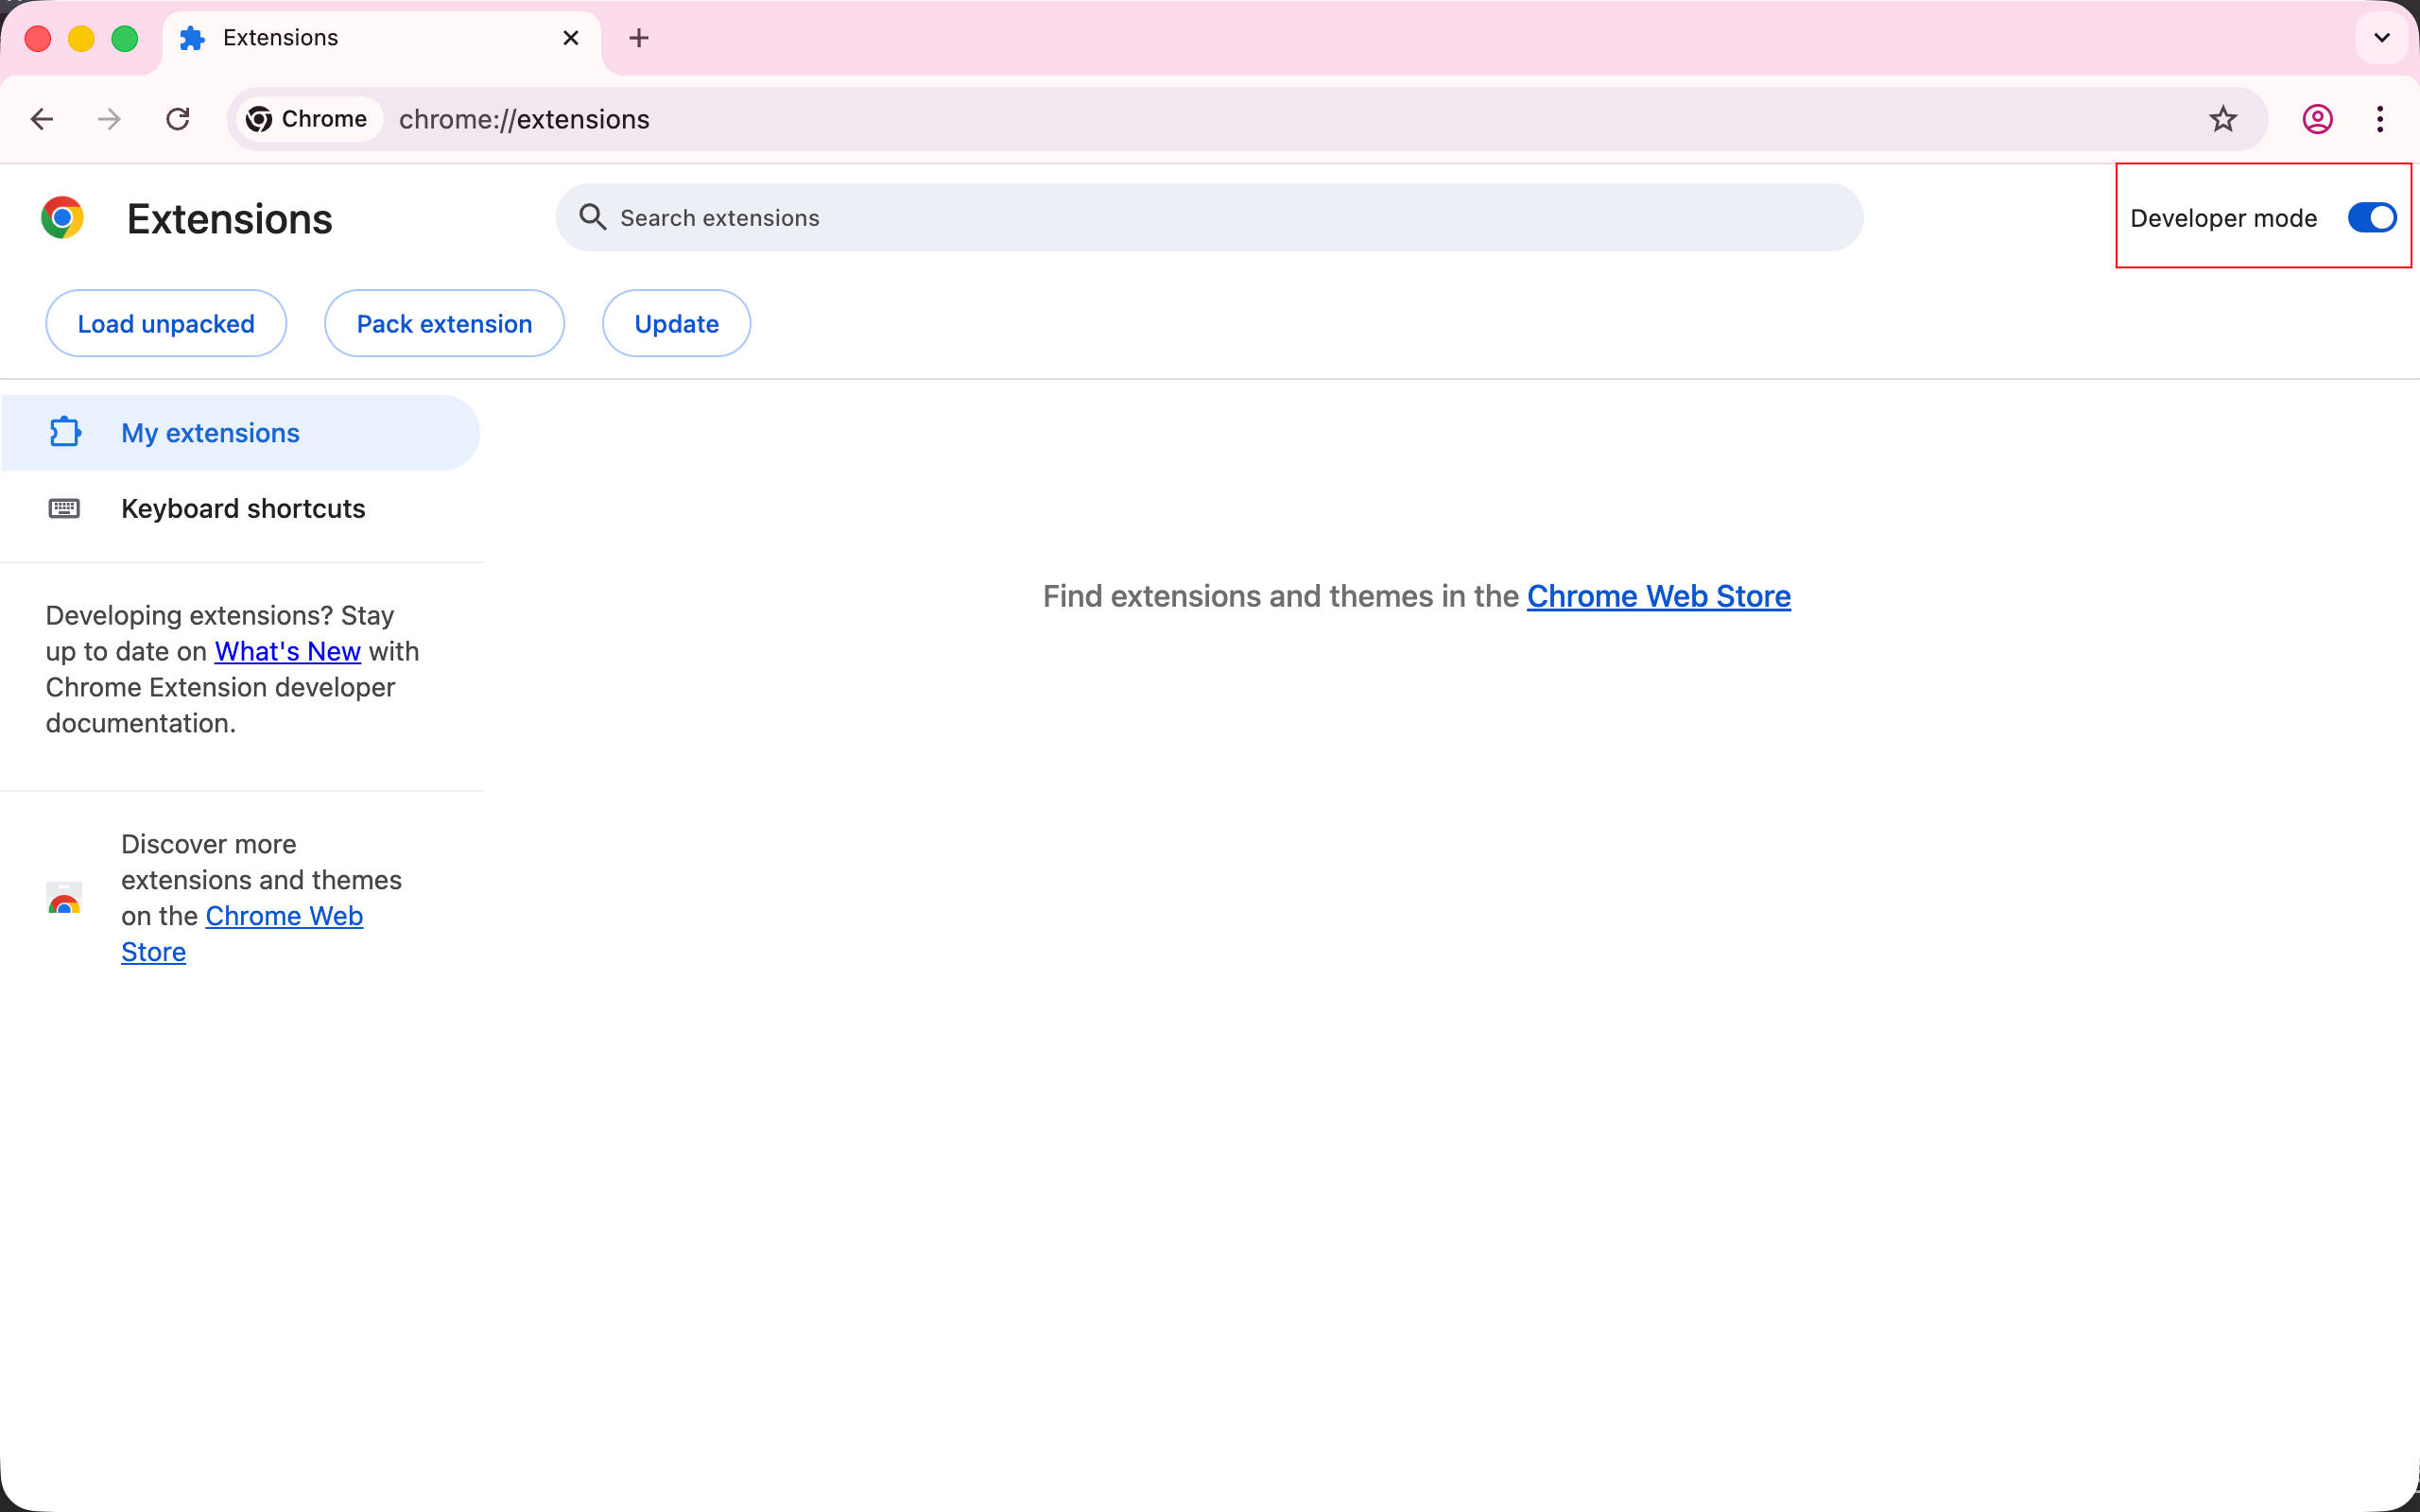
Then, use the Load unpacked button to select the extension directory to load it into the browser.
Visit google.com and you’ll see the AI Mode button is indeed gone, but it flashes briefly before disappearing. This means the injected script timing isn’t early enough - the AI Mode button was already displayed before the injected script executed, and then the script hid it. This is a basic timing issue. Fortunately, we can solve this problem by simply adjusting the manifest configuration.
{
  "content_scripts": [
    {
      "matches": ["https://www.google.com/"],
      "js": ["content-scripts/content.js"],
      "run_at": "document_start" // Inject the script right when the page starts loading, see https://developer.chrome.com/docs/extensions/reference/manifest/content-scripts#world-timings
    }
  ]
}
Then reload the extension in chrome://extensions/ to apply the changes.

Then you’ll see an error: Uncaught TypeError: Cannot read properties of null (reading 'appendChild').

This is because the script injection timing is so early that even the document.head tag hasn’t been rendered yet. We can modify it to inject the style tag into document.documentElement instead.
const style = document.createElement('style')
style.textContent =
  'button:has([d="M15.65 11.58c.18-.5.27-1.03.31-1.58h-2c-.1 1.03-.51 1.93-1.27 2.69-.88.87-1.94 1.31-3.19 1.31C7.03 14 5 12.07 5 9.5 5 7.03 6.93 5 9.5 5c.46 0 .89.08 1.3.2l1.56-1.56C11.5 3.22 10.55 3 9.5 3 5.85 3 3 5.85 3 9.5S5.85 16 9.5 16c.56 0 2.26-.06 3.8-1.3l6.3 6.3 1.4-1.4-6.3-6.3c.4-.5.72-1.08.95-1.72z"]) { display: none; }'
document.documentElement.appendChild(style) // document.documentElement represents the root element of the page, i.e., the `<html></html>` tag.
Refresh the extension again and visit google.com. You’ll see the AI Mode button is gone, and it no longer flickers.
Adding an Icon
Finally, this extension still lacks an icon. Place a 128x128 PNG image at icon/128.png. Then modify the manifest to add the icons setting.
{
  "icons": {
    "128": "icon/128.png"
  }
}
Refresh the extension again and you’ll see the extension icon has been loaded correctly.

Summary
This is our first basic extension. Through this example, we’ve learned several core concepts of extension development:
- The Manifest file defines the extension’s basic information and required permissions
- Content Scripts can be injected into web pages to directly manipulate the DOM
- Script injection timing affects the actual results - choose
document_start,document_end, ordocument_idlebased on your scenario - The extension debugging process is similar to regular web development - you can view errors in DevTools
You may have noticed that writing native JavaScript directly and managing files manually is somewhat tedious. In the next chapter, we’ll refactor this extension using WXT, a modern development tool, to experience features like TypeScript and hot reloading.
If you have any questions, feel free to let me know in the comments below.
Complete code: https://github.com/rxliuli/browser-extension-dev-examples/tree/main/packages/01-basic
References
Google Chrome Extension Development Documentation https://developer.chrome.com/docs/extensions